I bought three coach kits from Mark Addison of Maddison Coaches (no longer trading). Although Mark made them for SM32, he modified his bogies for me to run on 45mm track. These kits had been languishing for some time awaiting the urge to construct them. When I realised I would either have to modify the platforms at Beeston Castle and Bulkeley to accommodate the Accucraft W&L Pickering coaches I bought last year or modify the coaches, I decided to construct the kits to see if they would solve the problem.
Following the excellent set of instructions which accompany the kits, I firstly tidied up the pieces with a file and some sanding blocks:
The first stage of construction was to glue the exterior framework to the sides:
Next, the seats were added to the compartment partitions and ends by gluing them into the relevant slots.
The partitions were then glued on to one side:
and then the other.....
Then the base was fixed into place:
and the end frames were glued into place.
Next, the frame for the roof was assembled. Two side members were super-glued to the curved upper sections of the partitions:
to make the frame:Once dry, the side members were planed and sanded to match the contours of the roof:
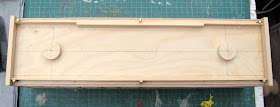
and then the frame was super-glued to the pre-formed roof:
The rain-strips were then trimmed to size and glued to the roof, following the marked-out guide-lines:
The roof was test fitted to the body, with a few small adjustments with a sanding-block.
Attention was turned to the underframe. The buffer beams were fixed to the ends:
Before fitting between the buffer beams. In addition the bogie mountings were glued in place:
After test-fitting the bogies and working out the how the couplings would be fitted (I prefer the couplings to be attached to the bogies (see below)), the buffer beams were rebated to allow the couplings to swivel with the bogies.
Next, I slightly enlarged the holes for the door hinges. These were supplied with the kit as whitemetal castings:
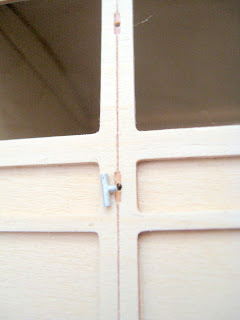
The hinges were inserted and then fixed in place with a dab of thin superglue
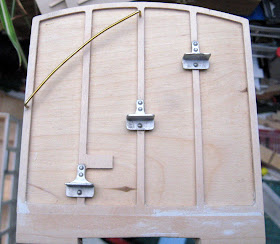
The door vents were superglued above the doors...........
and the vents for the gas lamps were fixed in place on the roof:
..... as were the steps and handrail:
The stage of kit-making I least look forward-to is painting. However, it has to be done so I do the best job I can - which usually takes me ages. Mind you, the more I do the more I learn.
The first step was to varnish the inside of the campartments and the underside of the roof. On reflection, I should have done this earlier, maybe before the floor was added, as trying to varnish beneath the seats was somewhat difficult. I used a polyeurethane varnish with an antique stain. I did contemplate adding some detail to the interiors but as the roofs are removeable, this can be done at a later stage.
Next, the windows were taped over with masking tape. This was done carefully to try and ensure that no gaps were left for the spray paint to seep through.
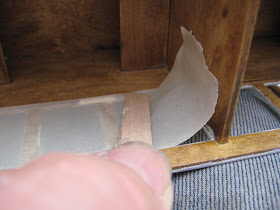
The roof was then taped over.........
....and the coaches were given a coat of primer. One coach was spray-painted with Plasitkote primer whilst the other two were brush painted (as I ran out of spray). One reflection, I should have bought another can of spray. I found it's much more difficult to get an even coat with brush painting. The primer tends to pool in the mouldings which must then be removed before the final coach can be applied. It makes the job much more complicated and more time consuming, and affects the finish.
Once the primary was dry, it was sanded with fine wet & dry paper and three coats of car paint were applied using rattle-can aerosol sprays from Halfords. I used Rover Damask Red, which seems to be close to a maroon finish. Before the final coat was added, the previous coats were sanded smooth with 1200 wet & dry paper, using a small wooden block:
Once the maroon paint was dry I removed the masking from the ends and masked off the sides with tape and newspaper. Again I learnt from experience to leave the paint to dry for at least 24 hours. On the first coach I put the masking tape on before the paint was fully hardened and took the sheen off the surface (another rub-down and final coat needed!).
The ends were then sprayed matt black (another Halfords aerosol). The roofs were also sprayed at the same time. Two coats seemed sufficient.
A day or two later, making sure all the paint was hardened off, I re-drilled the holes for the door handles and drilled holes for grab handles and fixed these in place with superglue. Although the kit was supplied with cast whitemetal handles, I bought some brass castings from Brandbright as I felt these looked a little more classy. The castings needed the minimum of cleaning-up and do look impressive.

Finally, waterslide transfers from GRS were added to the doors.
The footrails were then primed and painted matt black, before being screwed to the bottom of the coaches using the screws and spacers provided.
The ends, roof and footboards were sealed with matt varnish and the glazing was added to the windows. This is provided a a single strip which slots in between the compartment dividers and the sides.
These were supplied without wheels, which were purchased from Garden Railway Specialists. The bogies are constructed to provide compensation (much needed on my trackwork).
However, they were designed to operate prototypically and swing independently of each other, rather than being steered through the couplings. Given that I have some R1 curves on my railway, I decided to play safe and add some brass extensions to the bogies on which LGB couplings could be mounted.
For each bogie a piece of 1"x1/16" brass strip was cut to a length of 80mm.
A 2.5mm hole was drilled 15mm from one end and two 2mm holes were drilled at 24mm and 31mm from the other end along the centre line.
I decided to superglue the strip to each bogie rather than soldering - my soldering skills with brass is not wonderful! Bachmann LGB style couplings were fixed to the end, using self tapping screws, and a coat of matt black paint was applied.
The bogies were then screwed beneath the coaches.
Testing
Now the fun part. The coaches were extensively tested over all parts of the line to check clearances.
When running the coaches in a train for the first time, I was perturbed to find the controller kept cutting out. Somehow, the coaches were shorting-out across the rails. A close inspection of the bogies revealed that the insulation of the centre of the wheels purchased from GRS was recessed and hence the rim of the wheel was making contact with the brass bush of the bogie.
What was needed were some small insulated washers. An extensive search of various bits boxes failed to reveal any and so I would either have to order some or make my own. Being impatient, I decided to go for the second option.
Firstly, a 2.3mm hole was drilled into the thinnest plasticard I could find:
The base was removed from a paper hole-punch and the plasticard was inserted and manoeuvred until the hole appeared in the centre of one of the holes in the base of the hole-punch:
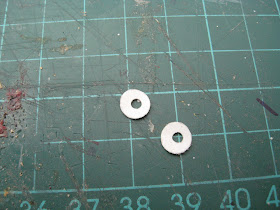
The washer was then 'punched' from the sheet. This procedure was repeated until I had accumuated sufficient washers:
A washer was then fitted over the protruding axle stub (journal) on each set of wheels .............
................... and these were then inserted back into the bogies:
The coaches were then successfully test-run again, this time with no short-out problems.
I realise that these washers will have a limited life-span. Plasticard is a fairly soft plastic and hence will probably wear fairly quickly. I will seek out a source for fibre or paxolin washers in the meantime.
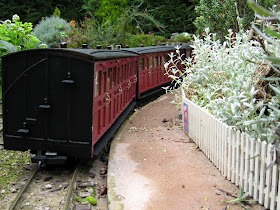
I want to add a few interior details and maybe some lighting, but in the meantime this rake of coaches fills a long overdue gap in the line's rolling stock roster:
Short video showing the coaches in action











how much did it cost you to make one of the coaches?
ReplyDeleteUnfortunately, the coach kits are now no longer available but they cost around 50UKP when I bought them. The bogies cost around 15UKP each and then the paint, transfers and details (I replaced the whitemetal door handles with brass ones) probably cost another 20UKP, so around 85UKP when I built them. There are similar coach kits available from http://www.brandbright.co.uk/index.php?cPath=12_14 for example
ReplyDelete