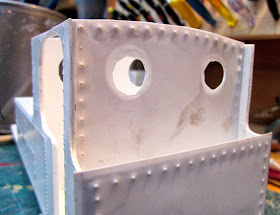
Firstly, I take no credit for this technique. I adopted the idea from Rod Hayward which he shared on the G Scale Central Forum.
The secret to getting consistent rivets is the riveting tool. This was constructed from a 30cm length of 2mm OD (outside diameter) brass tube, a short piece of 3mm OD brass tube, a steel nail and a piece of lead flashing.
The larger diameter tubing was threaded over the smaller diameter tube to act as a slider. A washer was soldered to the bottom of the slider and a piece of lead flashing was then wrapped around the slider tube to act as a weight.
The end of the nail was sawn off, inserted into the long tube and soldered into place.
After constructing the structure of the model in 2mm (80thou) plasticard ........
....... overlays for the surfaces requiring the addition of rivets were cut-out from 0.5mm (20thou) plasticard. Where feasible, I usually make the overlays slightly larger than needed so that after they have been glued on they can be trimmed exactly to size.
A strip of graph paper with a 2mm grid was then fixed on to the overlay using masking tape,
...... in this case the paper was wrapped around the overlay and taped to the back.
After calculating the spacing for the rivets (by dividing the number of rivets into the length), the strip was marked with the positions of the rivets ......
The position of the rivets is then transferred to the overlay by pricking through the graph paper with the point of a pair of compasses.
The point of the riveting tool was then positioned in each of the pinpricks (the point naturally locates itself in the hole). The weight was raised to the the same position up the brass rod and released to give a consistent impression. The higher the weight is raised the deeper the depression and the larger the rivet.
The overlay was then glued on to the relevant panel with solvent .......
....... and once the glue had set, the excess was trimmed off with a craft knife and tidied up with a file.
This technique was used in the construction of a model inspired by Southwold Railway's Sharp Stewart locomotive No. 1 - Southwold (see How I constructed a Sharp Stewart 2-4-2T locomotive).


No comments:
Post a Comment