Wednesday, March 11, 2020

How I harnessed a horse to haul my coal cart

Having constructed a coal cart from a Hobbys kit (see How I constructed horse drawn coal cart), I was faced with the prospect of finding a horse of a suitable size and then figuring out how it should be harnessed.

Fortunately, not far from where I live in Cheshire is the Cotebrook Shire Horse Centre, which has a good selection of Schleich horse models in appropriate scales. I selected one which seemed appropriate - the Clydesdale gelding (Item No. 13808)

 As I didn't need the fancy ribbons, I trimmed them off with a craft knife, touched-up the cut areas with some acrylic paints and then sent for the guidance sheet provided by Hobbys for harnessing a heavy horse.

I then picked up an A4 sheet of faux leather from my local 'The Works' shop.

The sheet comes with a self adhesive backing which I could have used, but decided I would prefer to use UHU clear glue as I know from experience this is reliable. I therefore stuck some black Gaffa tape to the back of the faux leather. I then scrunched the leather to give it some texture.

I set this to one side while a cut two strips of leather approximately 10mm wide and stuck them back to back.

This was then wrapped around the horse's neck and trimmed to fit with a 20mm overlap. It was then glued to make a collar by stripping 10mm of leather off alternate halves of the ends and gluing them together.


A length of 2mm half-round brass rod was then wrapped around the collar and trimmed so leave around 7mm excess at each end.

Two pieces of brass shim 4mm wide were then trimmed to make hooks.

These were then soldered on opposite sides of the brass collar, together with two L shaped pieces of 1mm brass rod to form loops for the reins.


A brass hoop made from 1mm brass rod was soldered across the top of the collar.

The 'spikes' on the backs of the rein loops were then forces into holes on the leather collar and bent over to hold the brass collar in place

A 10mm wide strip of Gaffa-backed leather was wrapped around the belly of the horse and trimmed to fit with 10mm overlaps. A couple of rectangles of leather were then glued to the strap to form a saddle.

This was then glued to the horse using UHU clear glue.

4mm wide strips of Gaffa backed leather were then trimmed to make the breechings, using the rear of the horse to ensure they were the correct size.

Small brass washers were then attached to the back piece of the breechings ........

.... at the junctions with the cross pieces.

The breechings were then attached to the back of the horse.

Two 3mm wide strips of Gaffa backed leather were cut out, together with 7mm wide strip which was cut down to form the blinkers as shown. The position of the blinkers was determined by wrapping the strip behind the horse's ears and marking the position of the eyes.

The two strips were wrapped around the horse's head as shown - the noseband being the lower one and the brow band the upper. These were trimmed to length and glued into place.

The longer head strap with the blinkers attached was wrapped around the back of the horse's ears, glued into place and trimmed off either side of the horse's mouth. A 1.5mm hole was drilled from side to side of the horse's mouth and a piece of brass rod threaded through and trimmed off with around 2mm protruding each side, These ends were then bent through 90 degrees to represent the bit.


Two D shaped loops were bent from 1mm brass rod as shown.

A length of fine chain was connected using a twist of fine copper wire.

Two 1.5mm hole was drilled into the sides of the horse at the lower ends of the breeching straps and the loops inserted with a dab of UHU to hold them in place,

The chains were cut to length and then attached to a loop made from 1mm brass wire with another twist of fine copper wire.

At the same time, another length of chain was passed over the saddle and attached to the slider bars on either side, again using twists of copper wire.

Finally, trace chains were connected from the the lower loops (hames) on the collar to tug hooks positioned near the ends of the shafts.

After some consultation with members of the Garden Railway Forum who are more knowledgeable than me on such matters, I realised I needed to shorten the trace chains and the ridge strap (the chain passing over the saddle) to raise the shafts, otherwise there would have been too much slack in the harness.

The reins were made by sticking two strips of Gaffa tape together and then twisting them tightly.

Unfortunately, the twists make them very springy and so it's difficult to get them to droop realistically. I might try experimenting with wrapping the Gaffa tape around some of the thin copper wire to see if that enables me to give them a more appropriate shape.

The driver is a secondhand resin figure I picked up at the Llanfair Show. I have no idea as to its origin but it depicted a bald headed chap in overalls wiping his hands on a rag. I reduced the size of the rag and drilled a hole through it to pass the reins through. He was given a cap made from Milliput to cover his bald head and then repainted with a fair bit of additional coal stains on his overall, face and arms.

The loaded coal sacks are resin castings, again picked up at Llanfair, I believe from Trenarren Models, .......


.... and the empty sacks were made by folding over some tightly woven pieces of cloth and gluing them down with UHU

There are still a few jobs to finish off - the nameboards need some lettering, for example. Rather than using the transfers which came with the kit, I want to create some using the name of the coal merchant which emblazons the coal office at Beeston Castle Station. The name was taken from the 1911 census for the area. I have assumed that the son of the coal merchant will have taken over his father's business, twenty years later (and had a son of his own).

I will find a way of making some coal scales for the cart and maybe add a bucket and a feed bag to hang from the back of the cart for the horse refreshment purposes.

Other than that, I am quite pleased with the outcome. Isn't amazing how many different skills and chunks of knowledge we need to acquire as railway modellers? When I started building my garden railway, I had no idea that fifteen years later I would be researching how horses were harnessed and wooden horse drawn carts were constructed. Well, it certainly keeps me out of mischief!


Monday, March 09, 2020

How I made a horse drawn coal cart

Coal was once the mainstay of traffic on railways in the UK - it was not only used to power locomotives, it was used on domestic fires, in ranges to cook food, to power machinery in factories, to make coal gas and as the power for early farm machinery. So, it's little wonder that most, if not all, railway stations between the Wars had coal yards.

Having just installed a small coal yard at Beeston Castle Station (See How I detailed the coal yard), I felt I needed to find or make a horse drawn coal cart for the coal merchant to ply his trade. I discovered that Hobby's produce a kit (scale 1:20) which seemed to solve my problem. However, when the kit arrived, rather than containing a set of laser-cut plywood parts, I discovered it contained a few sheets of plywood of varying thicknesses, some brass wire, brass rod, brass nails, wheels and a scale drawing showing all the various parts which were needed.

The kit was put on a shelf until I plucked up the courage to dust off my fret-working skills (acquired at school around fifty years ago) and tackle it. It turned out to be a lot less daunting than I had expected.

The first thing I did was buy myself a fretsaw and make a saw-bench from an offcut of 9mm plywood, similar to those which I remembered from my fret-sawing days. This I screwed to the surface of my workbench.

Following the instructions, I firstly marked out the main frame for the swivelling front truck copying the dimensions from the drawing. I could have overlaid the drawing on the ply and used carbon paper to transfer the drawing directly, but I didn't have any carbon paper to hand and, anyway, I dislike the smudging which often happens with carbon. As this is a commercial kit, I am not disclosing the dimensions. The kit costs just under £20 from the Hobby's website or the plans can be bought for around £4.00.

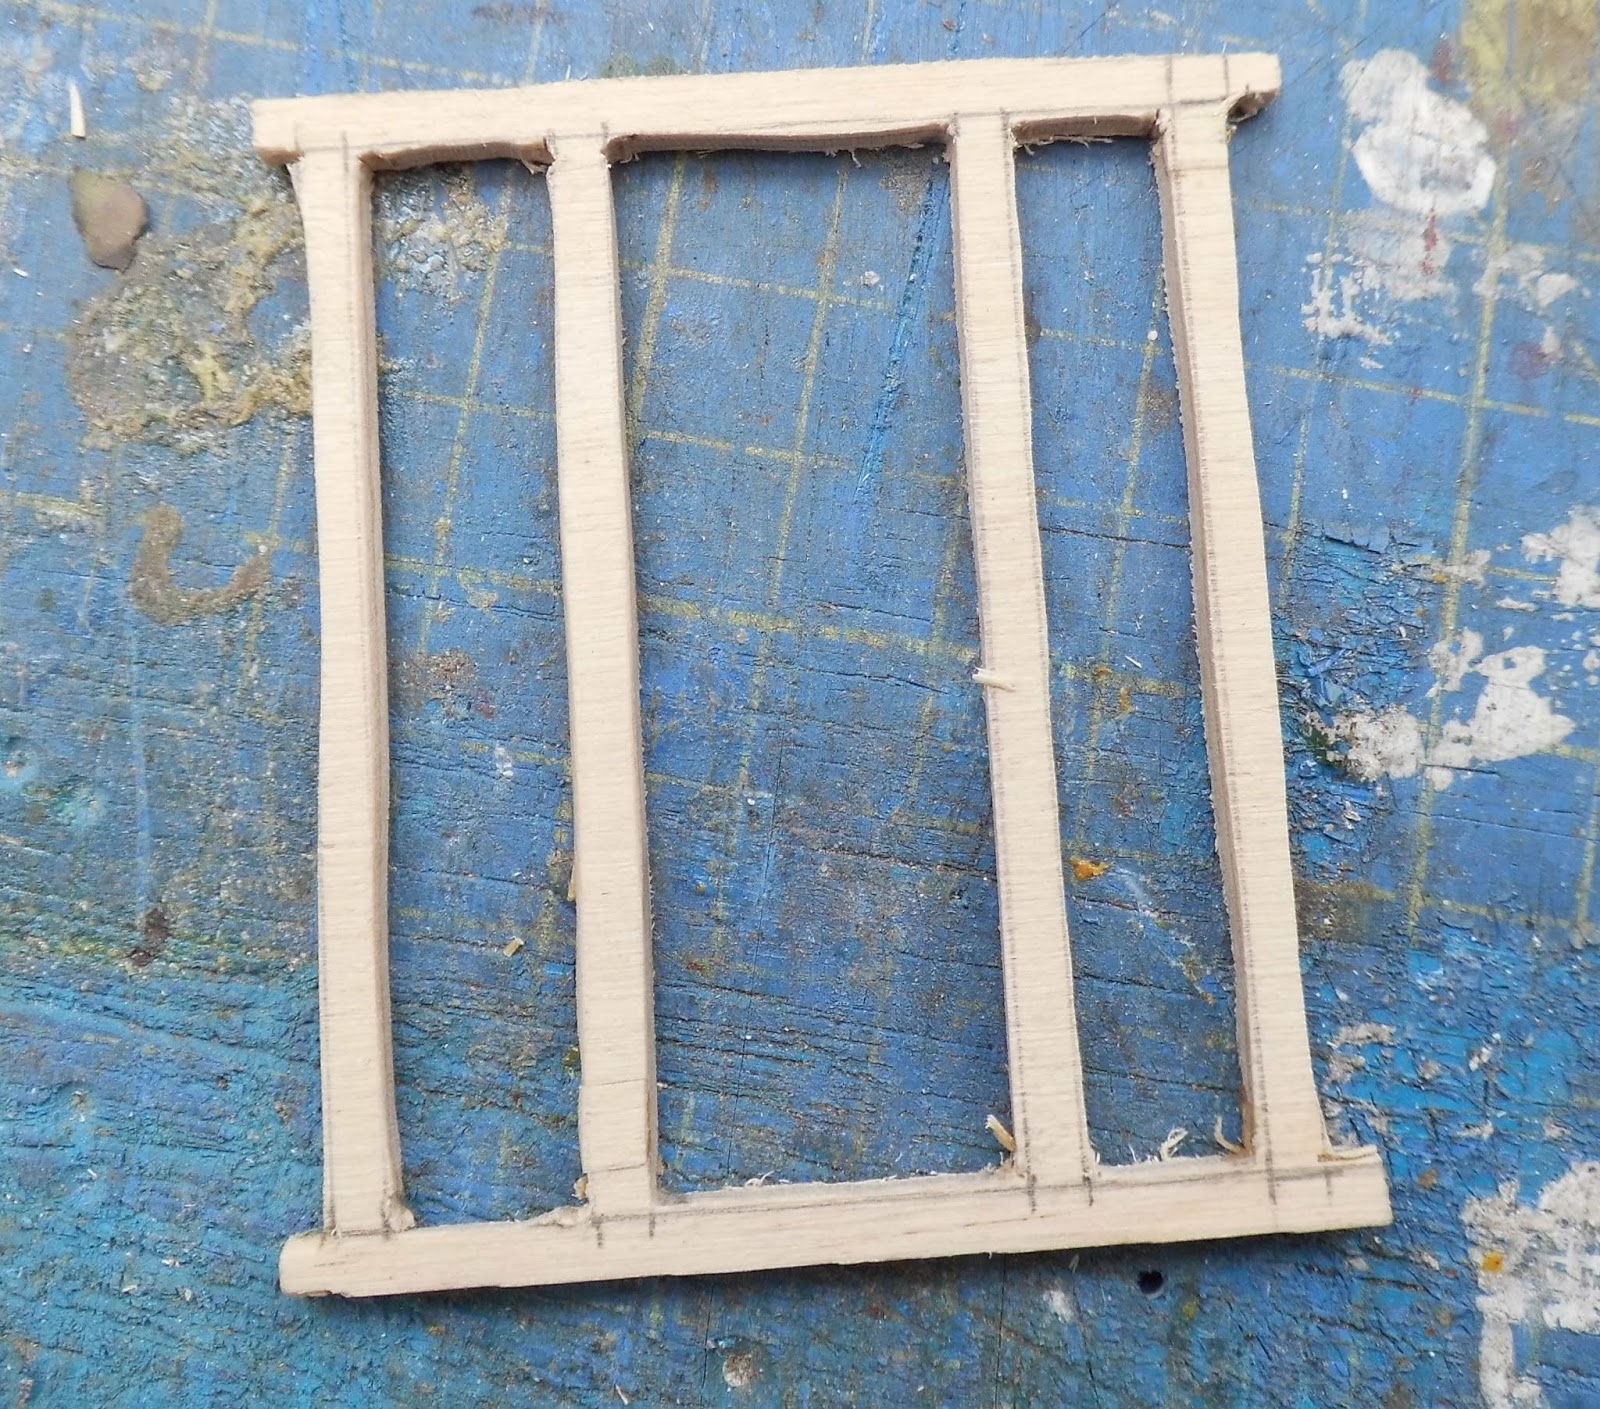
After marking and cutting out the outline ......

 ........ I drilled 2mm diameter holes in each of the internal corners ......

.... before sawing carefully along the lines with a fine fretsaw.

The cuts were then tidied up with a file and sandpaper.

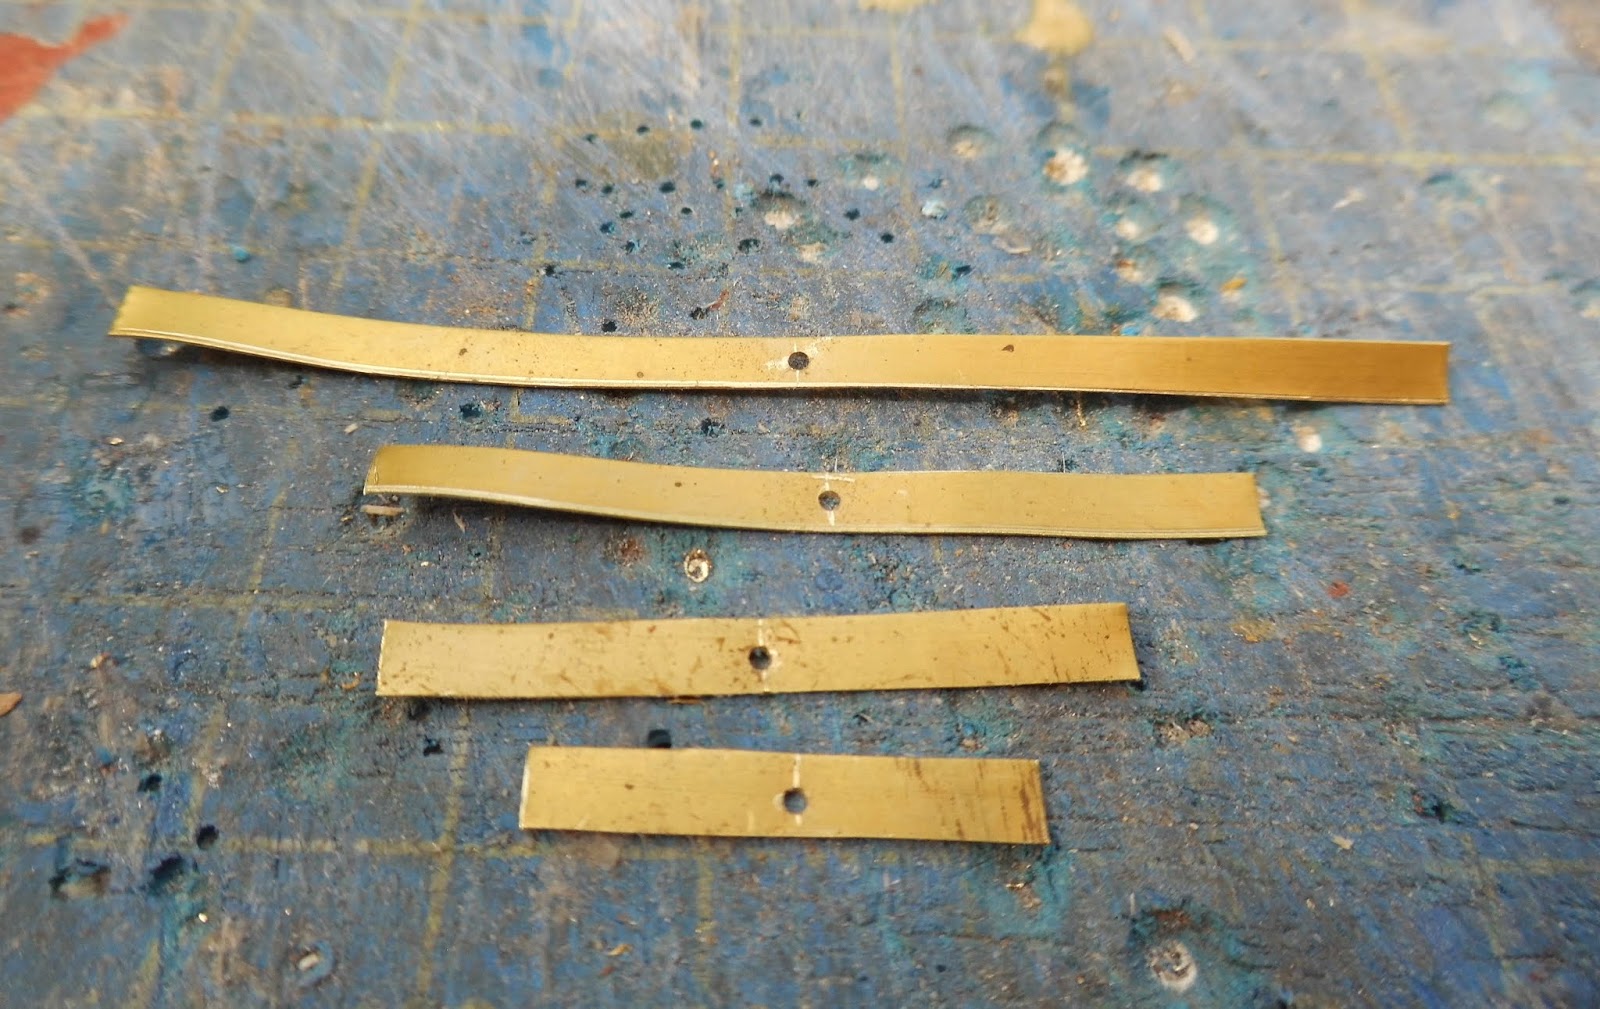
Rather than cutting out the profiles for the springs from ply, I decided to make them from strips of brass shim. The four strips needed were cut and a 1mm hole drilled in the middle of each.

The ends of the longest strip were wrapped around a 2mm diameter bolt.

A dome headed brass pin was passed through the holes and the four strips soldered together

The solder was filed down and the springs bent upwards.

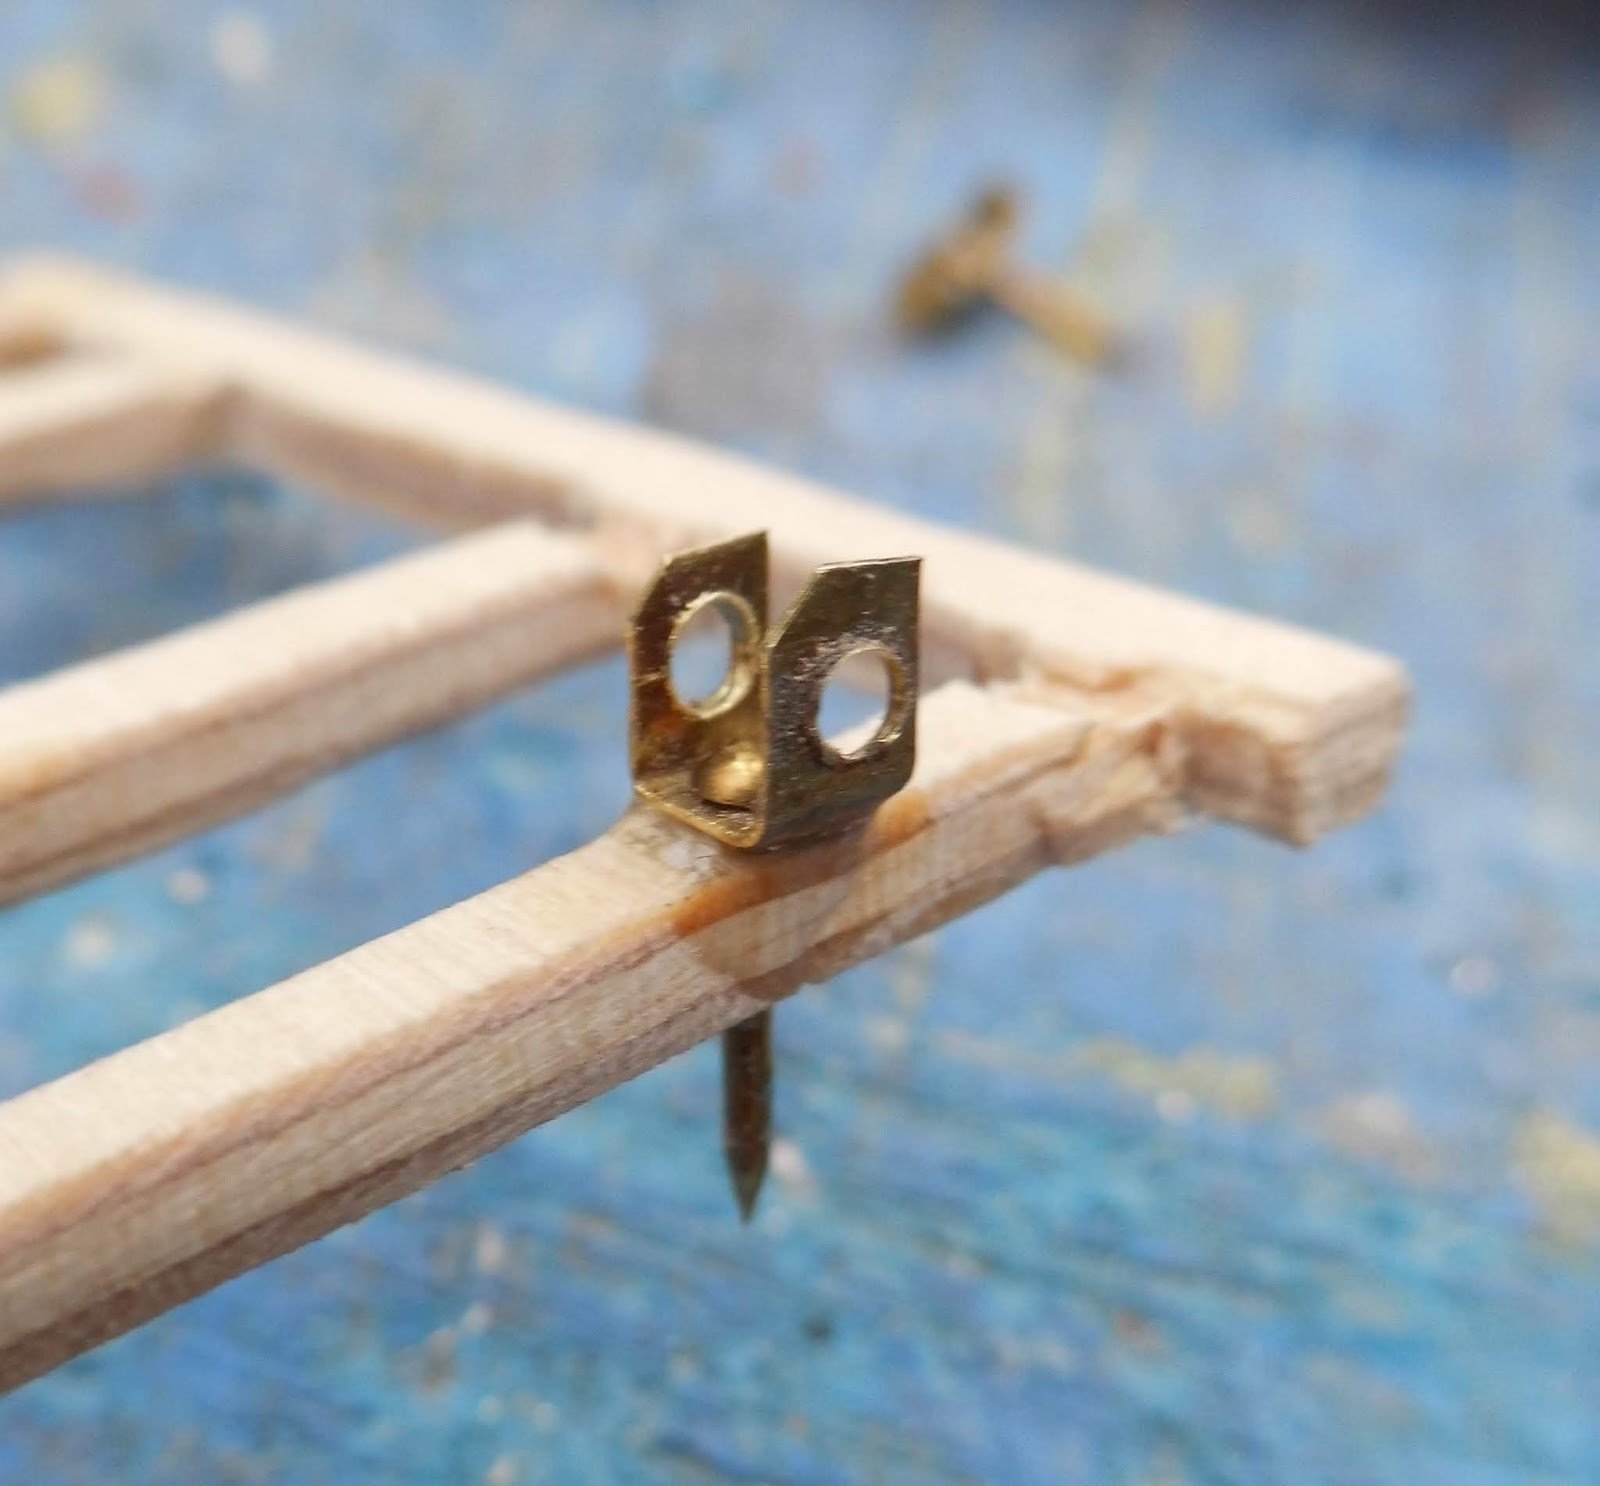
Four brackets were made from brass shim with 1mm and 2mm diameter holes.

The brackets were folded up ......

....... and then superglued to the frame in the positions marked on the plan, a brass pin holding them in place. The tails of the pins were snipped off when the glue set.

An axle mounting was cut from 6mm ply. 1mm holes drilled at the positions of the springs and 2.5mm holes drilled in the ends for the axles.

The springs were bolted to the brackets .......

...... and the springs glued to the axle support, and the ends of the bolts snipped off.

Bearing plates were then cut out .....

....... and fixed to the top of the truck.

Two bearing rings were carefully cut out ......

...... and one glued to the bearing plates.

Four corner plates were then drilled and folded from brass strip .......

...... and mounted on the corners of the truck, with 1mm domed brass pins to hold them in place in addition to superglue.

The ends of the pins were snipped off when the glue had set.

Where the pins coincided with those holding the spring brackets, dummy rivet heads were glued on - using 2mm half-round nail art gems.

The main timbers for the wagon body were then cut out .......

and superglued together.

The supports for the bearing ring were then cut out .......

..... and glued into place.

The second bearing ring was then carefully glued into place, making sure it was central.

The deck of the wagon was then cut out and planking scribed across it (on reflection, I should have cut the deck out with the grain at 90 degrees to the way in which I did it, so the grain was the same way as the planking).

The deck was test-fitted into the frame. A few adjustments were needed with sandpaper to make it fit properly.

It wasn't glued in place to make painting easier later. 

A 2mm hole was drilled in the centre of the swivel plate and a bolt glued into the hole.

Corner brackets were cut and drilled from the brass strip ......

..... bent ........

...... and pinned and glued into place on the corners.

As previously, dummy bolt heads were glued on the innermost holes as pinning these would have been tricky because the pins would have coincided.

The rear axle support was cut from 6mm ply.

Springs and brackets were made as previously and the rear axle was fitted into place. At this point the wheels were put on the axles and the axles inserted in the holes in the axle supports.

The frame for the shafts was next cut out ........

......... as were the shafts.

The shafts were glued to the frame.

Eyelets were fashioned from brass wire. After being wrapped around a former ....

...... the wire was snipped off and a tail left.

This process was repeated four times.

The eyelets were then glued on to the shaft frame ......

 ...... and the front truck and a length of brass rod passed through and glued into place to act as a pivot.

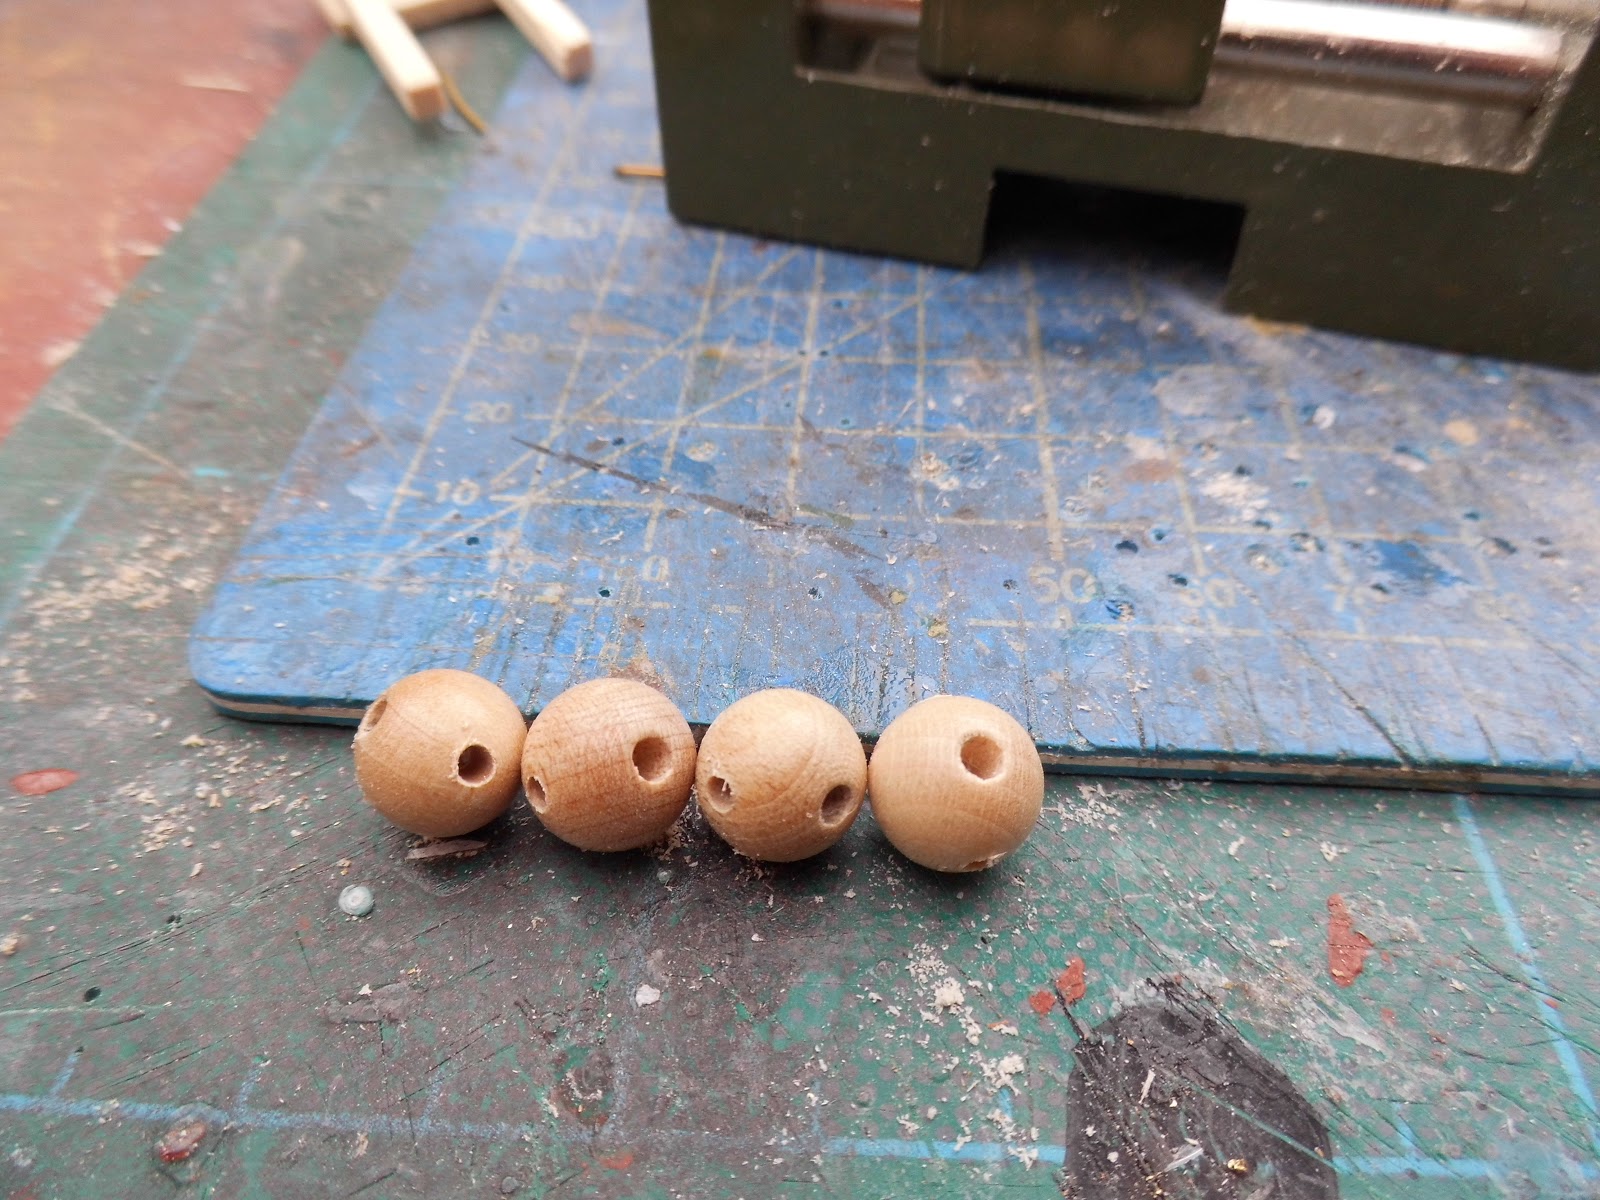
The 4mm diameter wooden beads supplied with the kit .......

....... we're threaded with a piece of brass rod so it would be easier to see when the bead was level. It was lightly clamped ......

....... before a 1.5mm hole was drilled through perpendicular to the original hole.

This process was repeated for all four beads, though on reflection the two beads destined to be at the ends needed only to be drilled half way through.

The large signboard was marked out and shaped .....

..... and 1.5mm holes drilled into the base to coincide with those on the deck.

Four short lengths of 1.5mm brass rod were cut .....

....... and slotted into the holes in the nameboard.

The beads were then slid on to the rods with brass rods cut to lie between them.

For the curly brackets at each end, two cut and shaped ....

..... before being threaded into the holes at the end of the deck.

The ends of the bracket were then soldered to the upright and tidied up with a file.

The front nameboard was then cut out and mounted on four lengths of 2mm square section stripwood supplied with the kit.

The name boards were then test fitted on to the deck.

Brackets were then fashioned from 1mm brass rod, following the guidance on the plan.


Similarly, corner brackets were made from brass strip, .....

..... before the brackets were attacked to the shafts.


The wagon was now more or less complete. As the deck of the cart was not yet glued, the nameboards were slotted temporarily into place to check everything fitted as it should.

Painting

The deck was removed and given a couple of coats of varnish. While this was set aside to dry, the rest of the wagon was given a couple of coats of sanding sealer, paying particular attention to the edges of the ply. This was to help give the paint a reasonably smooth finish.

Several coats of dark blue acrylic paint were then applied to the body and wheels.

NOTE: I have discovered that cheaper acrylic paints, particularly dark blues, tend to be quite translucent when applied and so require quite a few coats to give consistent coverage. By contrast, Pebeo Studio Acrylics are opaque, therefore requiring far fewer coats to give adequate coverage.

The parts were then assembled and glued in place, the deck being given a wash of black and dark brown acrylic paint to simulate weathering and daily use.

The next stage was to detail the cart and to track down a suitable horse and harness it appropriately. This process actually several months, until I discovered that there was an instruction sheet tucked away in a corner of the Hobbys website - https://hobby.uk.com/model-harness-instruction-sheet.html

The construction of the harness is covered in a separate post - See How I harnessed a horse to haul my model coal cart - pending