Whenever I read articles about others' railways, I am always interested in finding out how they solved various problems in the construction of their model. I do not profess to be an expert, but you may want to share in my experiences.
Bridging the gaps
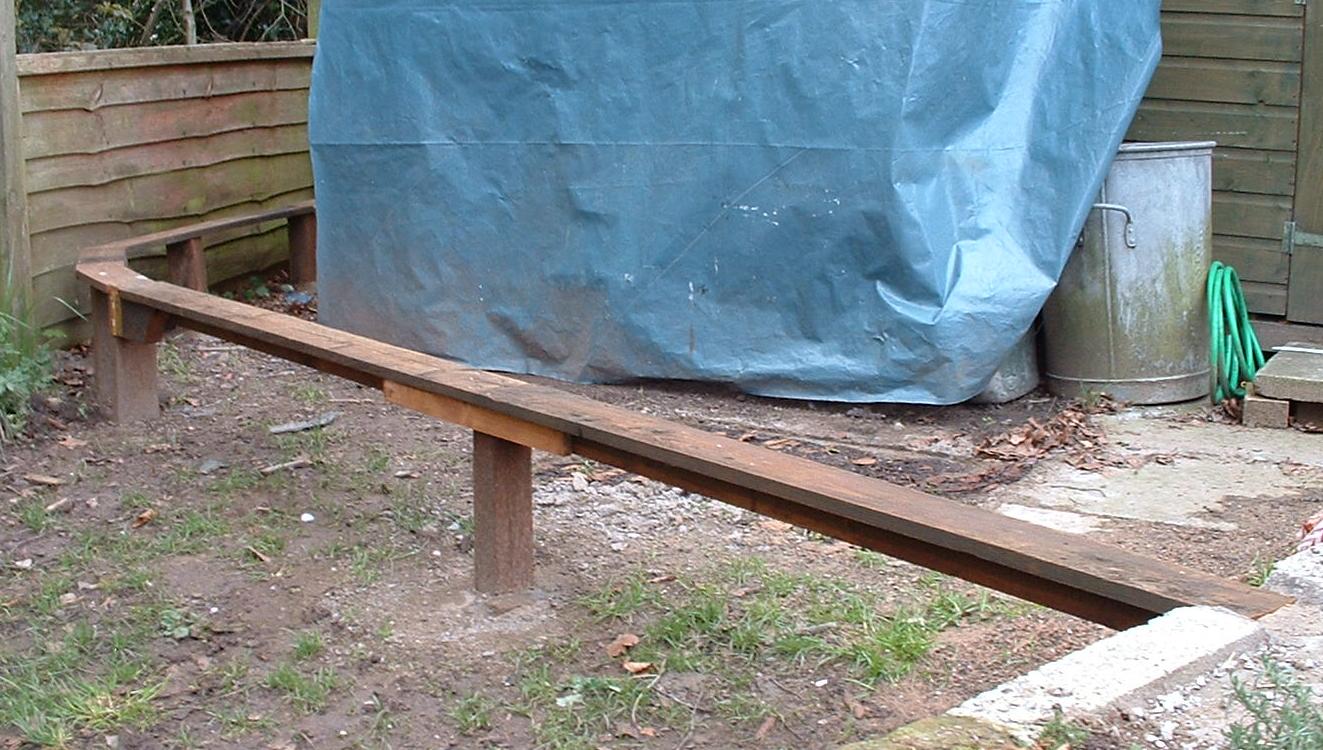
The design of my railway required two gaps to be bridged. One, relatively insignificant (approx. 4') to provide access to what will be a small patio and another more substantial (approx 12') to provide access to the shed and the shelter housing the trailer tent.
My initial thoughts were to provide a lifting bridge for the short span - one which would fold back on itself. This would have required hinges which stood proud of the tracks.

However, this would have increased the width of the bridge and detracted from its appearance. Browsing through the local DIY store, I came across a couple of hefty brass hinges which looked promising. The sort of thing from which you could hang a heavy door - or even a substantial bridge!
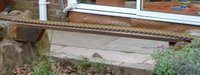


So here's the solution. Yes, I know they don't look too elegant at the moment - but the do the job and, when time permits, I intend to add some sort of bridge-like superstructure. I'm torn between constructing a sub-structure to make the bridges resemble viaducts (maybe too heavy) and investing in some aluminium extrusions and making girder bridges. With the long bridge I may do a combination of both. The centre-post for the long bridge is removable, by the way.


The wood for the bridges and their supports has been 'recycled' from an old fence which was erected over 20 years ago. It reeks of creosote and is still remarkably well preserved. I'm hoping it will last at least another 20 years!!
In addition, the hinged end has dropped slightly (a couple of mm), so needs propping-up to provide a smooth transition across the gap.


For more information, see 'How I made the swing bridge'.
Bridging the gaps
The design of my railway required two gaps to be bridged. One, relatively insignificant (approx. 4') to provide access to what will be a small patio and another more substantial (approx 12') to provide access to the shed and the shelter housing the trailer tent.
My initial thoughts were to provide a lifting bridge for the short span - one which would fold back on itself. This would have required hinges which stood proud of the tracks.

However, this would have increased the width of the bridge and detracted from its appearance. Browsing through the local DIY store, I came across a couple of hefty brass hinges which looked promising. The sort of thing from which you could hang a heavy door - or even a substantial bridge!


So here's the solution. Yes, I know they don't look too elegant at the moment - but the do the job and, when time permits, I intend to add some sort of bridge-like superstructure. I'm torn between constructing a sub-structure to make the bridges resemble viaducts (maybe too heavy) and investing in some aluminium extrusions and making girder bridges. With the long bridge I may do a combination of both. The centre-post for the long bridge is removable, by the way.

The wood for the bridges and their supports has been 'recycled' from an old fence which was erected over 20 years ago. It reeks of creosote and is still remarkably well preserved. I'm hoping it will last at least another 20 years!!
Update (3/5/08)
It is now two years since this part of the line was completed. The bridges have fared well, the construction technique seems to be appropriate, though the long bridge above is beginning to sag in the middle and the end nearest the camera is starting to deteriorate, presumably because air cannot circulate and it remains damp for prolonged periods.In addition, the hinged end has dropped slightly (a couple of mm), so needs propping-up to provide a smooth transition across the gap.
Update (26/8/09)
I've now 'prettified' the longer swing bridge using uPVC trim - a very inexpensive and easy way to make effective girder bridges.

For more information, see 'How I made the swing bridge'.
What have I learned?
In future, I will place roofing felt beneath the track to act as protection for the timbers beneath. I will also use felt as the bed for the end of the long bridge as this might reduce the amount of dampness between the bridge and its support.
Update (26/8/09)
No sign of rot in the unprotected timbers as yet. However, for the timber-based extension, I used roofing felt (see How Did I Build the Extension?). It's too early to make a comparison of the two methods.
No comments:
Post a Comment