| Item |
Image |
Status |
Comments |
| Locomotives |
1
Peckforton
|

|
In service
|
GRS Peckett body kit on LGB ToyTrain chassis. (see
How I constructed a Pecket from a GRS kit
for construction details). Powered by three 18650 lithium-ion batteries, controlled with an
RC Trains Rx65b receiver/controller. (See
How I converted a track powered loco to battery power)
|
2
Beeston
|
|
In Service
|
GRS Barclay body kit on LGB chassis bought secondhand from GRS
(see
Progress Report 33
and
Progress Report 51
). 12v li-ion battery powered ,RC Trains
radio controlled.
|
3
Bickerton
|
|
In service
|
GRS Hunslet body kit on LRB Toytrain chassis (see
How I constructed a Hunslet from a GRS kit, for construction details) Battery powered (three 18650 li-ions)
and controlled by
RC Trains Rx65b receiver /controller
|
4
Bulkeley
|
|
In Service
|
Battery powered, radio controlled. A scratchbuilt body on an LGB
Zillertal 0-6-2 locomotive of a Manning Wardle based (loosely) on
Southwold Railway loco No 4 (Wenhaston). The loco is powered by a
12v li-ion battery, has
RC Trains radio control and a MyLocoSound sound card. (See
How I constructed a Manning Wardle 0-6-2T battery loco)
|
5
Tarporley
|
|
In service
|
Battery powered, radio controlled. Scratchbuilt Sharp Stewart 2-4-2T body based on Southwold Railway
No.1 (Southwold) . Mounted on Playmobil chassis, powered by 12v
li-ion battery with
RC Trains r/c and MyLocoSound sound card (see
How I constructed a 2-4-2T Sharp Stewart for construction details)
|
6
Harthill
|
|
In service
|
12v li-ion battery powered, radio controlled. Scratchbuilt
Manning Wardle 0-6-0ST body on Piko motor block based on former
Davington Light Railway loco. Three 18650 li-ion batteries,
RC Trains rx65 receiver/controller - to be fitted with Picaxe steam sound
card (see
How I constructed a Manning Wardle 0-6-0ST loco)
|
7
Tollemache
|
|
In service
|
Scratchbuilt Fowler mechanical body on LGB Toytrain chassis (see
How I bashed a ToyTrain diesel into a Fowler mechanical, for construction details). Converted to battery radio control
using
RC Trains
equipment
|
8
Wynford
|
|
In service
|
Battery powered, radio controlled. Freelance diesel constructed from IP Engineering (Jessie) kit.
With 12v li-ion battery power, Deltang /
RC Trains r/c and MTroniks DigiSounds sound card. (see
How I constructed an IP Engineering diesel kit for construction details)
|
9
Lolly
|
|
In service
|
Battery powered, radio controlled. Freelance diesel railcar built from IP Engineering kit. 4.8v NiMH
battery power,
RC Trains Rx65b receiver/controller. (see
How I constructed an IP Engineering diesel railcar for construction details)
|
10
Tiverton
|
|
In Service
|
LGB Stainz from starter set and was the first loco used on the
railway. Converted to battery power, controlled by an RC
Trains/Deltang Rx65b with sound from a Dallee soundcard. See
How I Anglicised an LGB Stainz loco
|
11
Ridley
|
|
In Service
|
Bagnall 0-4-2T based on the four locos which ran on the
Rustenburg Platinum Mines Railway in South Africa. Bought
secondhand, built from an early GRS kit with an LGB ToyTrain 0-4-0
motor block. Powered with three 185650 li-ion batteries and
controlled with an
RC Trains
Rx65b receiver/controller
|
12a/12b
Samantha & Josephine
|

|
In Service
|
Battery powered, radio controlled. Modified from two Andel freelance coaches with scratchbuilt
chassis - radio controlled battery power (12v li-ion battery and
RC Trains
r/c) - see
How I constructed a railmotor)
|
|
|
14
Tarporley
|

|
In Service
|
Black Hawthorn 0-4-0T based on Kettering Furnaces No. 3. Started
life as an LGB Otto. Powered by three 16450 li-ion
batteries and controlled by a Deltang/RC Trains Rx65b
receiver/controller - with MyLocoSound sound card mounted in the
firebox (speaker outlet is through the firebox door). For more
information see -
How I constructed a Black Hawthorn 0-4-0
|
15
Doris
|

|
In Service
|
Freelance diesel constructed from an HGLW LB1 kit. Powered
with one 18650 li-ion battery and controlled by a Deltang / RC
Trains Rx65b receiver/controller. For more information see
How I constructed a small diesel from an HGLW kit.
|
16
Ernest
|
|
In Service
|
IP Engineering kit of freelance diesel mechanical loco. Slightly
modified by removal of cab (to enable it to fit beneath canopy of
loading bay). Powered by two 14500 li-ion cells and controlled
with Deltang / RC Trains Rx65b receiver. See -
How I constructed an IP Engineering Albert kit
|
17
Maisie
|

|
In Service
|
Supposedly representing a rail-based 'flyer' used by the younger
members of the Tollemache family to travel to and from Peckforton
Castle, their country residence. Based on a Sylvanian Families
wedding car. Powered by two 14500 li-ion cells wired in parallel
and controlled by a Deltang Rx60 receiver. See -
How I adapted a Sylvanian Families wedding car into a
flyer
|
18
Dorothy & Diana
|
|
In service
|
3D printed from files downloaded from Thingiverse. The second
loco is a slight variation on the original design. Constructed to
evaluate the potential of constructing rolling stock with a 3D
printer. They are based on Gmeinder diesel locos, mounted back to
back to improve hauling capabilities. Each powered by two 14500
li-ion cells and controlled by a single Rx65c receiver. They have
a cheap Chinese soundcard installed. See -
How I 3D printed and constructed a pair of diesel locos.
|
19
Lionel
|
|
In Service
|
A John Campbell etched brass kit of a County Donegal Walker
railcar forms the basis for this build which is poweredf by a
modified Aristocraft motor block. Several items, such as the roof,
radiator and rear panel of the railbus needed to be scratchbuilt.
Powered by three 18650 li-ion cells and controlled with a Deltang
Rx65b receiver it has a MyLocoSound soundcard installed. For more
info see -
How I constructed a Walker railcar from an etched brass
kit. |
20
Robert
|

|
In Service
|
Freelance diesel converted from LGB ToyTrain diesel loco. Powered
by three 14500 li-ion batteries and controlled by Arduino Nano
linked to a NRF24 radio control module.For more information see
How I constructed a Bluetooth control system.
|
21
Broxton
|
|
In Service
|
My first 3D printed scratchbuild. Designed in TinkerCad and
filament printed. It is a 'might have been' representation of a
combination of two Schull and Skiberreen locos - primarily a
Nasmyth and Wilson design. It is powered by three 18650 li-ion
cells and controlled with a Deltang Rx65c receiver. It has a
MyLocoSound soundcard installed. For more information see
How I designed, 3D printed and constructed a Nasmyth &
Wilson loco
|
22
Linda
|
|
In Service
|
Bought secondhand and based on a HGLW kit, it is powered by one
18560 li-ion cell and controlled with a Deltang Rx65b receiver. It
is 32mm gauge and has been programmed to provide a shuttle service
on the 32mm gauge feeder line to the Copper Mine. It has no
soundcard fitted at present. See
How I added radio control to a small diesel loco
|
23
Bunbury
|
|
In Service
|
My second 3D printed scratchbuild based on 0-4-2T Kerr Stuart
loco Sunbury which ran on the Metropolitan Water Board Railway at
Kew. It has a modified Bachmann Lyn motor block. It is powered by
three 18650 li-ion cells and controlled by a Deltang Rx65c
receiver. Its MyLocoSound soundcard is triggered by the Lyn chuff
cam. For more information see -
How I designed, 3D printed and constructed a Kerr Stuart
0-4-2T loco
|
24
Cholmodeley |
|
In Service
|
Another scratchbuilt 3D printed model based on one of the Glyn Valley Tramway Beyer Peacock tram locos. I was dissatisfied with the Bachmann motor block used originally and so it now has my own scratchbuilt 3D printed powered chassis. Powered by three 18650 li-ion cells, it is controlled with a Micron MR603a receiver and has a MyLocoSound soundcard. For more info see - How I constructed a GVT loco |
25
Tattenhall |
|
In Service
|
This loco was originally constructed from a LocoLines/RailRoad cardboard kit but I was unhappy with its appearance and so its body was scrapped and replaced with a 3D print based on a 3' gauge Hughie Hunslet loco. It is powered with three 18650 li-ion cells, controlled with a Micron MR603a receiver and has a MyLocoSound soundcard. For more information see - How I constructed a cardboard Hunslet loco |
26
James |
|
In Service
|
Started life as a secondhand HGLW steeplecab loco, it was adapted using 3D printed parts into a representation of a Gmeinder diesel loco. It is powered by two 14500 li-ion cells, controlled with a Deltang Rx65c receiver and has a cheap diesel simulation soundcard from AliExpress. For more information see - How I adapted a HGLW steeplecab loco |
27
Nick |
|
In Service
|
Based loosely on a Ruston 48HP loco it was 3D prtinted, including the powered chassis. It is powered by three 14500 li-ion cells, controlled with a Micron Mr603a receiver and has a cheap recordable sound module on which has been loaded the sound of a Ruston loco. For more information see - How I constructed a Ruston(ish) loco |
28
Greg |
|
In Service
|
A representation of a Ruston Proctor paraffin loco 3D resin printed from a Shapeways download and mounted on my own design 3D primted motor block. It is powered by three 18650 li-ion cells, controlled by a Micron MR603b receiver and has a cheap diesel simulation soundcard from AliExpress. For more info see - How I constructed a Ruston Proctor loco |
29
Rawhead |
|
In Service
|
A 3D printed representation of a three foot gauge De Winton vertical boilered loco based on measurements of a loco on display in the foyer of the Welsh Highland Railway station at Caernarfon. It is powered by three 14500 li-ion cells, controlled with a Micron MR603 receiver and has a MyLocoSound soundcard. For more information see - How I designed, 3D printed and constructed a De Winton loco |
30
Chaloner
|
|
In Service
|
My one and only live steam loco - a Regner Chaloner. I wanted a geared steam loco as it is easier to run and control at slower speeds. It is probably steamed about once a year. It was bought secondhand and has a few slight modifications.
|
| Coaches |
1
|
|
In Service, but awaiting further detailing and weathering
|
All third 4-compartment coach constructed from a Maddison kit.
(See
How I constructed Maddison coaches from kits)
|
2
|
|
In Service, but awaiting further detailing and weathering
|
First/third 4-compartment coach constructed from a Maddison kit. (See
How I constructed Maddison coaches from kits)
|
3
|
|
In service, but awaiting further detailing and weathering
|
Third class 3-compartment brake-end constructed from a Maddison kit. (See
How a constructed Maddison coaches from kits)
|
4
|
|
In Service - awaiting further detailing and weathering
|
Bachmann Jackson Sharp Passenger Coach converted to something
resembling a Leek & Manifold Open coach (see
How I based some Bachmann Jackson Sharps into L&M (ish)
coaches)
|
5
|
|
In Service - awaiting further detailing and weathering
|
Bachmann Jackson Sharp Passenger Coach converted to something
resembling a Leek & Manifold Open coach (see
How I based some Bachmann Jackson Sharps into L&M (ish)
coaches)
|
6
|
|
In Service - awaiting further detailing and weathering
|
Bachmann Jackson Sharp Passenger Coach converted to something
resembling a Leek & Manifold Brake End coach (see
How I based some Bachmann Jackson Sharps into L&M (ish)
coaches)
|
7
|

|
In service
|
Southwold Railway 6-wheel coach (early design). Designed in
TinkerCad and 3D printed
|
8
|
|
In Service |
Southwold Railway 6-wheel coach (early design). Designed in
TinkerCad and 3D printed
|
9
|
|
In Service |
Southwold Railway 6-wheel coach (early design). Designed in
TinkerCad and 3D printed
|
| 10 |
|
In Service |
Glyn Valley third class four-wheeled coach. Scratchbuilt and 3D printed. See How I designed, 3D printed and constructed a GVT coach |
| 11 |
|
In Service |
Glyn Valley third class four-wheeled coach. Scratchbuilt and 3D printed. See - How I designed, 3D printed and constructed a GVT coach |
| 12 |
|
In Service |
Glyn Valley open four-wheeled coach. Scratchbuilt and 3D printed. See - How I designed, 3D printed and constructed a GVT coach |
| 14 |
|
In Service |
Glyn Valley open four-wheeled coach. Scratchbuilt and 3D printed. |
| 15 |
|
In Service |
Glyn Valley open four-wheeled coach. Scratchbuilt and 3D printed. |
| 10 |
|
In Service |
Glyn Valley third class four-wheeled coach modified into a Directors' Saloon. Scratchbuilt and 3D printed. See - How I designed, 3D printed and constructed a Directors' Saloon. |
|
|
|
|
|
|
|
|
Unassigned
|
|
In service
|
Four wheel workman's coach constructed from early IP Engineering
kit (bought secondhand)
|
| Wagons |
|
Open 1
|
|
In service
|
Resin body on Hartland chassis. Removable coal load. (see
How I made my third batch of open wagons)
|
Open 2
|
|
In service
|
Resin body on Hartland chassis. Removable coal load. (see
How I made my third batch of open wagons)
|
Open 3
|
|
In service
|
Resin body on Hartland chassis. Removable coal load. (see
How I made my third batch of open wagons)
|
|
Open 4
|
|
In service
|
Resin body on Hartland chassis. Removable coal load. (see
How I made my third batch of open wagons)
|
|
Open 5
|
|
In service
|
Resin body on Hartland chassis. Removable coal load. (see
How I made my third batch of open wagons)
|
|
Open 6
|

|
In service
|
Resin body on Hartland chassis. Removable coal load. (see
How I made my third batch of open wagons)
|
|
Open 7
|
|
In service
|
Plasticard body on Hartland chassis. Bow-ended open with coal
load. (see
How I built the second batch of open wagons)
|
|
Open 8
|
| In service
|
Plasticard body on Hartland chassis. Bow ended open with
tarpaulin covered load. (see
HowtI built the second batch of open wagons)
|
|
Open 9
|
|
In service
|
Plasticard body on Hartland chassis. Coal load. (see
How I built the second batch of open wagons)
|
|
Open 10
|

|
In service
|
Plasticard body on Hartland chassis. timber load. (see
How I built the second batch of open wagons)
|
Open 11
|
|
In service
|
Resin body on Hartland chassis. (see
How I made my third batch of open wagons). General merchandise load (packing cases from coffee stirrers,
gear wheel in cradle, milk churns (from GRS)
|
Open 12
|
|
In service
|
Resin body on Hartland chassis. (see
How I made my third batch of open wagons). Load of wooden kegs.
|
Open 14
|

|
In service
|
Resin body on Hartland chassis. (see
How I made my third batch of open wagons) Removable coal load.
|
Open 15
|
|
In service
|
Resin body with building materials load (bricks, cement bags and
sand)
|
Open 16
|
|
In Service
|
Converted from a cheap Echo Toys US style gondola car. For
more information see
How I bashed a couple of cheap US style gondolas into open
wagons
|
Open 17
|
|
In Service
|
Converted from a cheap Echo Toys US style gondola car. For
more information see
How I bashed a couple of cheap US style gondolas into open
wagons
|
Open 18
|

|
In Service
|
Designed with TinkerCad and 3D printed. The design is based on my
resin cast wagons with a 3D printed chassis instead of the HLW
chassis
|
Open 19
|
|
In service
|
Designed with TinkerCad and 3D printed. The design is based on my
resin cast wagons with a 3D printed chassis instead of the HLW
chassis
|
Open 20
|

|
In Service
|
Southwold Railway 4-plank open wagon. Designed in TinkerCad and
3D printed.
No load as yet.
|
Open 21
|
|
In service
|
Southwold Railway 3-plank open wagon. Designed in TinkerCad and
3D printed.
No load as yet.
|
Open 22
|

|
In service
|
Southwold Railway 3-plank open wagon. Designed in TinkerCad and
3D printed.
No load as yet.
|
|
Open 23
|
|
In Service |
A 3D printed Cleminson six-wheeled open wagon based on those which ran on the Southwold Railway |
|
Open 24
|
|
In service
|
A 3D printed Cleminson six-wheeled open wagon based on those which ran on the Southwold Railway
|
|
Closed van 1
|
|
In service
|
Freelance conversion from LGB ToyTrain balcony van (see
How I converted an LGB ToyTrain balcony van into a closed
van) |
|
Closed van 2
|
|
In service
|
Freelance conversion from LGB ToyTrain balcony van (see
How I converted an LGB ToyTrain balcony van into a closed
van) |
|
Closed van 3
|
|
In service
|
Now sold and passed to another railway
|
|
Closed van 4
|
|
In service
|
Converted from an LGB US style box car - see
How I converted an LGB US style box car into a closed van
|
Closed van 6
|
|
Out of Service |
Now sold and passed to another railway
|
Closed van 7
|
|
Out of service |
Now sold and passed to another railway
|
Closed Van 8
|

|
In Service
|
Short wheelbase Southwold Railway luggage van. Designed in
TinkerCad and 3D printed.
|
Closed Van 9
|
|
In service
|
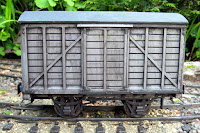
Long wheelbase Southwold Railway luggage van. Designed in TinkerCad
and 3D printed
|
Closed Van 10
|

|
In service
|
Based loosely on a County Donegal Railway luggage van. Designed in TinkerCad and 3D printed
|
|
|
Awaiting construction
|
|
Gunpowder van
|
|
In service
|
Wooden trinket box mounted on an HLW chassis (see
How I constructed a gunpowder van from a cheap wooden trinket
box)
|
|
Cattle wagon 1
|
|
In service
|
Scratchbuilt plasticard body on LGB chassis (see
How I constructed two cattle wagons). With load of two Schleich cattle.
|
|
Cattle wagon 2
|
|
In service
|
Scratchbuilt plasticard body on LGB chassis (see
How I constructed two cattle wagons). With load of two Schleich cattle.
|
Cattle wagon 3
|
|
In service
|
IP Engineering kit
|
Cattle wagon 4
|
|
In service
|
IP Engineering kit
|
Cattle wagon 5
|
(Awaiting photo)
|
In service
|
Accucraft
|
Timber wagon 1
|
|
In service
|
LGB stake wagon with log load
|
|
Timber wagon2
|
|
In service
|
LGB stake wagon with log load
|
|
Timber wagon 3
|
|
In service
|
LGB stake wagon with log load
|
|
Timber wagon 4
|
|
In service
|
LGB stake wagon with removable log load
|
Timber wagon 5
|
|
In service
|
LGB feldbahn stake wagon with removable 2' 6" (40mm) pit prop
load
|
Timber wagon 6
|
|
In service
|
LGB feldbahn stake wagon with removable 5' (80mm) pit prop
load
|
Timber wagon 7
|
|
In service
|
LGB feldbahn stake wagon with removable 7' (112mm) pit prop
load
|
Timber wagon 8
|
|
In service
|
LGB feldbahn stake wagon with removable 7' (112mm) pit prop
load
|
Bolster wagons 1 & 2
|
|
In service but in need of more restraining chains
|
LGB feldbahn wagons with papier mache log load
|
Tank wagon 1
|
|
In service
|
Converted from LGB Toytrain tanker wagon using GRS detailing
kit
|
Tank wagon 2
|
|
In service
|
LGB ToyTrain wagon converted to UK based wagon using same
techniques as GRS detailing kit
|
Flat wagon 1
|
|
In service
|
Modified Hartland wagon, with tractor load (adapted resin
moneybox)
|
Flat wagon 2
|
|
In service
|
Modified Hartland wagon with farm machinery load (Brittain's
toys)
|
Flat wagon 3
|
|
In service awaiting a removable load
|
Modified Hartland wagon (see
How I constructed some flat wagons)
|
Flat wagon 4
|
|
In service
|
Modified Hartland wagon - used as match wagon for crane wagon
(see below and
How I created some flat wagons)
|
Flat wagon 5
|
|
In service, awaiting weathering
|
Atropos kit with milk churn load. Milk churns bought as resin
castings or scratchbuilt (see
How I made some milk churns)
|
Flat wagon 6
|

|
In service
|
Freelance designed in TinkerCad and 3D printed. Awaiting
removable load
|
Flat wagon 7
|
[Awaiting photo] |
Awaiting construction
|
|
Permanent way wagon 1
|
|
In service
|
Scratchbuilt body on IP Engineering Hudson wagon chassis.
Bachmann tools added for detailing. (see
How I made a small engineering wagon)
|
Crane wagon
|
|
In service
|
Scratchbuilt body on Hartland chassis (see
How I constructed a crane wagon)
|
Guards van 1
|
|
In service, but further detailing needed
|
Scratchbuilt freelance body on Hartland chassis. Made from lolly
sticks and plasticard.
|
Guards van 2
|

|
In service
|
IP Engineering kit, bought secondhand as part of job lot,
partially detailed and repainted in PLR livery.
|
Guards van 3
|

|
In service, but in need of further detail
|
Converted from LGB Toytrain balcony van using GRS kit (bought
secondhand in unfinished condition as part of job lot)
|
| Guards van 4 |
|
In Service |
Based on a Glyn Valley Tramway brake van. A 3D scratchbuild. |
Rake of nine Snailbeach-esque hopper wagons
|
|
In service
|
Scratchbuilt on modified HLW wagon chassis (see
How I constructed Snailbeach-like hopper wagons)
|
Rake of nine tipplers (empty)
|

|
In service
|
LGB tipplers, repainted, weathered and rusted (see
How I weathered a rake of tippler wagons)
|
Rake of nine tipplers (full)
|

|
In service
|
LGB tipplers, repainted, weathered and rusted (see
How I created loads for a rake of tippler wagons)
|
| 2' gauge rolling stock |
| Locomotives |
21
(Linda)
|

|
In service.
|
To be used for conveying ore from mine to loading hoppers. Bought
via eBay - 32mm gauge, IP Engineering body and HGLW chassis.
Powered by one 18650 lithium-ion battery, controlled with a
Deltang Rx65b receiver/controller (programmed for auto-shuttle)
(see
How I converted a battery loco to radio control)
|
22
(Emma)
|
|
In service
|
IP Engineering plate frame Simplex diesel kit. Dual gauge (32mm
and 45mm). Powered by two 14500 li-ion batteries (in parallel) and
controlled with a Deltang Rx65b receiver. It has two soundcards
(adapted from musical greetings card modules) for motor sound and
horn. See
How I constructed a plate frame Simplex loco
|
23
(Sybil)
|
|
In service
|
IP Engineering Albert kit. Powered by two 14500 li-ion
batteries wired in parallel and controlled by a Deltang / RC
Trains Rx65b receiver / controller. See
How I constructed a small diesel from an IP Engineering
kit
|
| Coaches |
11
|
Awaiting photo
|
Planned
|
Workmen's coach
|
12
|
Awaiting photo
|
Planned
|
Workmen's coach
|
| Wagons |
101
|
Awaiting photo
|
In service
|
Constructed from a Binnie Hudson skip kit
|
102
|
Awaiting photo
|
In service
|
Constructed from a Binnie Hudson skip kit
|
103
|
Awaiting photo
|
In service
|
Constructed from a Binnie Hudson skip kit
|
110
|
|
In service
|
Tank wagon - Constructed from eBay wooden kit
|


 I decided that the mine rolling stock will be bauxite (ie red primer) rather than the grey finish for the main railway.


