Tuesday, December 20, 2016

How I made and installed some picket fencing on my railway

I have reached that stage in the construction of my railway where I am turning more of my attention to adding finer details. The main station (Beeston Market) has undergone a few changes since it was first built, with sidings being added and the length of the station being extended to include access to the storage roads in the garage (see Progress Report 59). This created a forecourt area for the station which has remained largely undeveloped. What I felt was needed initially was some sort of separation between the railway and the outside world - ie some fencing.
I decided to invest in some fencing packs from North Pilton Works. These seemed to me to be the most cost effective way of getting long runs of picket fencing and so I very shortly took delivery of four packs - a level crossing pack (see How I made a Level Crossing), a fencing pack and two gate packs.


The gate pack was opened first..........

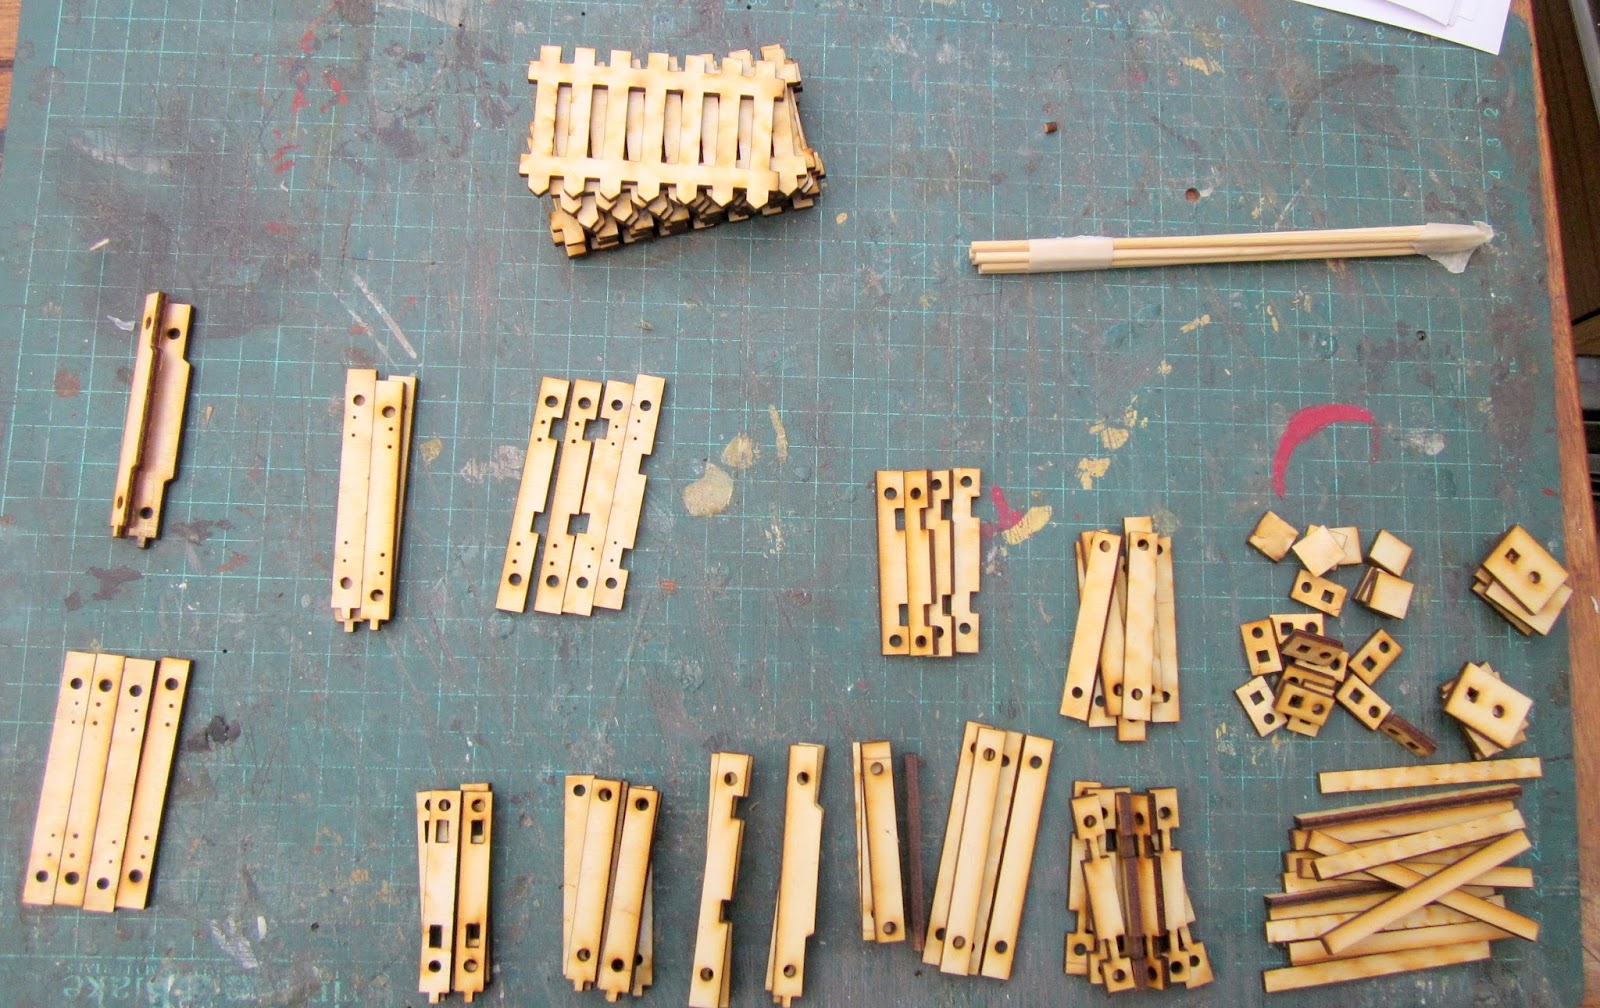
....... to reveal a set of laser-cut components .........

..... and a set of instructions.

The first job was to measure up the site to work out the length of fencing I'd require. To fit the gate for the station yard in the right place, I worked out that I needed to shorten one of the fence panels from 117mm to 70mm. One panel was duly shortened, making sure I left the locating lugs on both ends.

Next, I started making-up a series of posts. These are constructed from three components; a plain outer piece, an outer piece with a peg at the base and a notched inner piece.

These were glued together using exterior PVA and short lengths of dowel to help align the pieces.

 The fence panel was then glued to the post using the slots in the post.

The next post needed to be double-sided to support a panel on each side. This was constructed from three sections, the centre section including two sets of notches.


 The post was then glued together and inserted between the existing short length of fence and a full length of fencing. Battens were then applied behind the panels.

The bases for the posts were then glued on. 

... and the run of fencing was left to let the glue dry. Note that as the right hand post will be a gate post, it has a raised edge to act as a gate-stop.

This was constructed from three pieces as previously - one of the outer sections containing the gate-stop.

The next run of fencing would require a 90 degree bend and so a corner post was put together from three sections; one of the outside pieces including rectangular holes to receive the tabs on the fence panel at right angles to the normal run of the fence.

The remaining sections of fence panel and posts were constructed as above.

 The gate for the station yard was constructed from a fence panel with a backing piece comprising framing battens and a diagonal. The holes are to take the screws for hinges (supplied in the kit).

I decided at this point to make myself another gate using a spare fence panel. The tabs were removed from the end of the panel...

.... and two verticals were cut from an offcut of fencing panel.

The verticals were glued on to the fence panel and horizontal battens glued between them. A diagonal batten was then glued between the two horizontal battens.

The completed fence panels and gates were then given a couple of coats of resinous wood hardener as I wanted to ensure they would survive the damp environment in my shady back garden.

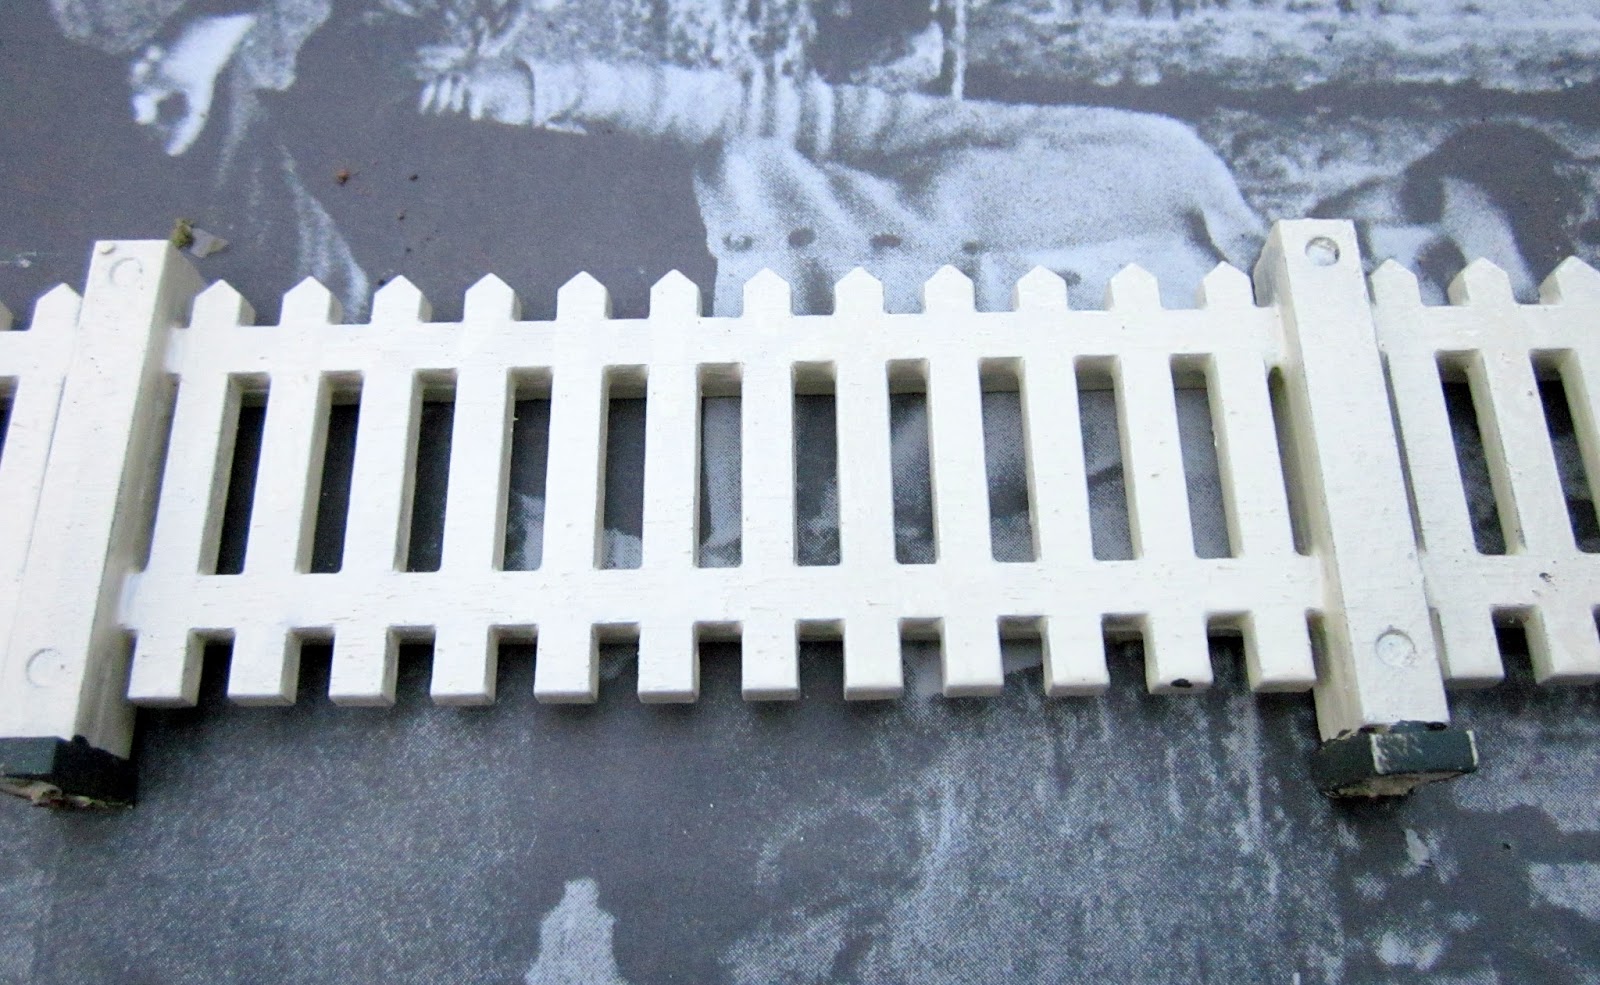
They were then given a couple of thin coats of exterior housepaint (light cream).

The bases were then given a coat of greeny-grey acrylic to represent concrete.

and 1.5mm diameter brass rods were inserted into holes drilled into the bases to act as locating pegs when the fencing panels will be installed.

Once the paint had dried, the hinges were then screwed to the gates and gateposts.

I decided to construct my own latches for the gates. These were made by cutting a 5mm strip of 1mm brass sheet and soldering a short length of 2mm diameter brass tube to the end.

 The end with the tube was then snipped off and the solder filed smooth.

A short piece of 1.5mm diameter rod was inserted into the tube, bent at 90 degrees and snipped off to form the bolt for the latch.

 Latch plates were then made in a similar way to receive the bolts.

 The latches were then superglued to the gates and painted with primer and black acrylic.

 The lengths of pre-assembled fencing panel were then taken out into the garden and fitted into place, holes being drilled in the baseboard to take the brass pegs on the base of each post.

 At the moment, the fencing has been fitted temporarily. I need to do some landscaping to build up the verges and curbs and the road surface. Some of the bases of the posts are therefore 'floating'. (Note one of the galvanised nail heads in the foreground. These will act as keys to help fix the concrete screed to the baseboard).

Eventually, the bases of the posts will be buried in the ground and will hardly be visible.

I could have left the bases off completely and will do so when I fit fencing at subsequent locations. I did try removing them, but the PVA had bonded far more strongly than I expected.

I will add more information and pictures to the foot of this blog-post, when I have finished the landscaping (weather permitting).

In the meantime, the fencing seems to be able to bear quite close scrutiny.

Though I am going to have to paint those hinges!!

 The packs of fencing and gates from North Pilton Works seem to present good value for money at less than a pound (GBP) per panel. Having tried to make my own picket fencing from wood and from plastic and discovered it's not easy to get the spacing consistent or vertical, these panels give a much better finish than I know I could achieve. I still have more than enough fencing left to complete the fencing at the other end of the station - another job for the never-ending jobs-list.

I will keep you posted as to developments when I finish off the landscaping.

Saturday, December 03, 2016

How I made a level crossing using a North Pilton Works kit

My hypothetical railway would have crossed several roads on its route from one terminus to the other and, given its 'light railway' status, most of these would have been level crossings. For a while I have been on the lookout for a cost effective solution to making some of the level crossings. Those provided by North Pilton Works seemed to fit the bill - for £25.00 I could get a kit which could be made up into one double gated crossing or two single gated crossings. As most of my roads are narrow country lanes, getting two single track crossings from one pack made it all the more attractive.

Construction

In addition to the level crossings, I also ordered some picket fencing panels (see How I made some fencing panels - pending) and some platform accessories (see How I made some platform accessories - pending). The laser cut sections arrived in well labelled thick brown envelopes which, when opened, ........

....... revealed packets of components and a set of instructions.

 Opening the packets revealed a wealth of laser-trimmed plywood sections, lengths of dowel and packets of hinges to make up the gates and adjacent fencing panels.

 My first task was to glue together the two sections which formed each of the gates, using exterior grade PVA adhesive.

This gave me four separate gates.

While the glue was setting, I laid out the sections for the adjacent fencing panels, gate posts and fence posts.

 The eight gate posts were tackled first. Each post was made from three sections, sandwiched together with dowel pegs to help with alignment and strengthen the bond.

Once the four 'hinging' gateposts were completed, ......

.... the 'receiving' gateposts were constructed. One of the sections included a batten against which the gate would close.

These posts were glued together with dowels as above.

I made sure there were equal numbers of left-hand and right-hand posts.

Using the same approach, I then constructed eight fence posts. The kit included two options for these posts; either with centre sections for end-posts (such as this) ........

..... or for double-sided posts (such as this).

I decided that my posts would be single-sided, as I did not want the fencing to continue from the level crossings alongside the track. The eight fence posts were thus constructed using the single sided centre sections ........

 .... so the posts would have recesses on one side only. The bases of the posts were glued on at this point, the lugs on the bottom of each post engaging with the slots in the bases.

 The fence panels fitted between the gateposts and the fence posts .......

..... and so they were glued in place.

I then had eight sets of gateposts and fence panels.

 The battens were then glued behind each fence panel, again making sure the four sets were matched left and right. You may see from the photo that I have been fairly generous with my application of adhesive. I prefer to ensure there is plenty of glue and then wipe off the excess with a damp paper towel than skimp on the amount of glue.

Painting

As my garden faces North and, apart from the mid-Summer months, my railway is shadowed from the sun by the house, I decided I needed to protect the plywood from the intrusion of damp. I treated half of the gates and fence panels with Ronseal Multi-purpose Wood Treatment .......

and the other half with Ronseal Wet Rot Hardener (a resinous fluid which gives the wood the consistency of hard plastic) which I have used previously (see How I made the viaduct). I thought this would be an opportunity to further test the comparative efficacy of these products.

Once dry, the panels were give a couple of coats of thinned primer, followed by a couple of coats of thinned exterior topcoat paint. Rather than stark white paint, I went for an off-white finish - pale cream.

2cm lengths of 1.5mm brass rod were then inserted into holes drilled into the base of each post to locate the fencing when in situ. I could have used the dowel pegs provided with the kit, but decided that brass pegs would be better suited for the concrete sub-base on which the gates would be mounted.

The crossing

While the various coats of preservative, primer and topcoat were drying, I turned my attention to the check rails for the crossings. As the crossings would be located on a section of my railway where I'd used Tenmille 45mm narrow gauge track, a 20cm section of spare track was cut to length.

I then cut out the centre sections of the sleepers.......

..... and filed a vee-shaped notch 1cm from the end of each rail using a triangular needle file.

The ends were then bent through approximately 30 degrees.


Alternate sleepers on each of the sections were then reduced in length ......

.... to enable the check rails to be 'dry' fitted and holes marked for the screws.

Holes were then drilled into the breeze block sub-base with a masonry bit .........

.... and rawlplugs fitted.

The check rails were then screwed into place.

A stiff mix of sand and cement (3:1 proportions), with a dash of brown and a dash of black cement dye, was then trowelled into place......

..... before being sprinkled with chicken grit to represent the road surface.

The location for this crossing is the approach to Peckforton Station from the direction of Beeston Market (see A Trip Along the Line).

Finishing touches

While the concrete roadway was setting, the hinges were fitted using the pre-drilled holes and Phillips headed screws provided in the kit.

 I decided to make some latches for the gates. A 5mm wide strip of 0.5mm thick brass plate was cut and a 10mm length of 2mm OD brass tube soldered into place.

The tube and plate were trimmed and the excess solder filed off.

1mm diameter brass rod was inserted into the tubes before being bent and snipped off to represent the bolts. Latch plates were then made in a similar way, using plate and tube.

The latches were then superglued to the gates and gateposts .........

.... before being primed with red oxide and painted black.

 The bases of the posts were painted with grey/green acrylic to represent concrete and........

....... the assemblies were fitted into place while the concrete was in its 'green' state so that final adjustments could be made.

The gates were tested .........

..... a few times and some of the railway's road vehicles were given the opportunity to give the level crossing a trial run.

 Once the concrete has set properly, the gates will be fixed into place more firmly, with rawlpugs inserted into the concrete base to accept the brass pins.

I never have any problem with encouraging moss to spread across the rocks and concrete surfaces and so, in time, the verges at the side of the road will merge into the surroundings.

The most time consuming part of the build was actually applying and waiting for the various coats of paint or preservative to dry. In the past, I have tried making my own picket fencing and have found it to be very time consuming with disappointing end-results. I found it difficult to get the spacings even and to keep the palings vertical. These cost effective packs have helped solve that problem.

I am very pleased with the way this little level crossing has turned out and I still have the parts to install another level crossing on the approach to Beeston Castle Station.  I aim to install others (there should be five in total on the whole of my railway) over the coming year and will install the fencing packs at Beeston Market Station once the weather improves sufficiently (see How I made some fencing panels - pending).