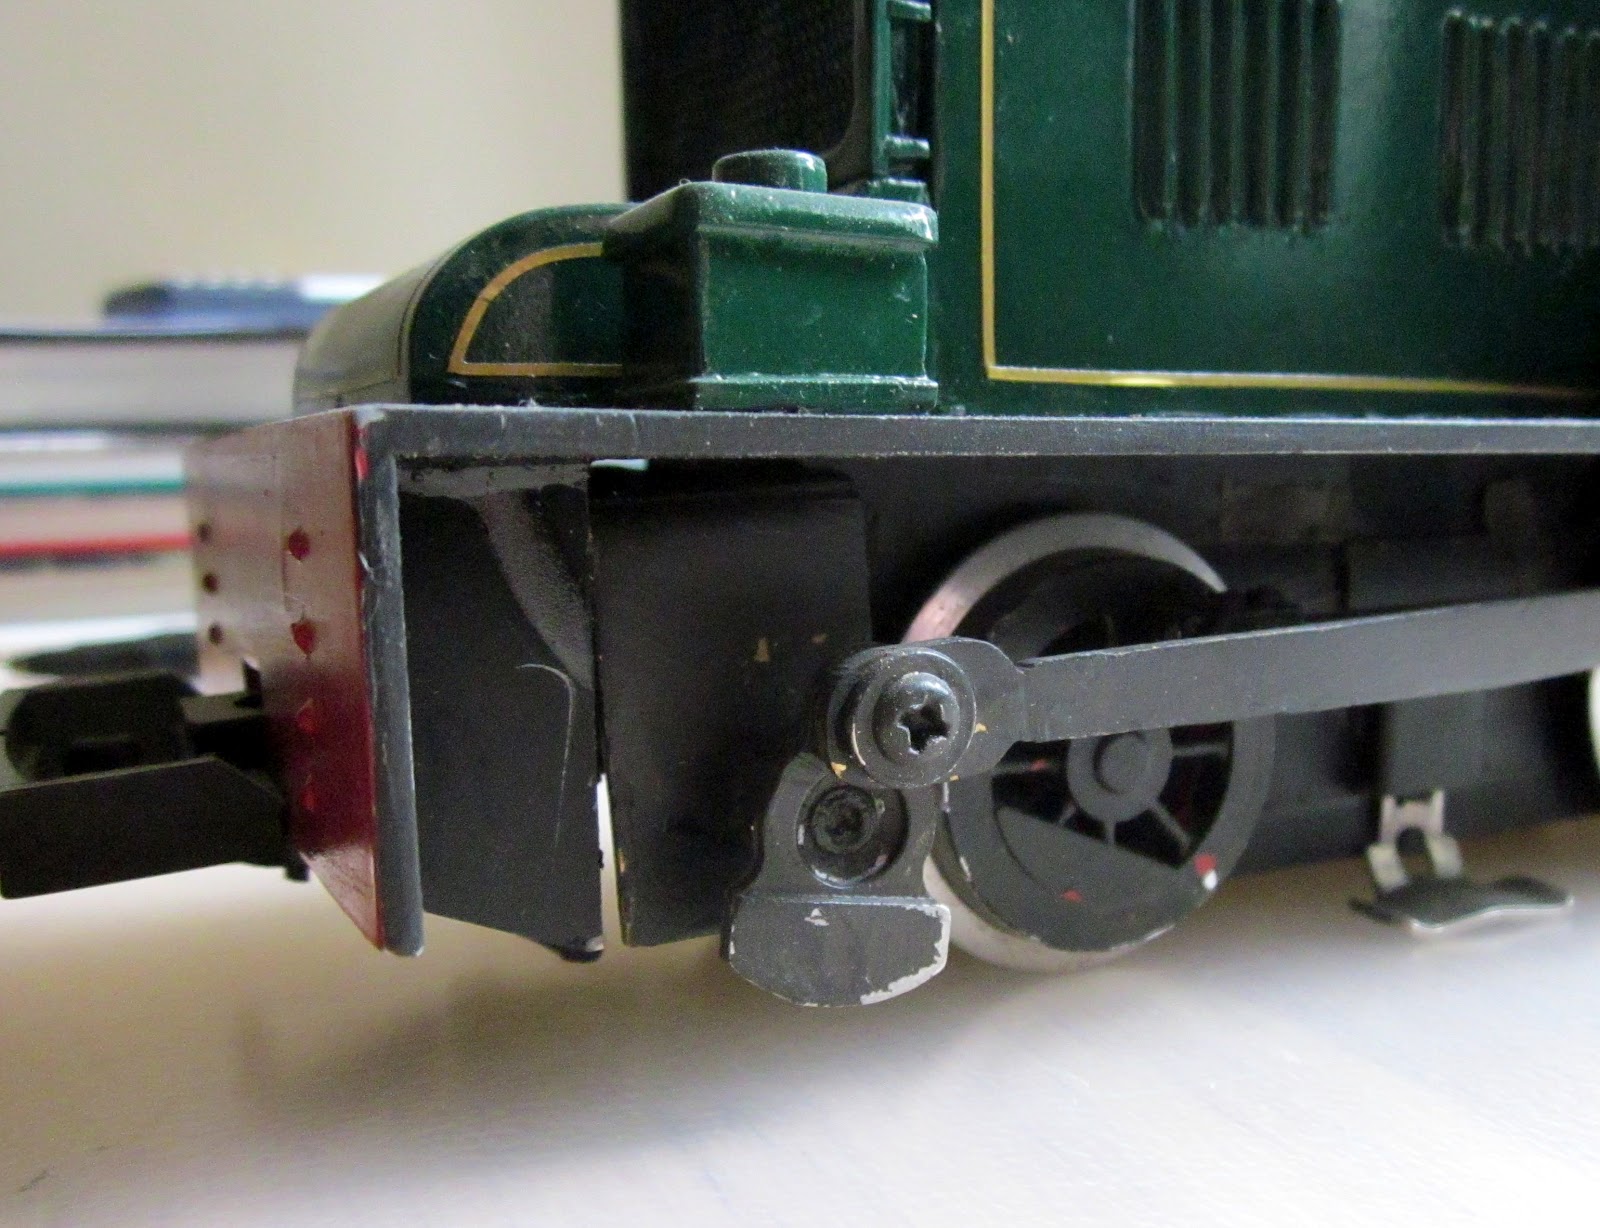
It has now been nearly two years since I started building and converting locomotives to battery power and radio control and in that time, a lot has happened. I feel it is now about time I presented updated and collated information about developments in the motive power on the railway.

The body was mounted on an LGB 0-4-0 Toytrain chassis which, considering it was secondhand when I bought it, served me well until the start of this year. After converting it to battery power (see below) and radio control, I gave it a load test which it handled well, until it ran into an obstacle on the track. This proved too much for the nylon worm wheels which admitted defeat and stripped themselves of teeth. Fortunately, I had a brand new ToyTrain motor block to hand and this was pressed into service.

She is now powered by three 18650 lithium-ion batteries which are housed in the cab (see Converting a track powered loco to battery power). There would have been sufficient room for them in the saddle tank, but opening-up the tank and removing the lead weights which are firmly glued inside would have required a substantial rebuild.

Control is via a Deltang Rx65b combined receiver/controller, which is the latest innovation from the Deltang stable (for more information see An evaluation of Deltang radio control and Getting started with Deltang r/c in the garden).
As Peckforton was my first purpose-built loco for the railway, I am delighted she is now back in service. However, as you can see from the photos, she lacks refinement. I really need to spend some time adding details and I'd like to replace the ToyTrain cylinders and motion with something more prototypical. At present, she does not have a soundcard and, without freeing-up space in the saddle tank, there is very little room left to instal one. However, she runs well and is very responsive to radio control.
I consider her a mixed traffic loco and so hauls passenger and goods trains. In a test run to answer an enquiry on the Garden Rails forum, she ran continuously for five hours and 20 minutes on one charge of the batteries.

She has an LGB motor block and Walschaerts valve gear presumably from another LGB locomotive (such as the Zillertalbahn U class loco). It was converted from track power to battery radio control in 2014 using a Deltang Rx60 receiver/controller (see Progress Report 51).

Other than a coat of paint and Trimline tape lining, she has not been modified or detailed since she arrived on the line, apart from the addition of some cosmetic buffers. I tend use her mostly for passenger duties. She will happily shunt wagons but as the driving wheels are quite large her crawling speed is less controllable than other locos.

The only place to install the batteries would appear to be inside the saddle tank. This will entail some substantial dismantling and rebuilding as the saddle tank is presently crammed full of lead. However, it will be good to see her back in action on the line.
She is in need of detailing and some light weathering.
Update Sept 2015 - She has now been converted to battery power with three 18650 li-ion batteries and a Deltang Rx65 receiver controller

She is controlled by a Deltang Rx60 receiver/controller and powered by a 12v li-ion battery which is intended for use in CCTV cameras. These batteries include protection circuits which monitor charging and discharging.

I decided to leave her unlined, as a homage to the Southwold livery which she wore for most of her working life. As my railway is set in 1932, I argue that they bought the loco from the SR when it closed in 1929. I will probably add some finer details at some point in the future, but for now she will happily pull passenger or goods stock.

Motive power comes from a PlayMobil 0-4-0 motor block as I found the wheel sizes and spacing were approximately correct for 16mm:1foot scale. She is powered by a 12v li-ion CCTV camera battery and controlled by a Deltang Rx60 receiver/controller.

Once the loco was finished, I spent a while adding smaller details, such as the oiling pots. She also has works plates which I feel add an extra touch of realism.

Motive power is provided by a Piko 0-6-0 motor block, which I've found to be a delight. It is extremely smooth running, especially at low speed, and is very responsive to the Deltang Rx65a receiver/controller.

She is in unlined livery and has recently been given appropriately number works plates. She has become the stalwart of the line, handling goods and passenger traffic with alacrity. Out of curiosity, I gave her a haulage test and found she could pull 24 wagons up a 1:40 gradient with ease.

At present, she is still track-powered, but will be the next loco to be converted to battery operation. The flycranks on the layshaft are, at present, somewhat loosely connected to the driving wheels, as I was unable to source flycranks of the correct size and so overcame this by slotting the holes in the connecting rod. When converted, I will improve this aspect and also add some finer detailing.

The bodywork is from an IP Engineering Jessie kit (now no longer available) which, being constructed principally from steel, provides plenty of inherent weight. As a consequence, I have not had to add any additional weight and yet she will happily haul twenty skips up the 1:40 gradients on my railway. She was originally powered by ten NiMh batteries but these have just been replaced by three 18650 li-ion batteries with a protection board. She is controlled via a Deltang Rx102 receiver feeding into a Brian Jones Mac5 ESC. Because the original mechanisms were so unreliable, I found that trying to control her with a Deltang Rx60 receiver/controller was somewhat erratic. I assume this is because this particular receiver was limited to 1 amp loading and the mechanisms might have been drawing more current (and were probably creating all manner of electromagnetic interference). One day, I will try controlling her with the more recent Deltang Rx65b - which can handle up to 3 amps.

She has a Peter Spoerer DigiSounds narrow gauge diesel sound module (developed by Mktroniks) which, as the name suggests, uses digitised recordings of a real diesel engine, and so sounds rather impressive.

...... this diminutive railcar was constructed as an experiment to find out how responsive Deltang receivers would be with a low voltage supply - three NiMh Low Self Discharge (LSD) batteries = 3.6v (see Evaluation of Deltang with low voltages). In fact, as Deltang receivers actually step down input voltages to 3v, they will happily manage with these low voltage supplies. This model uses a Deltang Rx60 receiver.
I added additional detailing (ie planking and bracing) during construction and she has red/white bi-colour LEDs which change colour dependent on direction of travel. She acts as the railway's permanent way vehicle and has a small trailer wagon which is often attached for the workers' tools (see How I constructed a small PW flat wagon).


For a while, they were extremely unreliable, becoming derailed when encountering any slight undulation in the track. Eventually, I created a very simple form of compensation on the leading axle of each car and since then have had very few derailments even though they are somewhat top-heavy.
Both cars have operating directional headlights and internal lighting.

At present they do not have a sound card but I am experimenting with various methods of digitising the sound effects of a Model T Ford starting, stopping and running at speed using a small sound recording board controlled by a Picaxe chip.

The receiver has been programmed to operate in shuttle mode as I decided it would be useful to have her pottering backwards and forwards with a train of Binnie skip wagons while I operated the main railway.
At present, she is more or less in the condition I bought her, but I have added more a little more detailing and given her some light weathering. It is doubtful I will add a sound card as space is limited, however, I am experimenting with a couple of small sound modules which are used in greetings cards to see if something could be squeezed in somewhere.


She has also been fitted with a small soundboard which has been modified from a cheap (£1.29) module designed to be used in musical greetings cards. While the sound isn't quite hi-fi, it is quite adequate for this little loco.
She is dual gauge - with interchangeable 32mm and 45mm gauge chassis. Both chassis have been fitted with chain drive which makes her quite a powerful little loco for her size

Locomotive No. 1 - "Peckforton" - Peckett 0-4-0
This was constructed from a Garden Railway Specialists kit in 2008 (see How I constructed a Peckett loco). Seven years ago, GRS kits were largely made from preformed Plasticard plus whitemetal fittings. The kits have now improved with fewer cast resin parts in place of the plasticard pieces.
The body was mounted on an LGB 0-4-0 Toytrain chassis which, considering it was secondhand when I bought it, served me well until the start of this year. After converting it to battery power (see below) and radio control, I gave it a load test which it handled well, until it ran into an obstacle on the track. This proved too much for the nylon worm wheels which admitted defeat and stripped themselves of teeth. Fortunately, I had a brand new ToyTrain motor block to hand and this was pressed into service.

She is now powered by three 18650 lithium-ion batteries which are housed in the cab (see Converting a track powered loco to battery power). There would have been sufficient room for them in the saddle tank, but opening-up the tank and removing the lead weights which are firmly glued inside would have required a substantial rebuild.
Control is via a Deltang Rx65b combined receiver/controller, which is the latest innovation from the Deltang stable (for more information see An evaluation of Deltang radio control and Getting started with Deltang r/c in the garden).
As Peckforton was my first purpose-built loco for the railway, I am delighted she is now back in service. However, as you can see from the photos, she lacks refinement. I really need to spend some time adding details and I'd like to replace the ToyTrain cylinders and motion with something more prototypical. At present, she does not have a soundcard and, without freeing-up space in the saddle tank, there is very little room left to instal one. However, she runs well and is very responsive to radio control.
I consider her a mixed traffic loco and so hauls passenger and goods trains. In a test run to answer an enquiry on the Garden Rails forum, she ran continuously for five hours and 20 minutes on one charge of the batteries.
Locomotive No. 2 - "Beeston" - Barclay 2-4-0T
This loco was bought secondhand from GRS in 2010 (see Progress Report 26), having been constructed from one of their very early kits (now no longer available). It is based loosely La Moye, a loco which ran on the Jersey Railway and is now preserved in South Africa.
She has an LGB motor block and Walschaerts valve gear presumably from another LGB locomotive (such as the Zillertalbahn U class loco). It was converted from track power to battery radio control in 2014 using a Deltang Rx60 receiver/controller (see Progress Report 51).

Other than a coat of paint and Trimline tape lining, she has not been modified or detailed since she arrived on the line, apart from the addition of some cosmetic buffers. I tend use her mostly for passenger duties. She will happily shunt wagons but as the driving wheels are quite large her crawling speed is less controllable than other locos.
Locomotive No. 3 - "Bickerton" - Hunslet 0-4-0T
I constructed this loco from a GRS resin kit and an LGB ToyTrain 0-4-0 motor block in 2010 (see How I constructed a Hunslet loco from a GRS kit). At present, she is still track-powered and so, as I have now sold off all my DCC gear, she is out of action.The only place to install the batteries would appear to be inside the saddle tank. This will entail some substantial dismantling and rebuilding as the saddle tank is presently crammed full of lead. However, it will be good to see her back in action on the line.
She is in need of detailing and some light weathering.
Update Sept 2015 - She has now been converted to battery power with three 18650 li-ion batteries and a Deltang Rx65 receiver controller
Locomotive No. 4 - "Bulkeley" - Manning Wardle 0-6-2T
This was my first scratchbuilt steam loco (see How I constructed a Manning Wardle 0-6-2T loco) and joined the line in 2013. She is based on the Southwold Railway No. 4 loco, Wenhaston. I found that the driving wheel sizes of the LGB U-class 0-6-2T locomotive were the correct size, though the wheel spacings are incorrect - the trailing driving wheels being too close to the centre pair. However, as the motor block included Walschaerts valve gear, I decided I could live with the slight inaccuracy.
She is controlled by a Deltang Rx60 receiver/controller and powered by a 12v li-ion battery which is intended for use in CCTV cameras. These batteries include protection circuits which monitor charging and discharging.

I decided to leave her unlined, as a homage to the Southwold livery which she wore for most of her working life. As my railway is set in 1932, I argue that they bought the loco from the SR when it closed in 1929. I will probably add some finer details at some point in the future, but for now she will happily pull passenger or goods stock.
Locomotive No. 5 - "Tarporley" - Sharp Stewart 2-4-2T
My second scratchbuilt steam loco was somewhat more ambitious as, not only did she have leading and trailing pony trucks, I also had to construct her motion (see How I constructed a Sharp Stewart 2-4-2T loco). She was constructed during 2013 and is based on the second Southwold Railway No. 1 loco, Southwold.
Motive power comes from a PlayMobil 0-4-0 motor block as I found the wheel sizes and spacing were approximately correct for 16mm:1foot scale. She is powered by a 12v li-ion CCTV camera battery and controlled by a Deltang Rx60 receiver/controller.

Once the loco was finished, I spent a while adding smaller details, such as the oiling pots. She also has works plates which I feel add an extra touch of realism.
Locomotive No. 6 - "Harthill" - Manning Wardle 0-6-0ST
My third scratchbuilt steam loco was completed in 2014 (see How I constructed a Manning Wardle 0-6-0ST loco). She is based on the Manning Wardle locos which ran on the 3'6" gauge railway at Davington. These were shipped to Brazil when the railway closed at the end of World War I. I found this loco to be the most challenging of the three to construct, owing to the saddle tank and making sure there was sufficient space inside the body to accommodate three 18650 lithium-ion batteries. She also has a fair amount of external pipework which proved to be more complicated to construct than it might appear.
Motive power is provided by a Piko 0-6-0 motor block, which I've found to be a delight. It is extremely smooth running, especially at low speed, and is very responsive to the Deltang Rx65a receiver/controller.

She is in unlined livery and has recently been given appropriately number works plates. She has become the stalwart of the line, handling goods and passenger traffic with alacrity. Out of curiosity, I gave her a haulage test and found she could pull 24 wagons up a 1:40 gradient with ease.
Locomotive No.7 - "Tollemache" - Fowler 0-4-0DM
This was my first foray into scratchbuilding in 2011 (see How I constructed a Fowler diesel loco). Based on an LGB ToyTrain 0-4-0 motor block, she is based loosely on the early Fowler diesel mechanical locomotives which ran on standard gauge and narrow gauge railways. Whilst I could find photos of standard gauge and 2' narrow gauge locos, I couldn't find an image of a 3' gauge Fowler and so imagined how it might look.At present, she is still track-powered, but will be the next loco to be converted to battery operation. The flycranks on the layshaft are, at present, somewhat loosely connected to the driving wheels, as I was unable to source flycranks of the correct size and so overcame this by slotting the holes in the connecting rod. When converted, I will improve this aspect and also add some finer detailing.
Locomotive No.8 - "Wynford" - Freelance 0-4-0DM
This was my second venture into battery power and, like my first battery model (see below), has had a long and chequered history. After three failed attempts to construct a reliable mechanism, I eventually found success by inserting a USA Trains motor block into the chassis. This lengthened the wheelbase, but has proved to be a lot more reliable than any of the previous mechanisms.
The bodywork is from an IP Engineering Jessie kit (now no longer available) which, being constructed principally from steel, provides plenty of inherent weight. As a consequence, I have not had to add any additional weight and yet she will happily haul twenty skips up the 1:40 gradients on my railway. She was originally powered by ten NiMh batteries but these have just been replaced by three 18650 li-ion batteries with a protection board. She is controlled via a Deltang Rx102 receiver feeding into a Brian Jones Mac5 ESC. Because the original mechanisms were so unreliable, I found that trying to control her with a Deltang Rx60 receiver/controller was somewhat erratic. I assume this is because this particular receiver was limited to 1 amp loading and the mechanisms might have been drawing more current (and were probably creating all manner of electromagnetic interference). One day, I will try controlling her with the more recent Deltang Rx65b - which can handle up to 3 amps.

She has a Peter Spoerer DigiSounds narrow gauge diesel sound module (developed by Mktroniks) which, as the name suggests, uses digitised recordings of a real diesel engine, and so sounds rather impressive.
Locomotive No. 9 - "Lolly"- Freelance 'Lollypop' railcar
Constructed from an IP Engineering kit (see How I constructed a small railcar from an IP Engineering kit),
...... this diminutive railcar was constructed as an experiment to find out how responsive Deltang receivers would be with a low voltage supply - three NiMh Low Self Discharge (LSD) batteries = 3.6v (see Evaluation of Deltang with low voltages). In fact, as Deltang receivers actually step down input voltages to 3v, they will happily manage with these low voltage supplies. This model uses a Deltang Rx60 receiver.
I added additional detailing (ie planking and bracing) during construction and she has red/white bi-colour LEDs which change colour dependent on direction of travel. She acts as the railway's permanent way vehicle and has a small trailer wagon which is often attached for the workers' tools (see How I constructed a small PW flat wagon).

'Locomotive' No. 10/10a - "Samantha" & "Josephine" - Freelance Ford(ish) railmotors
This was my first major investigation into the feasibility of battery power and radio control and as with No. 8 the railmotors went through various control systems and mechanisms before reaching their present state. They were 'bashed' from two freelance Andel resin coach kits (see How I bashed two Andel coaches into a 'Ford' railmotor) and the power car is now powered by a 12v CCTV li-ion battery, controlled by a Deltang Rx60 receiver/controller and motorised with a MFA Como gearbox motor and bevel gears.
For a while, they were extremely unreliable, becoming derailed when encountering any slight undulation in the track. Eventually, I created a very simple form of compensation on the leading axle of each car and since then have had very few derailments even though they are somewhat top-heavy.
Both cars have operating directional headlights and internal lighting.

At present they do not have a sound card but I am experimenting with various methods of digitising the sound effects of a Model T Ford starting, stopping and running at speed using a small sound recording board controlled by a Picaxe chip.
Locomotive No. 11 - "Linda" - Freelance 0-4-0DM
This was my first venture into 32mm gauge and was bought for a relatively modest sum on eBay. She has an IP Engineering body on an HGLW chassis. She was originally manually controlled and powered by two AA alkaline non-rechargeable batteries. These were replaced by a single 185650 li-ion battery and a Deltang Rx65b receiver/controller was installed.
The receiver has been programmed to operate in shuttle mode as I decided it would be useful to have her pottering backwards and forwards with a train of Binnie skip wagons while I operated the main railway.
At present, she is more or less in the condition I bought her, but I have added more a little more detailing and given her some light weathering. It is doubtful I will add a sound card as space is limited, however, I am experimenting with a couple of small sound modules which are used in greetings cards to see if something could be squeezed in somewhere.

Locomotive No. 12 - "Emma" - Plate frame Simplex
Constructed from an IP Engineering kit, at present she is powered by two 14500 li-ion batteries and manually controlled with a Deltang Rx65b receiver controller (see How I constructed a plate frame Simplex from an IP Engineering kit)

She has also been fitted with a small soundboard which has been modified from a cheap (£1.29) module designed to be used in musical greetings cards. While the sound isn't quite hi-fi, it is quite adequate for this little loco.
She is dual gauge - with interchangeable 32mm and 45mm gauge chassis. Both chassis have been fitted with chain drive which makes her quite a powerful little loco for her size