Introduction
I realised recently that I haven't actually described how to install Deltang radio control equipment in a basic kit-built loco. Having looked around at various kits, I opted for a simple diesel loco kit from Houstoun Gate Loco Works. Apart from their simplicity, I like option to have a 4 wheel drive chassis. I was also impressed that the kit arrived the day after I placed the order for it online.The kit comprised two packs; LB1 loco body kit and the Deluxe 4wd chassis kit - for around £40 in total.
The Chassis
I decided to start with the chassis. The kit was unpacked and checked ........... and checked against the illustrated instruction sheet.
The laser cut MDF sections were separated from their fret and tidied up with a sanding-block.
Following the instructions, the spreader, sides and base were glued together.
Although PVA adhesive was recommended, I opted for medium viscosity Superglue as I wanted the glue to set fairly quickly (I sometimes also used an accelerator spray to decrease the setting-time).
The buffer-beam ends were added next.
Then the axles were tackled. The washers and bushes ........
...... were threaded on to the ends of the axles .......
...... and the axle assemblies slotted into their housings on the chassis.
The polyeurethane belt was left loose at this stage to avoid stressing the axles.
To fix the bushes in place, the first layer of the axle box mouldings was glued into place.
Followed by the second layer .........
...... and the final layer.
Finally, the spring hangers were glued on.
This process was repeated three more times for the remaining axle-ends.
The 4-wheel drive belt was then looped over the pulleys ......
...... and the brake gear glued into place.
The mounting rings for the motor were glued together, using the motor to ensure they were properly aligned.
The motor and rings were then slotted into the hole in the chassis plate ........
..... and the motor positioned so that its worm meshed appropriately with the worm wheel on the axle.
The motor was then screwed into place.
A 3v battery pack was then connected to the motor to check the chassis was functioning properly.
The Body
The kit comprised a couple of laser cut MDF frets, a couple pieces of perspex, some mesh, and three pre-cut pieces of thin ply for the roof and window surrounds.The MDF sections were removed from the frets and tidied-up with a sanding block.
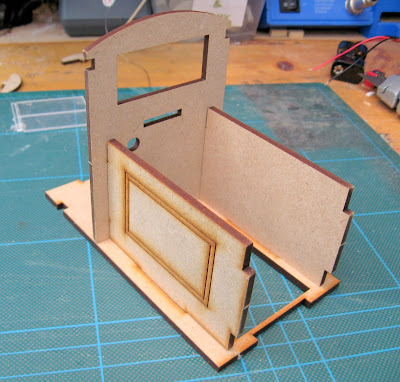
Following the instructions, the cab front was glued to the sides of the engine compartment.
These were then glued to the running plate.
The front was then added .......
The engine compartment top cover was then glued into place.
I then glued the cab sides and loose-fitted the cab-back.
The roofing bars were then glued into place ......
..... and once the glued had set (with help from the accelerator spray), the back of the cab was removed.
The window frames were then added to the front window .........
...... and the rear window.
At this point (ie before painting), I decided to add some louvres to the sides of the engine compartment. My mate Greg in Australia had sent me some louvred metal sheet intended for fly screens.
A couple of 52mm x 30mm pieces of louvre were cut out .........
....... and glued to the sides of the engine compartment, using medium viscosity Superglue, with a lead weight used to hold each piece in place while the glue set.
A 40mm x 45mm piece of mesh was cut to size .......
...... and glued into place behind the opening at the front of the engine compartment.
Painting
The body was given a gouple of coats of Halfords red oxide primer and once dry, the interior of the cab was sprayed with a matt cream acrylic spray (after masking the rest of the body with masking tape).This was the reason I had left the back of the cab unglued as painting the interior of the cab would have been tricky.
The inside of the cab back was also sprayed cream.
The cab back was then glued into place. Squadron White Putty filler was applied to the various cracks and crevices and then smoothed off with a sanding block.
The roof was then fitted into place, using rubber bands to hold it down while the Superglue set.
In the meantime, the chassis was given a couple of coats of Halford's grey primer, followed by a couple of coats of Halfords satin black (the motor, axles and sheels were masked to avoid them becoming gummed-up with paint).
The electrics
I decided to use a single 3.7v 18650 lithium-ion battery as the power source. The motor is designed to run from a 3v battery pack and the Deltang receivers require at least 3.2v. In addition, Deltang receivers are designed to operate with li-ion batteries and, by default, include low-voltage cut-off sensing to ensure that they will not excessively drain li-ion battery packs. Li-ion batteries become permanently damaged if their voltage drops below 3v.I figured that a single 18650 li-ion battery would comfortable fit into the engine compartment above the motor and so three pieces of 5mm x 25mm wide stripwood were cut, two pieces 25mm long and one piece 66mm long.
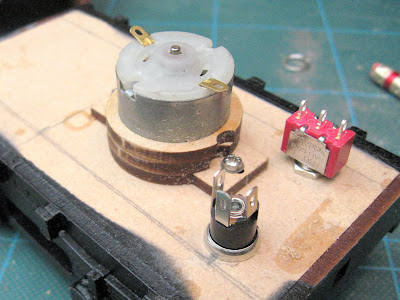
These were glued together to make a bracket for the motor. Two 3mm holes were drilled midway along the longer piece to take a strap for the battery.
The battery was strapped to the bracket and the bracket test-fitted to check clearances.
A 6mm hole and an 8mm diameter hole were drilled into the base of the chassis 15mm from the front edge of the chassis. A 2.1mm DC socket was fixed into the 8mm hole and a miniature SPDT toggle switch fixed into the 6mm hole.
They gave sufficient clearance underneath for the leading axle, gear and pulley system.
The switch and socket were wired up ........
....... using my preferred wiring circuitry. I decided a battery protection board was not necessary as I was only using one cell, the polyswitch would help protect the battery from short circuit and the LVC (Low Voltage Cut-out) feature of the Rx65 would guard against over-discharge of the li-ion cell.

The polyswitch fuse was soldered to the negative tab on the battery .......
.... and the additional wiring on the RC Trains Accessory Wired Rx65b receiver was tucked away for future use. This wiring will eventually be used to trigger sound effects on a soundcard and also provide directional lighting when I get around to fitting it.
The receiver was then bound to one of my Deltang transmitters and the loco was taken outside for testing.
Conclusion
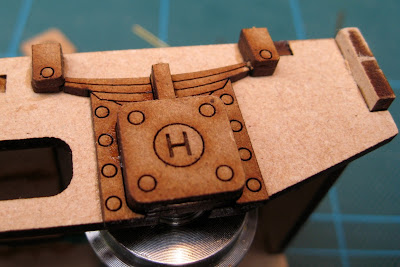
There is still more to be done. I want to add more detailing to the loco and she is sadly in need of a decent final paint-job (Update - See How I detailed my HGLW loco)I am pleased that I managed to complete the loco and get her running in a single day. The kit was extremely easy to construct, thanks to the well through-out tab system for aligning the pieces. The mechanism sounds noisy and so I might need to fine tune the meshing of the gears to see if that reduces the noise.
As indicated above, I will probably add a soundcard, though the rumble from the gears actually sounds quite diesel-like. She will probably potter around the timber yard at Peckforton which I anticipate will be quite busy as wagons of raw timber are shunted to be off-loaded by the gantry crane (to be constructed) and finished timber loaded into open wagons.


