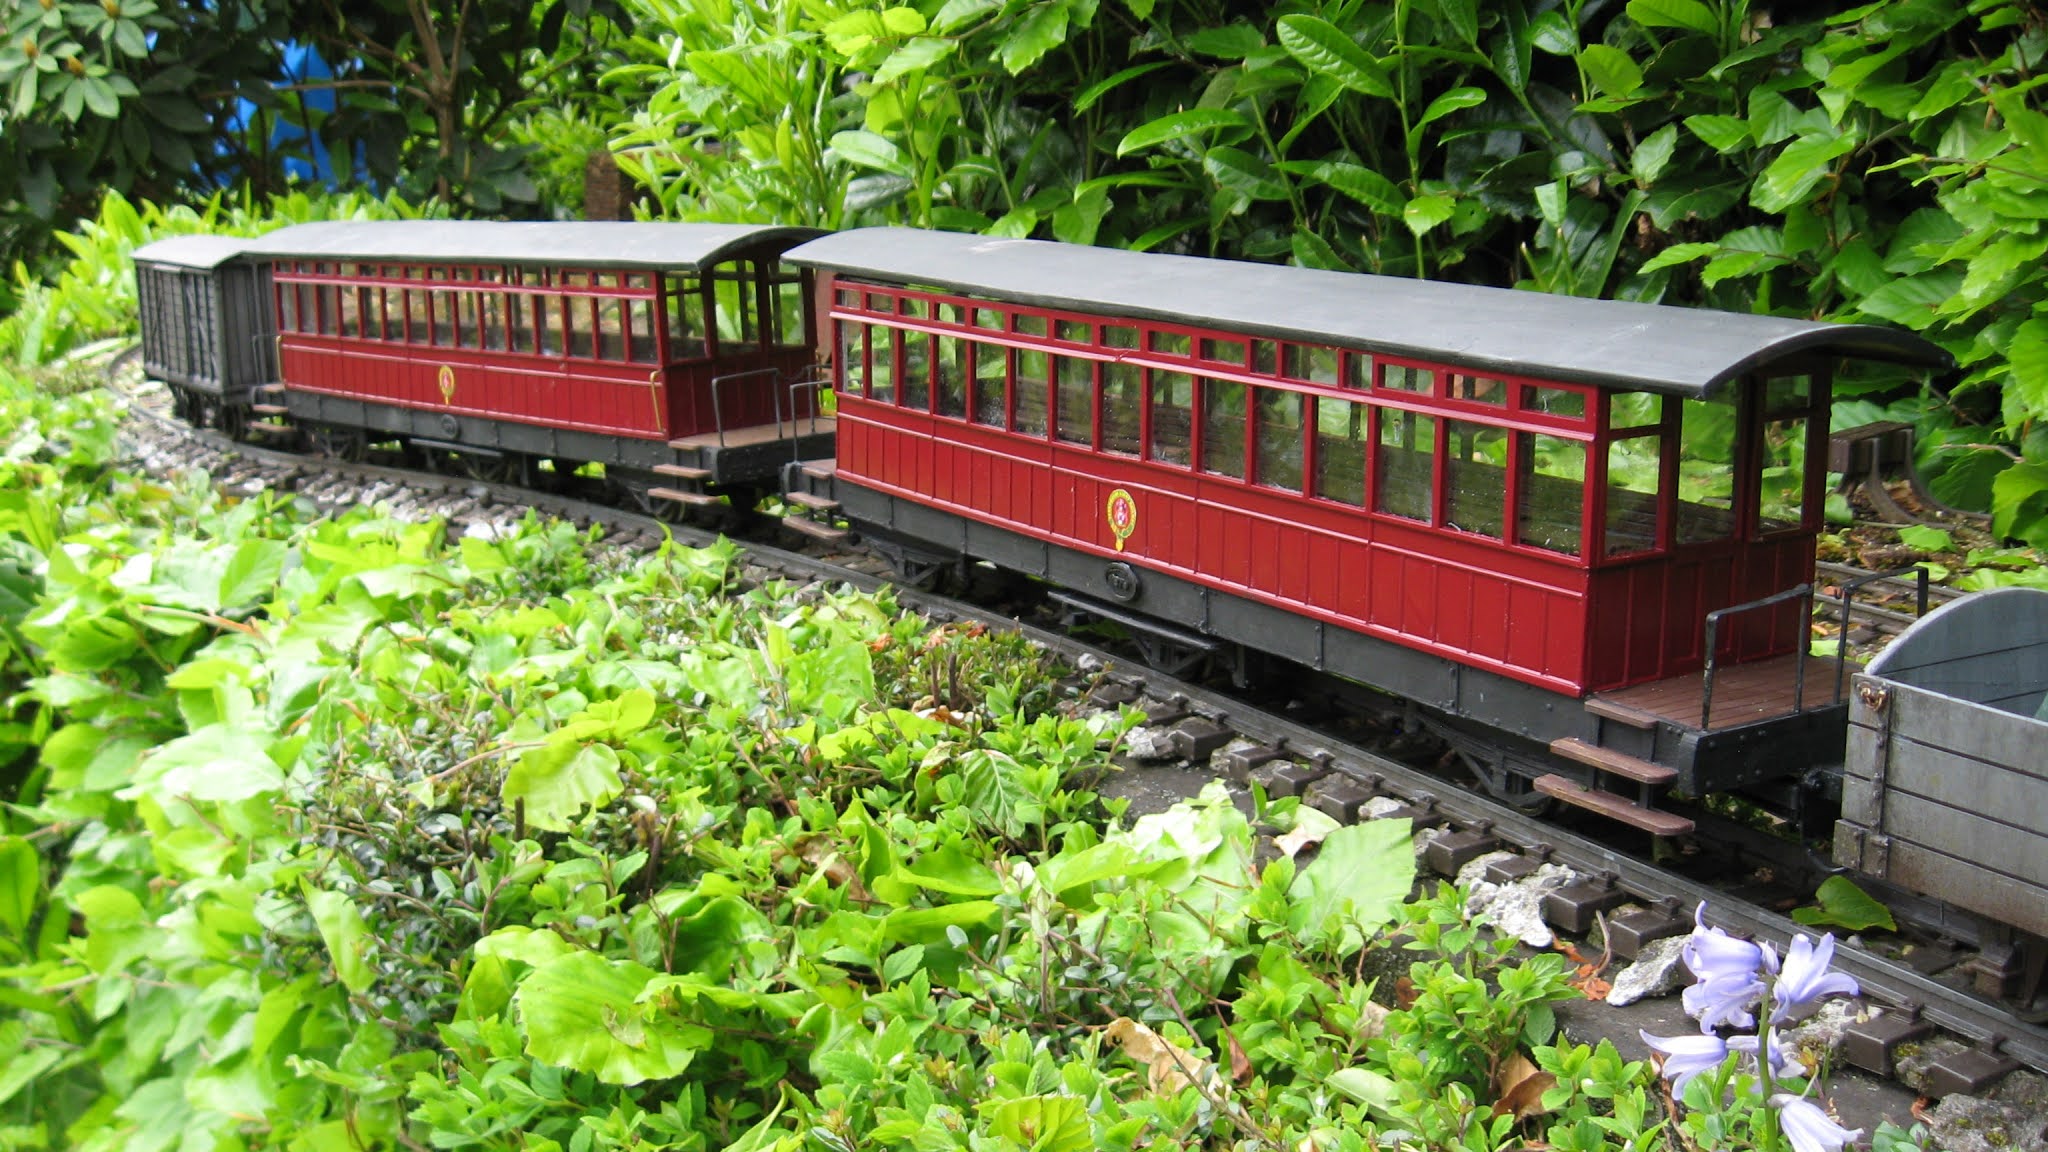
This Blog describes the ongoing development of a 16mm scale 45mm gauge garden railway situated in the North West of England, UK from 2004 to the present day.
Last year, I programmed my Psion pocket computer with a cut-down
version of my freight management program so I could transport it out into the
garden with me during operating sessions. I had tried to do this previously by
writing a Google Sheets version which I could use on my mobile phone
but the difficult with this was that the screen is difficult to see when the
sun shines and also, the Android version of Sheets annoyingly does not
support the use of on-screen buttons instead requiring the user to click on
cells on the spreadsheet, making it tricky to use on a mobile phone screen in
daylight.
I then uncovered my old Psion 3a Pocket Computer and, despite being
nearly 30 years old, was in perfect working order, Furthermore, with the help
of its manual, I discovered I was able to program it. (See How I created the Psion version of my freight management program)
I therefore produced a
version of my freight management program to run on it. The advantage being
that the screen was perfectly visible in daylight and its operation made use
of its Sinclair Spectrum style rubberised keyboard. The disadvantage
was that is was restricted to 1Mb of memory and so I had to rewrite the
program to ensure it used minimal memory. To achieve this, rather than
providing individualised weightings for each wagon dictating the possible
destinations for each wagon, I devised a series of eight categories (or Types) for wagons
- with destination weightings for each category.
The categories I used were:
C - Coal
T - Timber
M - Miscellaneous
F - Fruit
P - Pit-Props
B - Beer/Brewery
S- Sacks
G - Gunpowder
I found these categories were sufficient to guide the production of probable
destinations for all 80+ wagons on the PLR. Although I have outlined these
weightings in my previous post, I felt it was necessary to provide more
detail.
The weightings for each category are as follows.
Category
B Market
B Castle
P'forton
Mill
Bulkeley
Cop Mine
Bick'ton
Coal
9
6
5
2
5
4
5
Timber
7
2
6
0
4
0
4
Misc.
8
6
6
3
6
1
7
Fruit
9
0
4
0
8
0
5
Pit-props
6
0
6
0
0
6
0
Beer
8
6
4
0
4
0
4
Sacks
8
5
0
7
5
0
5
Gunpowder
8
0
0
0
0
8
0
Assuming that 0 = never and 9 =certain, we can see that Coal wagons could travel to any location on the railway, though they will definitely return to Beeston Market if out at any other station, they are more likely to travel to Beeston Castle than anywhere else and are least likely to travel to the Mill Siding.
Timber wagons are most likely to travel to Beeston Market and then Peckforton, but will never travel to the Mill.
Miscellaneous wagons could travel anywhere but are highly unlikely to travel to the Copper Mine.
Fruit wagons (mostly vans) are most heavily weighted to travel to Beeston Market and Bulkeley (where the loading dock for the fruit farms is located), though could also travel to Peckforton and Bickerton.
Pit Prop wagons have an equal chance of travelling to Beeston Market, the Copper Mine and Peckforton but will never travel to other locations.
Beer wagons are most likely to travel to Beeston Market and Beeston Castle (where the brewery is located) but have a fair chance of travelling to other stations - but no chance of travelling to the Copper Mine or Mill Siding.
Sack wagons are most likely to travel to Beeston Market and the Mill, but could also travel to Beeston Castle and to Bulkeley and Bickerton.
And Gunpowder wagons will only travel to and from Beeston Market and the Copper Mine.
Livestock wagons have been assigned to the Miscellaneous category which means it is possible (though less likely) that they will travel to the Mill and the Copper Mine. I can justify these unusual movements by assuming that the Mill owner might also own some land for grazing sheep and the Copper Mine makes use of pit ponies.
To make life interesting, some wagons have been assigned to categories other than those which might be expected. For example, one coal wagon has been assigned to Miscellaneous and another to Fruit.
I've been using this version of the Freight Management program for two seasons, now. Over that time, I've tweaked the weightings slightly and also rewritten part of the program to save even more memory as sometimes an 'Out of Memory' error message was displayed half way through a session. Since then the program seems to be a lot more stable.
I find being able to update the database on the fly results in a lot more flexibility. Occasionally, I might forget to deliver a wagon at a station or decide to include an additional wagon in a train. Both these eventualities can be easily managed.
The downside of using the Psion is that I no longer have the capability to print out a list of wagons and their locations which makes checking all the stock is in the right place at the start of a session a bit time consuming. However, I feel the added flexibility in using the Psion compensates for this.
According to the meteorologists, May was one of the wettest since records began - and it felt like one of the coldest. However, the weather turned completely during the last weekend of the month and I was able to have a full running session which gave an opportunity to test out a few of the projects I had been working on during the bad weather.
Infrastructure
Fencing
Owing to the poor weather, I was unable to do much out in the garden. However, following a tip-off from a fellow GardenRails forumite, I bought a few lengths of Fairy Garden fencing from eBay.
I hadn't seen it before, but I was told it's been around for a few years now but it seems good value for a 90cm length of fencing in the right scale. The palings are thin wood (similar to coffee stirrers) and they are held together with twisted plastic coated wire. This means the fencing is very flexible in both the horizontal and vertical planes.
Level crossing
The first application of the fencing has been alongside the level crossing on the approach to Peckforton station.
To fix the fencing in place, I added some copper wire stripped from 13A twin and earth electrical cable. This was forced in behind the twisted wire of the fencing at roughly six inch (15cm) intervals and secured with a couple of bends, leaving a tail of around an inch (2.5cm) pointing downwards.
The tail ends of the copper wire brackets were then inserted into plastic rawlplugs forced into holes in the concrete breeze blocks which form the trackbed.
Permanent way
Remote point operation
A couple of hard to reach points (turnouts) at Beeston Market and Beeston Castle stations have had push-pull point rodding added, using galvanised fencing wire and screw eyelets.
In addition, the two points for the storage sidings in the lean to can now be operated remotely from the entrance to the sidings with twist point rodding.
The double ended diesel loco which I 3D printed has now had its dummy trailer loco motorised.
It already had a 3D printed chassis which was designed to accept a motor and worm gear set from IP Engineering and so it was a quick and easy conversion. Four wheel drive was also added with Delrin chain and sprockets.
Although the locos are powered with cheap three volt can motors, the loco is now quite powerful coping easily with a train of eight loaded hopper wagons and a brake van up the 1:40 gradients on the railway.
In addition, the locos have been given name and number plates, drawn in TinkerCAD, 3D printed and painted.
The names, Dorothy and Diana, as well as being alliterative with Double Diesel, are taken from two of the daughters of Lord Tollemache, the supposed benefactor of the Peckforton Light Railway.
Schull & Skibbereen loco
The motorisation of the 3D printed Schull and Skibbereen loco (see How I drew and 3D printed a Schull & Skibbereen loco) is still being worked on. The original Bachmann Lyn motor block proved to be under-powered and so I have been seeking ways of improving its mechanical efficiency. Initially, the difficulty was finding smaller diameter worm gears which were compatible with the original worm wheels. I tried using different gear sets but they weren't sufficiently robust. I then discovered that the worm gears on Bachmann motor blocks are fairly interchangeable and so I am presently redesigning the motor block to make use of the worm gears from another Bachmann loco.
Getting the gears to mesh reliably and smoothly is proving to be very difficult inside a fully enclosed motor block housing.
However, I will not be defeated!
Second SR coach
After developing the design of the Southwold six wheeled coach, I have now constructed a second one.
I discovered during a test run, that the centre truck kept derailing. Closer examination revealed that the arms of the swivelling mechanism on the outer trucks were 4mm too short. Not sure how this happened when I redesigned the trucks, but it just emphasises how critical the dimensions need to be.
A third coach should hopefully finalise the design.
Cleminson open weathered
The six wheeled Southwold open wagon has now been weathered
I have now used the wagon twice on operating sessions and, touch wood, it seems to be performing well. It did derail on one of the points at Bickerton Station, but hopefully this will not be a regular occurrence.
Operation
Running session
Although the weather has generally been bad through May, it improved markedly towards the end of the month and so I managed to organise a full running session.
I am very pleased with how my revisions to the original program performed. At the start of the session, the location of some stock didn't match where it was supposed to be according to the program. This is because through May, I had been having ad hoc running sessions and testing locos and new rolling stock and so the wagons had become displaced.
I found that the easiest way to change a piece of stock's location in the database was firstly to reset all wagons to Beeston Market and then use the List and Move functions to relocate stock which had found its way to other stations.
About ten years ago, I posted an article describing a typical operating session. Although not much has changed, I focused that article on the hypothetical sequence of trains rather than the actual series of events carried out by the operator - ie me. Following a couple of enquiries asking how I actually go about running my railway, I've decided to focus this article on the actual sequence of actions I carry out during an operating session and the rationale behind the decisions I take.
Rather than describing a whole operating session, which can sometimes take two full days to cover one day in the life of the railway, I will describe an extract from one session, otherwise the article will become overlong and repetitive.
Firstly, here's the trackplan. This help you to understand where, how why each move takes place.
The main station is Beeston Market in the bottom left corner of the plan. From here, trains travel first to Beeston Castle, then to Peckforton and the take the crossover to go back round the workshop to take the line to Bulkeley. From here, trains descend the gradient to take the branch to Bickerton Station.
Trains for the copper mine take the branch at the right hand end of Bulkeley station, around the back of the workshop and then the line towards Beeston Market, branching off at the copper mine.
We join the session mid morning. The mid morning Down passenger has just arrived at Bickerton, the sand hopper train is at the sand quarry just outside Bickerton being loaded, the empty ore train has just arrived at the Copper Mine and the daily pickup goods is about to be shunted at Beeston Market.
Move 1 - Beeston Market.
I consult my freight management program on my trusty old Psion 3a pocket computer to see which wagons need to be shunted on to the daily Down pickup goods
Move 2. Beeston Market.
I mark the wagons needed for the train with a small blob of BluTak. This makes them easier to identify and saves me having to keep consulting the Psion
Move 3. Beeston Market
I take Loco No. 6, Manning Wardle 0-6-0ST, Harthill from the engine shed to the yard to begin shunting the marked wagons.
Move 4. Beeston Market
The Down pickup goods is made ready for departure.
Move 5. Copper Mine
The full Up ore train departs. As you can see from the plan, the Copper Mine is located adjacent to Beeston Market station, though in the real world, it should be around six miles away between Bickerton and Bulkeley. We shall see why later.
Move 6. Bickerton
I now stroll across the garden to the other end of the line, Bickerton, where I run the loco around the recently arrived train.
Move 7. Bickerton
After the Down ore train has passed by on the mainline, the Up passenger departs.
Move 8. Bulkeley
I now follow the Up passenger and guide it into Bulkeley Station, where it pauses.
Move 9. Beeston Market
Meanwhile, the Up ore will have been slowly making its way through Peckforton and Beeston Castle stations and so I stroll over to Beeston Market to oversee its arrival.
The ore train is one of the most reliable and seldom derails - unless a leaf or twig falls on to the line - or sometimes I forget to set the points correctly and it ends-up back in Bulkeley or the Copper Mine.
Move 10. Beeston Market
Whilst I am at Beeston Market, I take the opportunity to depart the Down Pickup Goods
Move 11. Beeston Castle
I follow it as it progresses behind the workshop and on to Beeston Castle. On the way, I consult the Psion and see that one wagon needs to be picked up and two dropped off.
Move 12. Beeston Castle
As they are or will be located on the Down facing siding, it's easier to do the shunting as the train is passing Down the line and so I stop the train with the relevant wagons about to enter the station
Move 13. Bulkeley
Rather than doing the shunting at Beeston Castle at this point, I go back over to Bulkeley. The Up passenger has been sitting there for a while and so is ready to depart. I make sure the route is set correctly for Peckforton and set it off on its way.
Move 14. Beeston Castle
I now return to Beeston Castle and shunt the wagons which need to be moved, keeping half an eye on the progress of the Up passenger which passes by on the track just below the station.
Move 15. Peckforton
I am lucky today, I finish the shunting at Beeston Castle, just as the Up passenger is pulling into Peckforton station, so I walk over to Peckforton to ease the passenger to a halt.
Move 16. Peckforton
As I had already made the pickup goods ready to depart, I bring it on from Beeston Castle to Peckforton. Where I bring it to a halt.
Move 17. Peckforton
Whilst I'm here, I might as well depart the Up passenger ......
Move 18. Beeston Castle
...... and follow it to Beeston Castle, where it stops for a while. On a normal operating session, I might place the video camera down to film the train as it passes the River Gowy but today I simply watch.
Move 19. Beeston Market
Rather than going back to Peckforton to sort out the Pickup Goods, I decide that it's been a while since the ore train has had any attention and so I go over to Beeston Market and, after leaving the brake van in the siding, I propel the skip wagons back into the exchange siding (ie the hidden link back to the Copper Mine)
Move 20. Beeston Market/Copper Mine
The rake of full ore skips is swapped for the rake of empties (keeping the timber stake wagon behind the loco)
Move 21. Beeston Market
The guards van is retrieved from the siding .......
Move 22. Beeston Market
..... attached to the train of empties and then pulled up into the siding at the back of the station.
Move 23. Beeston Market
With the platform empty, the loco takes the train on to the loop and runs around it, so it is ready for departure.
Move 24. Beeston Castle
I can now turn my attention to the Up passenger which has been waiting patiently at Beeston Castle. I depart it from the station .......
Move 25. Beeston Market
...... and follow it round to Beeston Market.
Move 26. Peckforton
At this stage, it would have been easy to depart the Down ore train from Beeston Market, but instead I turn my attention to the Pickup Goods at Peckforton. Although a timber wagon needs to be dropped off, I decide it will be easier to do this when the train returns up the line - and so, the Pickup Goods departs Peckforton.
Move 27. Bulkeley
I follow the train to Bulkeley, ........
Move 28. Bulkeley
..... where the Psion tells me a cattle wagon needs to be dropped off. An open
wagon also needs to be dropped off, but as that needs to be left in the
Up facing siding, I decide to do that when the train returns Up the
line. So, the cattle wagon is dropped off ......
Move 29. Bulkeley
And so the Pickup Goods departs Bulkeley ........
Move 30. Bickerton
....... and I follow it down the line to Bickerton, where I oversee its arrival
Move 31. Beeston Market
I now go to the other end of the line where the Down ore has been waiting to depart. If this was a real railway, the ore would have departed ages ago and would have been running down the line at the same time as the Pickup Goods. But as I have to run the trains on my own, these events have to happen sequentially rather than simultaneously.
Move 32. Beeston Market
However, sometimes I can run things simultaneously, provided they are not too onerous. In this case, while the ore train is slowly moving down the line towards Beeston Castle and on to Peckforton, I run the loco around the passenger train.
Move 33. Peckforton
By the time I have finished Move 32, the ore train is approaching Peckforton, so I stroll over to supervise its arrival.
Move 34. Peckforton
The manifest required a small timber stake wagon to be moved from the Copper Mine to Peckforton timber yard. As the Pickup Goods does not travel up the Copper Mine branch, any wagon movements to and from the Copper Mine need to be done by attaching them to ore trains. The wagon could have been dropped off when the ore train went Up the line but, to be honest, I forgot. As the wagon is on the end of the train, it's a fairly straightforward process to get the timber yard shunter to detach it from the train, shunt it into the siding and then return the brake van to the train. Besides which, it's an interesting little manoeuvre.
Move 35. Peckforton
The next job is to depart the ore train from Peckforton ........
Move 36. Copper Mine
....... and follow it to the Copper Mine.
Move 37. Bickerton
Time to turn my attention to the Pickup Goods at Bickerton. A quick consultation of the Psion reveals two wagons need to be dropped off and four picked up.
Move 38. Bickerton
To enable me to keep tabs on which wagons need to be moved, I use blobs of BluTak once more ....
Move 39. Bickerton
I now shunt the wagons.
Move 40. Beeston Market
Now back to the other end of the line (and the garden), where the Midday Down passenger departs.
Move 41. Beeston Castle
..... and I follow it down the line as far as Beeston Castle, where it stops for a while.
Move 42. Copper Mine
Now back to the Copper Mine, where I run the loco around the empty ore train, remove the brake van and then attach it to the end of the full ore train, making it ready for departure.
Move 43. Bickerton
Now over to Bickerton, where the Pickup Goods departs and ......
Move 44. Bulkeley
.... I follow it up to Bulkeley, where the manifest shows I have to drop off two wagons and pick up one. I stop the train beside the Up facing siding so this shunting can take place.
Move 45. Beeston Castle
I now return to Beeston Castle, where the passengers and crew have been patiently waiting. I depart the train ......
Move 46. Peckforton
...... and follow it down to Peckforton, where I leave it to wait.
Move 47. Beeston Market
I now trot over to Beeston Market, where Loco No. 14, Black Hawthorn 0-4-0ST, Burwardsley is taken from the engine shed and sent off down the line, heading towards the sand quarry.
Move 48. Copper Mine
After it has passed the Copper Mine, I send the Up ore train off - apparently pursuing it, but in reality it is at the other end of the line and, after going behind the workshop, it takes the branch to Bulkeley....
Move 49. Bulkeley
.... where it stops, awaiting clearance to join the main line. The station already has the Pickup Goods shunting its train.
Move 50. Beeston Castle
The light loco has now reached Beeston Castle so I quickly dash over there to bring it to a halt at the platform. In theory, it could advance as far as the home signal outside Peckforton, but I prefer to hold trains in stations - it makes life easier when trying to find them again.
Move 51. Bulkeley
Back to Bulkeley. The Pickup Goods needs to be shunted so it can be moved to the passing loop.
Move 52. Peckforton
With the Pickup Goods now in the loop at Bulkeley, I depart the Down passenger from Peckforton. It could have progressed to Bulkeley as the other loop at the station was available but it's a case of juggling priorities.
Move 53. Peckforton
With the platform road clear, the light loco can now be brought from Beeston Castle to Peckforton, where it waits.
Move 54. Bulkeley
Meanwhile, the Down passenger has been steadily progressing to Bulkeley, so I turn around and bring it to a halt by the platform as the Pickup Goods simmers on the passing loop.
Move 55. Bulkeley
Rather than giving the light loco the right of way, I decide to despatch the Pickup Goods so it can make its way up the line to Peckforton.
Move 56. Bulkeley
While the Up Pickup Goods is making its way around behind the workshop, I move to the other end of the platform and depart the Down Passenger .....
Move 57. Bickerton
..... and follow it down to Bickerton, where I bring it in to the station
Move 58. Peckforton
As the Pickup Goods passes by, I follow it to Peckforton, where I bring it to a halt.
Move 59. Bickerton
Twisting around, I now take the opportunity to bring the Up ore train off the branch and into the station at Bulkeley. I now have to decide whether to send it on the Peckforton or give the light engine the Right of Way
Move 60. Peckforton
I decide that the light engine has been waiting long enough and send it Down the line to Bulkeley.
Move 61. Peckforton
With the light engine making its way under its own steam Down the line towards the quarry at Bickerton, I shunt the two timber wagons into the timber yard sidings (one from Beeston Market and the other from Bickerton).
Move 62. Bulkeley
With the light engine having passed through Bulkeley, I spin round and depart the Up ore. As it is making its way around the back of the workshop, I quickly follow the light engine Down .......
Move 63. Sand Quarry (Bickerton)
I bring the light engine to a halt in the quarry ......
Move 64. Sand Quarry (Bickerton)
..... and wait for the Up ore to pass by. In reality (?), the ore train is now actually approaching Peckforton about four miles away, but using some parts of the track twice is my means of compressing the distances into my garden.
Move 65. Peckforton
With the Up ore train approaching Peckforton, I depart the Up Pickup Goods to make its way Up to Beeston Castle.
Move 66. Peckforton
Almost immediately, the Up Pickup Goods arrives, so I bring it to a halt as the section ahead is occupied by the Pickup Goods.
Move 67. Beeston Castle
A quick sprint over to Beeston Castle. Although no further shunting is required here, I decide to halt the Pickup Goods. I could easily have let it progress on towards Beeston Market while I carried out the next train movement.
Move 68. Bickerton
I run the loco around the train at Bickerton
Move 69. Beeston Castle / Bickerton
This is why I halted the Pickup Goods at Beeston Castle, it provided a photo opportunity as the Up Passenger departs Bickerton I can depart the Pickup Goods from Beeston Castle on the line behind and above it
Move 70. Bulkeley
I bring the Up Passenger into Bulkeley Station and halt it, while the Up Pickup Goods makes its way behind the workshop
Move 71. Peckforton
With the section ahead now clear, I depart the Up ore from Peckforton
Move 72. Beeston Market
Meanwhile, the Up Pickup Goods is approaching Beeston Market and so I stroll over and bring the it to a halt in the station.
Move 73. Beeston Market
The Up Ore has been slowly making its way to Beeston Market and so I wait and bring it in to a halt on the exchange siding headhunt at the back of the station
If I had been paying closer attention, at this point I should have run the Pickup Goods loco around its train so it could start shunting the wagons into their respective sidings.
Move 74. Bulkeley
Instead, I decided to depart the Up passenger from Bulkeley
Move 75. Sand Quarry
I now move down to the Sand Quarry and depart the Up sand train
Move 76. Beeston Castle
After pausing the Up Passenger at Peckforton, I then take it on to Beeston Castle, where it halts for a while. In the meantime, the Up Sand Train passes by on the line below on its way towards Peckforton.
Move 77. Beeston Market
I now follow the Up Passenger to Beeston Market and bring it to a halt in the station. You can see now why I should have taken the opportunity to run the Pickup Goods loco round its train. We have a bit of a bottleneck!
Move 78. Beeston Market
As the Sand Train is approaching, I need to move the ore train into the exchange siding - after first shunting its brake van into the spur.
Move 79. Beeston Market
The Sand Train arrives and is halted on the headshunt for the exchange siding.
Move 80 ...... etc
I am now about 5/8 of the way through an operating session. The Sand Train needs to be shunted into the exchange siding where the hoppers' loads will be removed, the Pickup Goods needs shunting, the Passenger train needs to make three more journeys down and up the line, one as a mixed train. The ore train needs to make another couple of trips and the last passenger of the day (a railmotor) also needs to run.
I hope this gives you some sort of feel for how I actually run my trains on the Peckforton Light Railway. I know it is not to everyone's taste, but it's what motivates me to get out in the garden and run trains. Although, each session follows a similar pattern, each one is different. The semi-randomised freight program generates markedly different goods and mixed trains each time and I will usually include a special train of some sort - maybe a Market Day Special or a special train for excursion tourists making their way to the spa hotel at Bulkeley.
And then, of curse, sometimes I just run a few trains round at random if I don't fancy having a full operating session. But, to be honest, it's the full operating sessions which I enjoy the most - they allow me to fulfil my ambition of running a railway properly.
In summary - here's how this part of the session went: