Showing posts with label weathering. Show all posts

Saturday, July 11, 2020

Progress Report 82

Introduction

For most of the time since my last progress report, the weather has been fairly bad - cold, wet and stormy. However, there were three days when it was warm and dry and so I managed to organise a good running session which I filmed, using Bulkeley Station as the focal point.

There have been a few other developments but, because of the weather, most of these have been inside the workshop.

Lineside and Permanent Way

On those few occasions when the weather improved, I have been able to finish off a few outside jobs.

Cable operated points at Beeston Market

The points on the far side of Beeston Market Station are just about in reach, if I stretch across the tracks. However, if the siding to the cattle dock is full and/or there are wagons or coaches on the main station loop, then it can be tricky to change the points. The pointwork leading to the 'exchange siding' is used frequently during an operating session and so improving access to the point lever became an increasing priority.


As the points were just over a metre from the edge of the baseboard, I decided to use bowden cable (ie bike brake cable) which I ran beneath the baseboard from each of the two points.

The points are now a lot easier to operate at a distance.


Sound modules

After shooting and editing a couple of videos recently where I added some ambient sounds - the sound of the sawmill in operation (see Lineside business on the PLR) and the sound of cattle in a cattle wagon (see Trainspotting at Bulkeley Station) - I felt it would be more interesting for visitors to the railway to have these sounds played live. So I invested in two small, self-contained MP3 cube players for the modest sum of slightly over £5 (GBP) each.

I downloaded the sounds of a sawmill and cattle lowing from various sources on the internet, edited them in Audacity to focus on the sounds I wanted to use and then saved them as WAV files on a couple of very cheap, low capacity micro SD cards. These were inserted into the MP3 players so the amplified sounds can be played as loops.

As the rechargeable batteries in the players last only a couple of hours, I am now investigating the use of Arduino circuitry to energise them either only when the wagon is in motion (for the cattle sounds) or only when a sensor detects the nearby presence of an observer (for the sawmill sounds).

Boneworks

Plans are now in hand to construct a building for the Boneworks siding at Bulkeley. This will be a half-relief model based on the old Bone and Flint Mill in Stoke on Trent which is now used as a museum.

Photograph taken 15 August 2000 © Mr Brian Peach LRPS. Source Historic England Archive ref: 384358

I am considering moulding the building in concrete so it can be left outside all year round and am currently experimenting with ways of representing the brickwork. Failing that, I'll revert to my now favoured method using PVC foamboard.

Workshop Test Track

A major development in terms of tracklaying has been the creating of a test track around the inside of the workshop. This was partly prompted by the wet weather and partly by the discovery of some Playmobil plastic track which has lain unused in the loft for the past ten years.

The test track is now available whenever I want to test-run a loco or some rolling stock - and also, I can run trains even when the weather outside is not conducive.


Rolling stock

There have been a few developments with rolling stock on the line - a new pair of locomotives have joined the roster, the new railcar has received a more appropriate soundcard, some of the stock has been weathered and I have replaced the last remaining plastic hook and loop couplings on my stock with my own version made from wire.

3D diesel(s)

Having recently bought a budget 3D printer ostensibly to create 14 identical seats for my County Donegal railcar (See How I constructed a railcar from an etched brass kit), I wondered whether it would be capable of printing out something more complicated and so downloaded a freebie kit for a narrow gauge diesel locomotive from the Thingiverse.com website. I also discovered that another modeller had added some enhancements to the basic kit and so I downloaded those as well. In the end, I decided to print out and construct two versions and then couple them together back-to-back in a similar manner to Australian sugar cane locomotives. For more information, see How I constructed a double diesel from 3D printed parts)

I was very pleased with how the larger pieces turned out, though I needed to make some adjustments to the printer to improve its consistency (see How I improved my budget Anet A8 3D printer - pending)

Railcar soundcard

After constructing a CDR Railcar from a John Campbell bare bones etched brass kit (see How I constructed a railcar from an etched brass kit), I installed a Dallee soundard designed for an American Galloping Goose railcar which I had bought secondhand on eBay. Although the sound quality was quite good, the sounds didn't seem quite right for a Perkins diesel powered former Irish railcar.

After watching the promo video of their latest diesel soundcard on the MyLocoSound website which indicated that one of the digitised sounds was of a Perkins diesel, which made it ideal.

I duly purchased one and installed it. The setup still needs to be tweaked a little but the sounds now seem far more appropriate.

Weathering

Weathering rolling stock is one of those jobs which I often put off. I can't think why as it's not difficult and quite an enjoyable task, but there always seem to be more important things to do! A couple of wagons which I constructed a few months ago were still in need of weathering and so, with the bad weather deterring me from running trains, they made their way into the workshop to be attacked.

One of the former Newqida van modifications (see How I bashed a Newqida closed van) was tackled first, following my usual approach (see How I weather my rolling stock)

This was followed by the open wagon which I had converted from a cheap Echo Toys gondola wagon (see How bashed a couple of cheap gondola wagons into opens)

Couplings

The final four items of stock have now been equipped with my versions of hook and loop couplings (see How I make my own LGB style hook and loop couplings)

I don't often run my Maddison coaches (see How I constructed coaches from Maddison kits) but they do occasionally appear on special trains. For this reason they have been languishing on a shelf in the workshop for far longer they they should. The couplings and buffers are attached to arms so they can swing round tight curves without compromising the couplings.

The R1 curves on the test track (see above) was therefore extremely useful in ensuring I had got the geometry right for the linkages and the coupling lengths - previously, the couplings were a bit too close to the coaches which meant the corners of the coaches touched when taking the curves.

The last loco to be converted to my own style of couplings was my HGLW diesel loco which potters about in the timber yard at Peckforton. I hope you will agree that its appearance has been enhanced by replacing the rather chunky LGB plastic hook and loop couplings .....

.... with my somewhat less obtrusive alternatives.

I appreciate that they are not prototypical but, because I need to do a lot of shunting on my railway, I wanted something which was reliable and also, as I have around 70 items of rolling stock, it needed to be cheap!

Operation

Running sessions

As indicated, the weather has been quite bad over recent weeks. When it hasn't been pouring with continuous rain, it has been very showery - which is bad news for trying to set up and run a garden railway. Very frustrating taking an hour to set up and then have to cover everything up again or return the stock to the storage sidings when the heavens open!

However, there was a three-day spell of very fine weather when I was able to have a full and somewhat leisurely full operating session. I decided to record the session by focusing on Bulkeley Station which has recently been revamped (see How I modified the track layout at Bulkeley). Following suggestions from fellow modellers and YouTube viewers, I replaced my usual on-screen captions with a spoken commentary. I've not quite got the relative sound levels correct, but it seems to have gone down well.


Psion-based freight management system

I am constantly tinkering with the freight management program on my old Psion computer (see How I created a portable freight management system) to improve the goods movements it creates. I was finding, for example, that the Mill Siding was receiving far more items of stock and they seemed to be remaining there longer than would be expected. I've therefore changed the weighting for these movements.

In addition, the computer occasionally ran out of system memory, which caused the program to abort. I've hopefully now cured this by moving the freight management program and its associated database on to an SSD RAM card. I need another spell of decent weather to test how successful these changes have been.

I quite enjoy the challenge of getting old tech to do a job. These days, with seemingly unlimited memory and superfast processors, it can sometimes be too easy to create apps or programs. The challenge of creating a program which uses a limited amount of memory to do a complex job adds an extra layer of complexity to a task which I relish!

Thursday, May 05, 2016

How I weathered some LGB Feldbahn timber wagons and added pit prop loads

One of the sources of traffic on the Peckforton Light Railway is timber. In my imagined history (see A short history of the Peckforton Light Railway), Lord Tollemache developed the forestry on his estate to establish a thriving industry in timber with a sawmill based beside Peckforton Station. Recent developments at the station (see How I extended Peckforton Station) and the acquisition of new rolling stock (see Progress Report 64) have focused attention on the timber traffic on the line.

I have been planning on making or adapting some rolling stock to carry pit props and/or shorter lengths of lumber for some time, so when the opportunity arose to buy some LGB fedbahn stake wagons, I didn't hesitate.

My first job was to dismantle them and give the main bodywork of each wagon a spray of Halford's grey primer from an aerosol rattle can.

However, very few of the wagons on my railway remain in pristine condition for long (see How I weather my wagons) and I like to give all my wagons removable loads (see Progress Report 39) to facilitate fairly realistic freight operations on the line (see Managing freight on the railway).

The first job was to weather the wagons. I followed my usual approach - daubing mucky dark brown and rust coloured acrylics ............

...... on to the wagon body, making sure it penetrated all the cracks and crevices, .........

 ........ and then wiping most of it off with a paper towel before it dries.

As you can see, this accentuates the planking and the indented wood grain.

The same process was repeated for the sole bars and underframes, .......

...... though a more rust-coloured mix of colours was used on the metalwork.

As I like my wagon loads to be removable (so wagons can run loaded in one direction and empty on the return trip), I cut pieces of mounting board the same size as the wagon floor.

 The position of the planking was marked on to the board .......

..... and then scribed with the blade of a screwdriver.

The false floors were then given a coat of grey acrylic to match the body of the wagons. Both sides of the card were painted to stop the board from warping as the paint dried and also to seal the board against damp.

Some research on the web (eg Mike Smith's marvellous resource on railway wagon loads), revealed that pit props were usually between 2' 6" and 11' in length and between 3" and 12" in diameter. With this in mind I scoured the woodland near my house for dead branches and twigs which were between 4mm and 16mm in diameter.

I found elderberry stems and the prunings from a lime tree to be the most suitable, but of course a lot depended on what happened to be available in my neck of the woods.

Wagon 1 - short pit prop load

I decided the first wagon would be loaded with the shortest 2'6" (ie 40mm) pit props. My trusty bench-hook was pressed into service and, with the help of a junior hacksaw, ......

...... a pile of  pit props steadily grew. I decided to use the elderberry stems as these seemed to represent lumber stripped of its bark.

A couple of lengths of stripwood were cut to the length of the wagon floor and stained (with watered down acrylics) to emphasise the grain. The first layer of pit props was laid on them, angled down to the middle using external grade PVA to hold them in place.

Once the first layer was complete, I placed them into the wagon and prepared for the next layer with more PVA.

And so the layers were built-up ........

..... until the wagon was fully laden.

Wagon 2 - Medium length pit props

For the second wagon, I cut a load of twigs 80mm in length (to represent 5' long pit props).

These were laid across the removable board ........

....... in layers ........

....... until this wagon was fully loaded.

 Wagons 3 & 4 - Long pit prop loads

For the remaining two wagons, the stakes were re-inserted and timbers 112mm (scale 7')  in length were laid lengthways on the boards.


 Conclusion

Once completed, the wagons were given a few test runs on the new timber yard sidings at Peckforton Station (see How I extended Peckforton Station).


The new wagons have now been added to my freight handling computer program (see My revised freight handling program). These wagons have provided an opportunity for a new freight movement to be added - pit props being shipped from the timber yard at Peckforton directly to the Copper Mine (with empties returning). So, do I add pit prop wagons to one of the regular trains of empty skips or do I run a special service up the Copper Mine Branch? Just the sort of question which an Operations Manager on a real light railway might have to address. The beauty of getting the computer program to generate the freight movements is that each operating session becomes unique.

The only difficulty I now face is that I am running out of storage space in the garage (see How I created storage roads in the garage)! But maybe there might be room for one or two more wagons??


Sunday, July 07, 2013

How I weather my wagons

I've been asked on a few occasions how I go about weathering my rolling stock. As always, I don't profess to be an expert in this field - there are some whose use of weathering powders and the like reaches the realms of artistry, but here's how I go about it. Each wagon takes about an hour to weather.

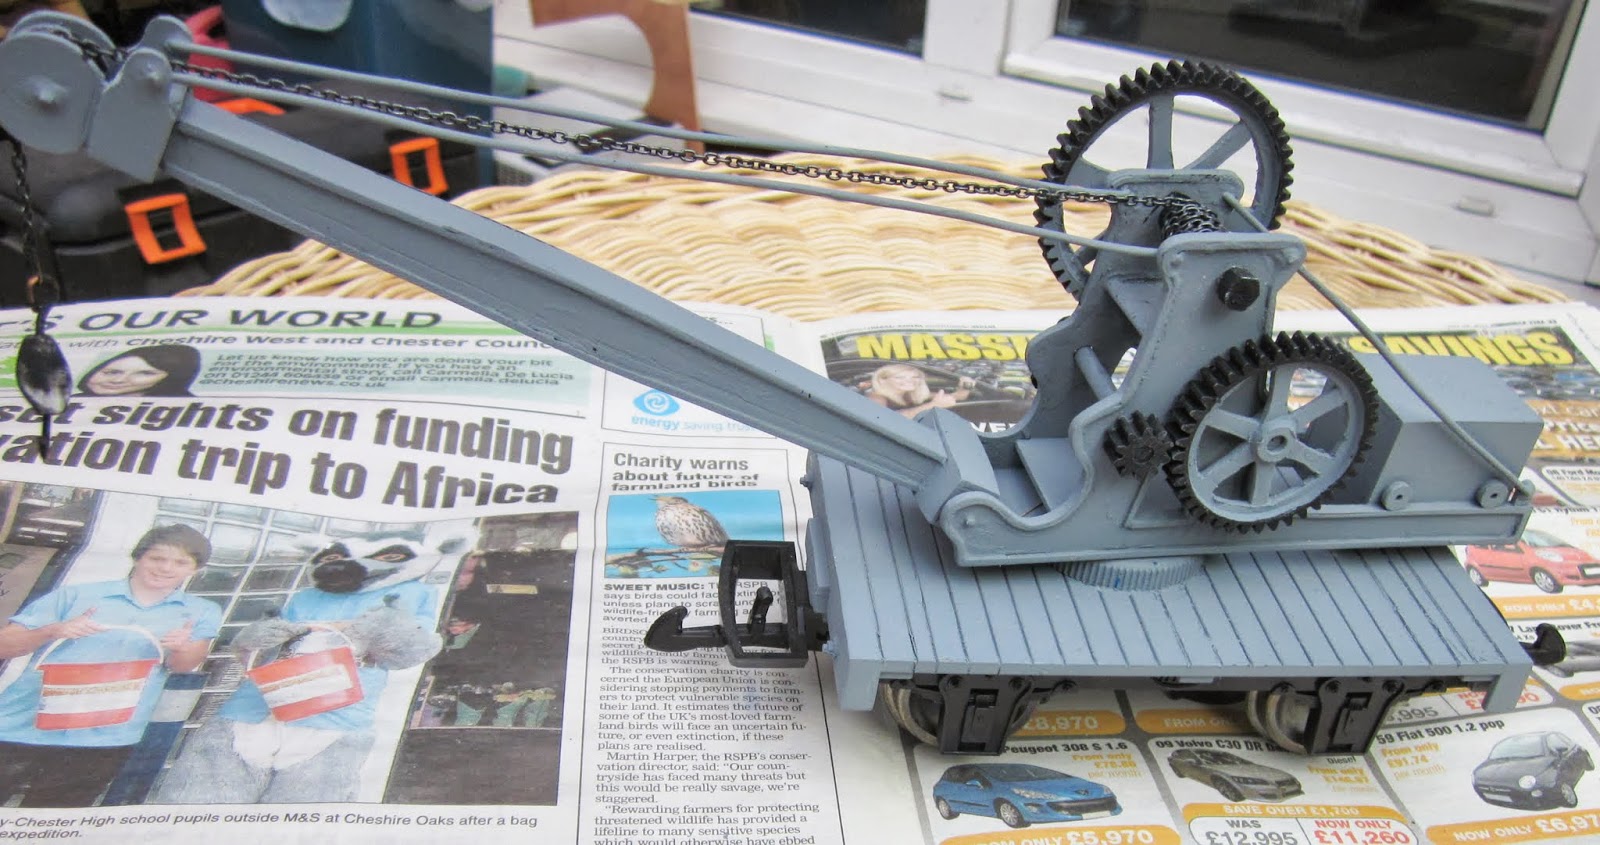
First, I take a wagon. This is the crane wagon which I converted from a Hartland Loco Works (HLW) flat car (see How I made a crane wagon).

In this case, I've partially dismantled the wagon for ease. My next job is to mix up some mucky acrylic paint - I tend to tone down black with some brown, otherwise it looks a bit too stark. This is mixed to a creamy consistency and smeared over the wagon in stages.

Before it has time to dry, I wipe it off with a paper towel. With planking such as this I wipe diagonally across the planking to ensure the paint stays in the cracks and crevices.

This action is repeated until the whole wagon is treated.

Where surfaces are flatter, I dab the wet paint with the paper towel, making sure the paint stays in the corners. This process is repeated several times until I feel content with the amount of paint which has been deposited. For lighter weathering, the paint is thinned with water.

A muddy red is mixed to represent rust, and this is daubed over the chassis.


This is then dabbed with a paper towel to leave clusters in the crevices.

The next stage is to dry-brush areas of rust or heavy wear. In the case of the crane which would have been largely constructed from steel, rust was dry-brushed on to some of the mechanism. Dry-brushing, by the way, involves depositing a small amount of paint on the tip of a brush, then wiping most of this off on a paper towel and lightly applying what is left of the paint on to the raised parts of the model.

The final process is to give a very light dusting of light brown or sand colour from an aerosol. I tend to invert the model and spray from a distance of at least two feet with a passing movement.