Sunday, May 13, 2018

Progress Report 72

Over the winter, understandably, most of the jobs I undertook on the railway were indoor ones but I have also managed a few outdoor jobs as and when weather permitted. Developments since the last Progress Report include:
  • finishing off the water mill and sluice gate, 
  • landscaping the area around the mill, including the provision of a mill stream, 
  • starting construction of the sawmill for Peckforton Station, 
  • ballasting the re-aligned track near Bulkeley, 
  • constructing two new small diesel locos from kits, 
  • experimenting with replacements for LGB couplings 
  • reprogramming the receiver in Loco No.1 to provide auto station stop, 
  • and making some videos for fellow modellers on how to reprogram and adjust the outputs from various Deltang receivers.

Lineside

Water Mill

The water mill is now more or less completed (see How I constructed the water mill). The sluice gate has been installed (see How I constructed a sluice gate) and the area landscaped to include a mill stream and the planting of a dwarf rhododendron which will eventually grow into a small tree.


Sawmill

The main structure for the sawmill is now finished using a range of materials; wood, aluminium foil, brass channel and copper tubing (see How I constructed the sawmill).

Work is progressing on the interior, constructed from various sized sections of strip wood and all manner of 'reclaimed' materials.

 I am in the process of bashing a plastic model of a beam engine into something vaguely resembling a mill engine which will eventually be connected to the machinery via a series of pulleys 3D printed for me by a fellow modeller.

Permanent Way

Ballasting

After eliminating a hump in the track on the approach to Bulkeley station, adjacent to the junction for the copper mine branch (see Progress Report 71), it was some time before I got around to ballasting it. I used my now preferred method, three parts horticultural grit to one part cement - brushed into place while dry and then soaked with a watering-can rose.


Rolling stock

I realised that all the accounts of battery and radio control installations on my blog were quite complex as they also included wiring up lights and/or soundcards. I therefore decided to construct a couple of basic diesel loco kits and keep the radio control installations as simple as possible.

HGLW diesel loco

 I opted for HGLW's most basic loco body (LB1) and their Deluxe 4wd chassis - for a total of around £40.00. The kit was very easy to construct and the battery and radio control installation very straightforward (see How I constructed a HGLW diesel loco kit).


 IP Engineering Albert

The IP Engineering basic diesel loco kit was slightly more expensive at £45.00, though I needed to spend another £8.00 for Delrin chain and sprockets to provide 4 wheel drive. Without it, the loco has quite limited hauling power. The kit was quite straightforward to construct and battery and radio control installation relatively easy. (see How I constructed an IP Engineering Albert loco - pending)


 Couplings

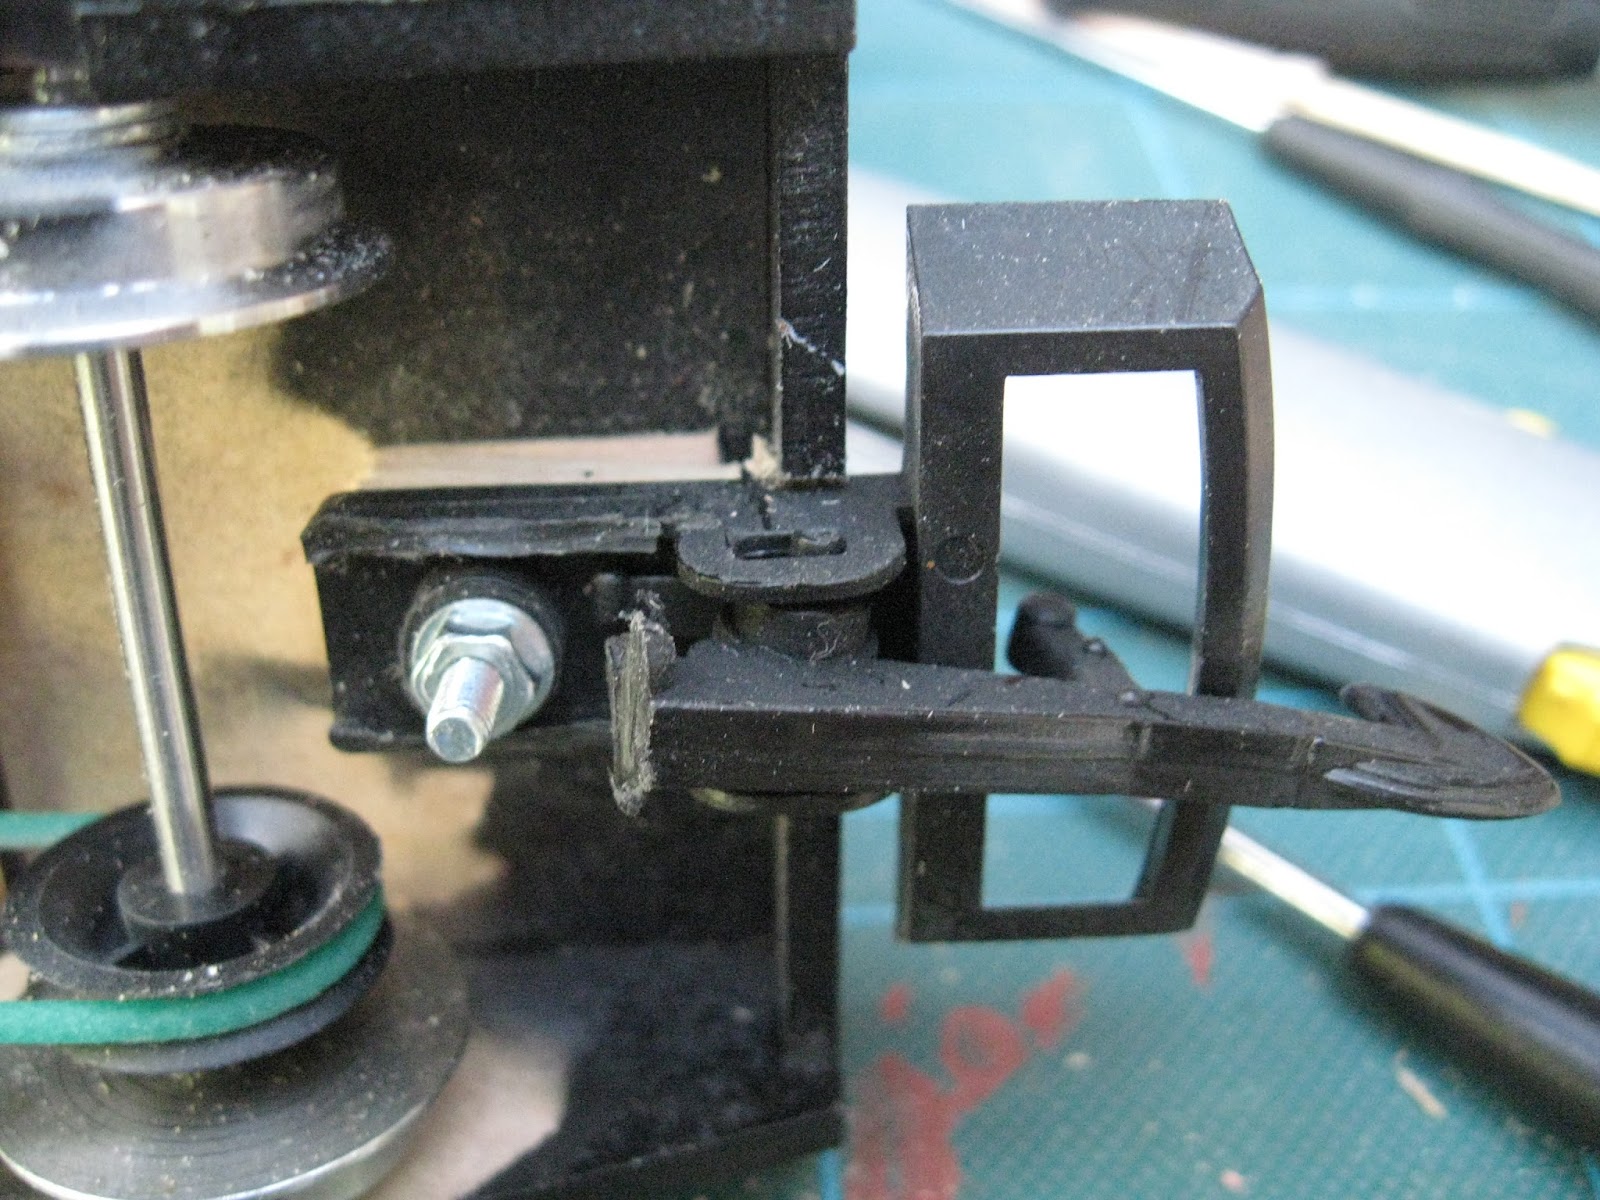
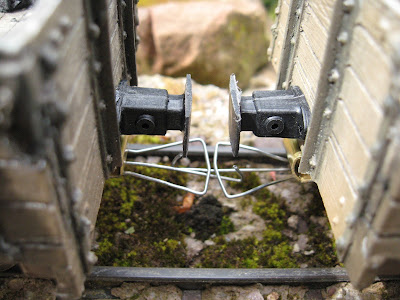
 I have retained LGB style couplings on all my stock because I really enjoy shunting and so I need couplings which are easy to couple and uncouple, are reliable and, most importantly, are cheap. However, LGB couplings are unrealistic and obtrusive. For a long time I have been exploring alternatives but failed to find anything which met all my criteria. 

However I have just reached the conclusion that, rather than looking for alternatives, why not use the LGB coupling principle but find a way of making them less obtrusive. After a bit of experimentation, I have made some couplings from a piece of brass and some wire which seem to fit the bill.

At present, these are just prototypes, but they do seem to work OK and so I am planning to install them on several items of stock so I can give them a thorough testing. The advantage is that they are compatible with LGB style couplings and so I should be able to convert the stock in batches rather than having to refit all 75 items of stock at the same time.

Control

Peckett Loco No.1 has been a stalwart of the line since the early days of its Anglicisation (see How I constructed a Peckett loco from a GRS kit). I thought it would be interesting to re-program a couple of locos to stop automatically at each station as they trundled around on days when I had visitors or when I was gardening. Loco No. 1 has now been reprogrammed (see How I reprogrammed a loco for auto station stop - pending).

Various Deltang video guides

Programming an Rx102 for latching on/off outputs

Reprogramming an Rx102 to provide triggers for sound cards

Adjusting servo throws from an Rx102


Wednesday, May 02, 2018

How I detailed my HGLW diesel loco

Having recently built a Houstoun Gate Loco Works (HGLW) kit and got it running with radio control How I constructed a HGLW kit), I then set about detailing it.
in a day (see

Contents

Introduction

As you can see, although it was running by the end of the day, it was not exactly looking pretty.

I cast about the net for some inspiration and, although not a direct comparison, the Amberley Museum's Fowler loco, Peldon, looked as if she was close enough to offer me some ideas for detailing.
Source: http://www.amberleynarrowgauge.co.uk/peldon.htm

Couplings

For the loco to become a useful member of the Peckforton Light Railway's roster, she would need to be equipped with LGB style couplings. I know they are not the most realistic type of coupling, but I do a lot of shunting operations on my railway and I have not yet discovered a suitable replacement for them which is as reliable and cheap.

To accommodate the couplings, the buffer beams on the chassis needed to be slotted to approximately the right height. This was achieved with a razor raw and Stanley knife.

Next, the mounting blocks for the couplings needed to be fashioned. I discovered that a piece of 25mm thick stripwood, plus to pieces of 3mm thick plywood would allow the couplings to be mounted at the right height. These were drilled with a 3mm hole for a bolt.

A 3mm hole was also drilled in the chassis plate for the bolt .....

..... and passed through the layers of mounting block  ........

...... to allow the coupling to be bolted into place. I discovered that Hartland Loco Works (HLW) couplings were more suitable as the springs on LGB couplings fouled the wheels.

The couplings were mounted to stand out by 4mm from the chassis buffer beams to give room for the buffer beams on the loco body.

The buffer beams on the body were slotted to take the couplings, .......

......  so the body could be slid into place over them.

Finally, Binnie Engineering medium sized Carmarthen couplings were glued above the LGB couplings as dummies to disguise the presence of the LGB couplings and to give the buffer beams a more realistic appearance. Cambrian Models plastic rivet heads were also glued on to the buffer beams for cosmetic effect.


Radiator

The kit came with some aluminium mesh for the radiator grille but scrutiny of various photos of 'Peldon' revealed what looks like black vertical tubes with cooling fins behind the grille. As it would be hidden behind the grille, I decided that a simple representation of this would be sufficient.

Six 30mm lengths of 4mm diameter Plastruct tube were cut as was a 40mm x 40mm piece of 1.5mm thick black plasticard. Lines of plastic solvent adhesive were placed on the plasticard sheet ......

 .... and the tubes fixed to them.

The 'radiator' was then given a couple of coats of Halford's grey primer, followed by a couple of coats of Halford's satin black.

After the loco body had been painted (see below), the radiator was glued behind its opening at the front of the bonnet (with superglue)........

...... and the mesh trimmed to 30mm x 30mm to fit. This was sprayed with grey primer and a couple of coats of Halford's Rover Brooklands Green before being glued into the aperture.

Exhaust

The exhaust pipe and silencer on Peldon is quite prominently positioned on top of the bonnet. To represent this, two short lengths of 3mm copper tube were cut (one 60mm long and the other 20mm long). In addition, a 40mm length of 6mm Plastruct tube and a 38mm piece of 4mm plastic rod was cut. I piece of flattened copper wire was wrapped around the top of the longer piece of copper tube and soldered into place. The ends of the copper tubes were bent through 90 degrees (after a piece of brass rod had been inserted to stop the tubes from kinking).

3mm holes were drilled into the ends of the 4mm plastic rod and the copper tubes inserted and glued into place with superglue.

 The exhaust was given a couple of coats of grey primer followed by a couple of coats of satin black. ......

..... before being weathered with matt acrylics and glued in place on the loco bonnet.

Painting

I had originally intended to paint the loco maroon (hence the original primer coat of red oxide), but after giving her an initial coat, I changed my mind. The body was rubbed down and given a couple of coats of Halford's grey primer (after the apertures had been masked).

After filling, rubbing down, another coat of primer, more filling and rubbing down, and another coat of primer, she was given a couple of coats of Halford's Rover Brooklands Green.

The buffer beams were given a couple of coats of Plasti-kote Insignia Red.

The loco was then lightly rubbed down and given a couple of coats of Halford's clear varnish and the roof given a coat of matt black acrylic paint.


Grab rails

The grab-rails are essentially two 35mm long pieces of 2mm thick brass rod, bent at each end.

2mm holes were drilled in the cab sides to take the rails ........

..... and 2mm brass washers were threaded on .......

...... before being glued into place with superglue.


Conclusion

I am pleased I decided to paint her the same colour as the rest of my loco stud - I don't think I was influenced by Peldon's colour scheme, but who knows.

I think the details have complemented the model well - and given her a sense of identity. I might still add some more details, particularly inside the cab which is, at present, a bit stark. The driver (Jon's People) needs some controls and gauges, a brake standard and maybe a seat. There also needs to be a bit of clutter, such as an oil can, toolbox and starting handle.

I was delighted with the kit which was extremely easy to build and provided a good canvas on which to express some individuality. I might add some lead to improve adhesion but I have given her a test run and was pleased to see she sould pull six wagons with ease. Given that she will be assigned to shunting duties at the sawmill, it is unlikely she will be required to haul anything greater. Once the weather improves, I will have a proper operating session and shoot some video of her in action.

PS - I have now also added an Acme multi-cylinder sound card - see How I added a sound card to my HGLW diesel loco