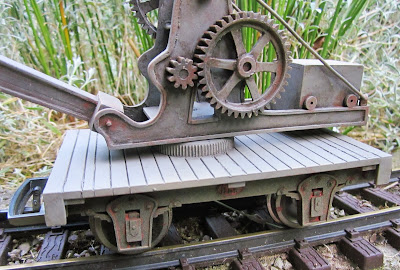
 I've been asked on a few occasions how I go about weathering my rolling stock. As always, I don't profess to be an expert in this field - there are some whose use of weathering powders and the like reaches the realms of artistry, but here's how I go about it. Each wagon takes about an hour to weather.
First, I take a wagon. This is the crane wagon which I converted from a Hartland Loco Works (HLW) flat car (see How I made a crane wagon).
In this case, I've partially dismantled the wagon for ease. My next job is to mix up some mucky acrylic paint - I tend to tone down black with some brown, otherwise it looks a bit too stark. This is mixed to a creamy consistency and smeared over the wagon in stages.
Before it has time to dry, I wipe it off with a paper towel. With planking such as this I wipe diagonally across the planking to ensure the paint stays in the cracks and crevices.
This action is repeated until the whole wagon is treated.
Where surfaces are flatter, I dab the wet paint with the paper towel, making sure the paint stays in the corners. This process is repeated several times until I feel content with the amount of paint which has been deposited. For lighter weathering, the paint is thinned with water.
A muddy red is mixed to represent rust, and this is daubed over the chassis.
This is then dabbed with a paper towel to leave clusters in the crevices.
The next stage is to dry-brush areas of rust or heavy wear. In the case of the crane which would have been largely constructed from steel, rust was dry-brushed on to some of the mechanism. Dry-brushing, by the way, involves depositing a small amount of paint on the tip of a brush, then wiping most of this off on a paper towel and lightly applying what is left of the paint on to the raised parts of the model.
The final process is to give a very light dusting of light brown or sand colour from an aerosol. I tend to invert the model and spray from a distance of at least two feet with a passing movement.


No comments:
Post a Comment