32mm gauge comes to Peckforton!
For various reasons, I am in the process of adding a 32mm gauge tramway to the Peckforton Light Railway - to tranship ore from the copper mine workings to the crushing shed and the loading hoppers (see Progress Report 59).

When I constructed the half-relief mine buildings for the Copper Mine (see Progress Report 45 and How I constructed the mine buildings - pending), I installed a non-operational Gn15 feeder railway to supposedly transfer ore from the mine workings to the loading chutes and crusher.

However, after a chance purchase of some 32mm gauge track at the Llanfair Garden Railway Show (which coincides each year with the Welshpool & Llanfair Steam Gala) I've now changed my plans. The feeder is being converted into a 2' gauge operational mine tramway.
A couple of small diesel locomotives have been acquired (see How I converted a small diesel loco to radio control and How I constructed an IP Engineering plate frame Simplex) and I am in the process of constructing some rolling stock (eg see How I assembled a barrel wagon).

Recently, I modified the trackwork for the sidings at the Copper Mine (see Progress Report 58). This has meant that the sidings are now separate from the main line.

While doing this work, I decided to make more of the 32mm feeder line. Instead of the 32mm track disappearing behind the mine buildings as the Gn15 track did, I would send it towards the front, to run for a while parallel with the main line. However, this would require the construction of an embankment and a couple of bridges.

Initially, a smaller wall was also constructed to support the other end of the bridge, but this was later enlarged when the track layout at the mine was changed (see Progress Report 58 and above).
Following the lead given by the sadly missed Peter Jones in his excellent Making Model Buildings for Garden Railways, I decided to make the stonework cladding from balsa wood. Rather than the random stonework used on Peter's buildings, I wanted a dressed stone look and so cut some 3/16" thick balsa wood into 10mm wide strips

Each strip was then bevelled along the sides using a craft knife.

The end was then bevelled with a triangular needle file which was then used to file notches across the length of the strip at roughly 2cm intervals.

I wanted the stone blocks to be irregular and so their lengths varied from 5mm to 25mm.

I could have varied the widths as well, but decided to keep things simple. The blocks were then separated from the strip with a razor saw.

Using exterior PVA, I then started laying my courses of stone on the wooden embankment foundation, starting with the topmost course and working my way down the wall.

I left a gap or around 2mm between the courses and between each adjacent block. This is larger than would have been on real wall, but I wanted to make sure there was sufficient space for the grouting to adhere (see below). Starting at the top of the wall also meant that I would get a full width course at the top and if necessary the lowermost course could be narrower. I figured this would look more prototypical as the lower course would be embedded in the ground.

Where the blocks reached the corner of the wall, I made them protrude slightly and bevelled them to try to make a sharp edge.

The courses were then continued along the next edge of the embankment.


On the wing of the embankment wall which would support the bridge taking the 32mm line over the mine sidings, I cut and glued a 1/4" thick strip.


On this edge, rather than bevelling, I butted the edges. Less tidy, but a lot easier to achieve.

Once all the stonework was completed (about three days' work), I let the glue dry off ready for the grouting process.
I used flexible interior/exterior 'wide' grout which I happened to have left over after laying some floor tiles in the kitchen. This was mixed up to a consistency like single cream. This is runnier than I used on the floor tiles as I reckoned the balsa wood would be more absorbent.

This mix was spooned on to one embankment wall (while it was lying flat) ......

..... and then spread out using a tile squeegee. I made sure, as much as I was able, that the grout penetrated into all the crevices by spreading it in several directions across the wall.

Once the grout was in place, it was left to dry.

About an hour to an hour and a half later, while the grout was still in its 'green' state, I used a plastic tile grouting tool to recess the grout in the gaps between the blocks.

I then turned the wall over and grouted the opposite wall, using the same approach.
I left the embankment wall as couple of days to ensure the grout had fully hardened.


I then, 'textured' the walls, by prodding the blocks randomly with the point of a small Phillips screwdriver.
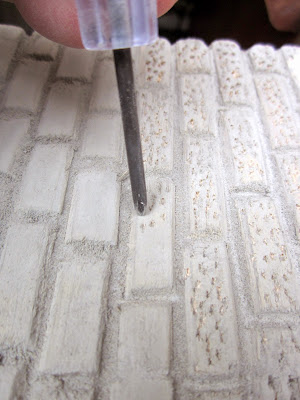
This proved to be very time-consuming, but I felt the effort was worthwhile.

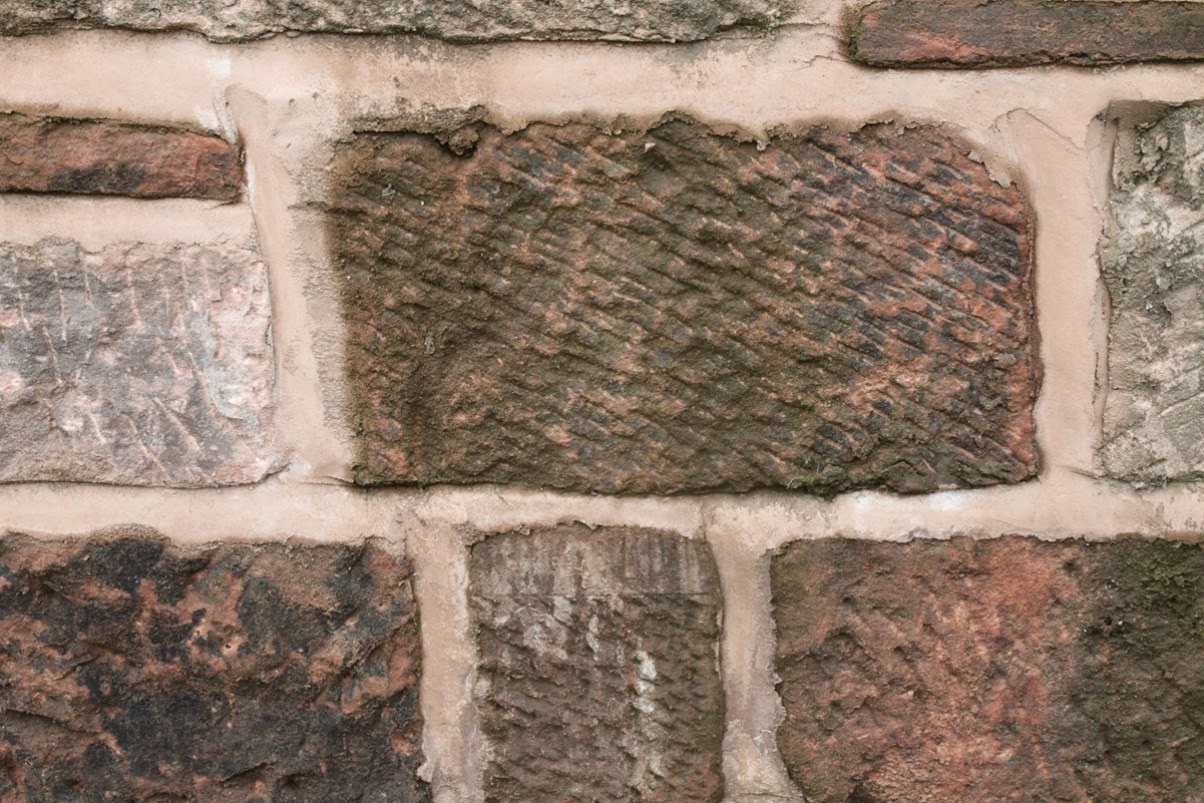
I felt the stonework looked a lot more like the dressed sandstone seen on several buildings and structures in my locality.


I then applied Ronseal Wet Rot Hardener with a paintbrush to walls. This resinous liquid soaks into the balsa and the grout and, once dry turns them into something resembling hard plastic.

The walls were soaked in the liquid with a broad brush ........

.... and left (in a well ventilated room) for the stipulated six hours for the hardener to dry.

I then dry-brushed a base-coat of reddy-brown acrylic paint over all the walls.
For the uninitiated, dry-brushing is a technique much favoured by the war-gaming fraternity. The brush is dipped into the paint in the normal way, and then most of it is wiped off again - so the brush is almost dry (hence the name). I used a fairly broad brush (bought from a craft shop for applying paste).

The brush was then lightly wiped across the surface of the wall. I tend to do this diagonally to avoid running directly along the line of the the mortar courses.

And then across the other diagonal.
Applying several light coats .......

Until the wall was covered uniformly.

But, of course, stone walls are seldom, if ever, uniform in colour ........

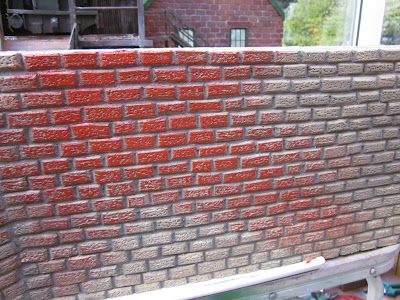
........ and so, once dry, individual stones were picked-out in varying shades and tints of the red sandstone colour (and some yellow sandstone which in this area seems to end up looking grey) with a small paintbrush.

I figured that after a while in the great outdoors, the colours would fade and weather naturally and so gave the walls only a light weathering by dry-brushing some lighter tints and some darker shades over the surfaces of the blocks.

I then gave the embankment a couple of light coats of matt varnish to seal them.

The finished embankments were then screwed into place on the mine sidings board .....

A layer of roofing felt was glued on top and the track was then screwed in place.

The track was then tested. At present, there are no bridges between the two stone embankments, but this will be remedied soon (see How I constructed a small trestle and a plate girder bridge - pending)

The mine tramway and the sidings have yet to be properly ballasted and weathered using the same methods I have used for the mainline trackwork (see How I ballasted my track ) and at my stations (see How I embedded my tracks in concrete).
As ever, there are always more jobs to do on a garden railway!

For various reasons, I am in the process of adding a 32mm gauge tramway to the Peckforton Light Railway - to tranship ore from the copper mine workings to the crushing shed and the loading hoppers (see Progress Report 59).
When I constructed the half-relief mine buildings for the Copper Mine (see Progress Report 45 and How I constructed the mine buildings - pending), I installed a non-operational Gn15 feeder railway to supposedly transfer ore from the mine workings to the loading chutes and crusher.
However, after a chance purchase of some 32mm gauge track at the Llanfair Garden Railway Show (which coincides each year with the Welshpool & Llanfair Steam Gala) I've now changed my plans. The feeder is being converted into a 2' gauge operational mine tramway.
A couple of small diesel locomotives have been acquired (see How I converted a small diesel loco to radio control and How I constructed an IP Engineering plate frame Simplex) and I am in the process of constructing some rolling stock (eg see How I assembled a barrel wagon).
Recently, I modified the trackwork for the sidings at the Copper Mine (see Progress Report 58). This has meant that the sidings are now separate from the main line.
While doing this work, I decided to make more of the 32mm feeder line. Instead of the 32mm track disappearing behind the mine buildings as the Gn15 track did, I would send it towards the front, to run for a while parallel with the main line. However, this would require the construction of an embankment and a couple of bridges.
The embankment
The first task was to decide where the railway would run, and then construct the foundations for the embankments. These were made from offcuts of old treated 1" thick fencing panels. The main embankment was 3½" wide and 8" high, with a kink at the end to lead the track over the sidings towards the crusher shed.Initially, a smaller wall was also constructed to support the other end of the bridge, but this was later enlarged when the track layout at the mine was changed (see Progress Report 58 and above).
Following the lead given by the sadly missed Peter Jones in his excellent Making Model Buildings for Garden Railways, I decided to make the stonework cladding from balsa wood. Rather than the random stonework used on Peter's buildings, I wanted a dressed stone look and so cut some 3/16" thick balsa wood into 10mm wide strips
Each strip was then bevelled along the sides using a craft knife.
The end was then bevelled with a triangular needle file which was then used to file notches across the length of the strip at roughly 2cm intervals.
I wanted the stone blocks to be irregular and so their lengths varied from 5mm to 25mm.
I could have varied the widths as well, but decided to keep things simple. The blocks were then separated from the strip with a razor saw.
Using exterior PVA, I then started laying my courses of stone on the wooden embankment foundation, starting with the topmost course and working my way down the wall.
I left a gap or around 2mm between the courses and between each adjacent block. This is larger than would have been on real wall, but I wanted to make sure there was sufficient space for the grouting to adhere (see below). Starting at the top of the wall also meant that I would get a full width course at the top and if necessary the lowermost course could be narrower. I figured this would look more prototypical as the lower course would be embedded in the ground.
Where the blocks reached the corner of the wall, I made them protrude slightly and bevelled them to try to make a sharp edge.
The courses were then continued along the next edge of the embankment.
On the wing of the embankment wall which would support the bridge taking the 32mm line over the mine sidings, I cut and glued a 1/4" thick strip.
On this edge, rather than bevelling, I butted the edges. Less tidy, but a lot easier to achieve.
I used flexible interior/exterior 'wide' grout which I happened to have left over after laying some floor tiles in the kitchen. This was mixed up to a consistency like single cream. This is runnier than I used on the floor tiles as I reckoned the balsa wood would be more absorbent.

This mix was spooned on to one embankment wall (while it was lying flat) ......

..... and then spread out using a tile squeegee. I made sure, as much as I was able, that the grout penetrated into all the crevices by spreading it in several directions across the wall.

Once the grout was in place, it was left to dry.

About an hour to an hour and a half later, while the grout was still in its 'green' state, I used a plastic tile grouting tool to recess the grout in the gaps between the blocks.

I then turned the wall over and grouted the opposite wall, using the same approach.
I left the embankment wall as couple of days to ensure the grout had fully hardened.


I then, 'textured' the walls, by prodding the blocks randomly with the point of a small Phillips screwdriver.

This proved to be very time-consuming, but I felt the effort was worthwhile.

I felt the stonework looked a lot more like the dressed sandstone seen on several buildings and structures in my locality.

I then applied Ronseal Wet Rot Hardener with a paintbrush to walls. This resinous liquid soaks into the balsa and the grout and, once dry turns them into something resembling hard plastic.

The walls were soaked in the liquid with a broad brush ........

.... and left (in a well ventilated room) for the stipulated six hours for the hardener to dry.

I then dry-brushed a base-coat of reddy-brown acrylic paint over all the walls.
For the uninitiated, dry-brushing is a technique much favoured by the war-gaming fraternity. The brush is dipped into the paint in the normal way, and then most of it is wiped off again - so the brush is almost dry (hence the name). I used a fairly broad brush (bought from a craft shop for applying paste).


And then across the other diagonal.

Applying several light coats .......

Until the wall was covered uniformly.

But, of course, stone walls are seldom, if ever, uniform in colour ........

........ and so, once dry, individual stones were picked-out in varying shades and tints of the red sandstone colour (and some yellow sandstone which in this area seems to end up looking grey) with a small paintbrush.

I figured that after a while in the great outdoors, the colours would fade and weather naturally and so gave the walls only a light weathering by dry-brushing some lighter tints and some darker shades over the surfaces of the blocks.


A layer of roofing felt was glued on top and the track was then screwed in place.

The track was then tested. At present, there are no bridges between the two stone embankments, but this will be remedied soon (see How I constructed a small trestle and a plate girder bridge - pending)

The mine tramway and the sidings have yet to be properly ballasted and weathered using the same methods I have used for the mainline trackwork (see How I ballasted my track ) and at my stations (see How I embedded my tracks in concrete).
As ever, there are always more jobs to do on a garden railway!
No comments:
Post a Comment