I decided from the outset that all rail joints would be bonded. Rather than relying on the fishplates / rail-joiners to make electrical contact, I opted to solder links across the rail joints. This would not have been possible without the 75 watt soldering iron which I purchased some years ago.
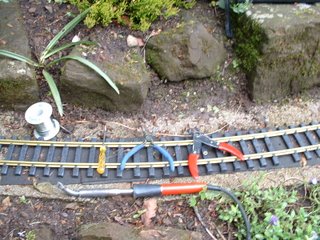
Firstly, the tools needed for the job are gathered - soldering iron (75 watt), multi-core solder, pointed nose pliers, wire cutter, small screwdriver, 1mm copper wire.
I then, clean the area to be soldered by filing or scraping down to bare metal:
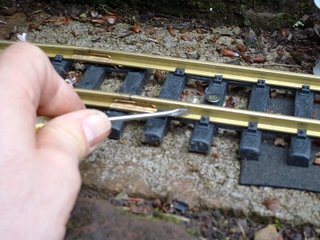
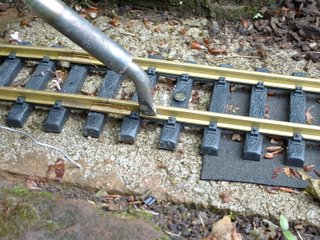
Next, heat is applied to the rail and the solder is melted on to soldering iron which, when it is hot enough, runs on to the rail:
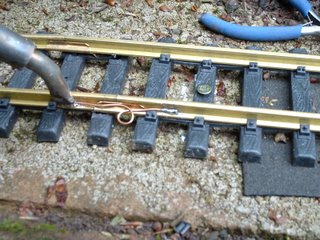
The copper wire is cut to length, with a loop included for expansion. The ends of the wire are tinned with solder:
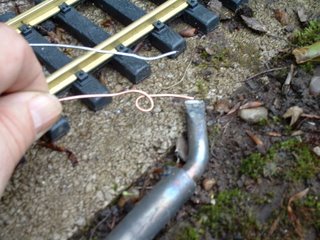
Finally, the wire is soldered to the rail, by applying heat from the iron until the solder on the wire and the rail melt together.
The composition of the brass for Aristocraft rail seems different to the LGB rail. Aristocraft rail does not become tarnished so readily but is more difficult to solder; it seems to dissipate the heat more quickly and hence the solder does not bond quite so well.
Firstly, the tools needed for the job are gathered - soldering iron (75 watt), multi-core solder, pointed nose pliers, wire cutter, small screwdriver, 1mm copper wire.

I then, clean the area to be soldered by filing or scraping down to bare metal:

Next, heat is applied to the rail and the solder is melted on to soldering iron which, when it is hot enough, runs on to the rail:

The copper wire is cut to length, with a loop included for expansion. The ends of the wire are tinned with solder:

Finally, the wire is soldered to the rail, by applying heat from the iron until the solder on the wire and the rail melt together.

The composition of the brass for Aristocraft rail seems different to the LGB rail. Aristocraft rail does not become tarnished so readily but is more difficult to solder; it seems to dissipate the heat more quickly and hence the solder does not bond quite so well.
2 comments:
Why has not wanted to use fish plates with screws as an alternative?
http://masquetrenes.wordpress.com/2013/10/16/alternativa-a-la-soldadura-de-vias-de-escala-g/
Welds are just rusting ...
Greetings.
The first track I laid was Tenmille and then LGB. It wasn't until I laid some Aristocraft that I found out about screwed fishplates. The soldered joints have been there now for seven years and I have only had to redo about a dozen. I think the work involved is about the same and the reliability is probably about the same as well.
Post a Comment