May Bank Holiday provided me with an opportunity to move much further forward with tracklaying which is now almost complete. The trip to Bay Models in Carnforth to collect 20 x 3m lengths of LGB rail and two sleeper packs was 'interesting'. My wife found the house in which her great grand uncle resided (in Allithwaite) and then we motored down a rain-lashed M6 with around 1.5m of rail in its cardboard tube poking out through the rear window of my Mazda MX5, my wife clutching on to it. Each bump caused an interesting snaking motion which, like a Mexican wave translated itself back down the tube!
Apart from one 3m length, all that rail is now laid.
A tour of the line
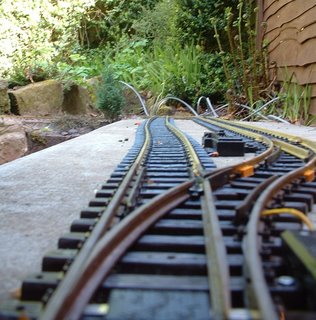
Emerging from the tunnel to the storage sidings we enter the main station. The run-round loop is completed (though not yet wired) and the siding to the right it to be laid. The base for the station is two 3'x2' paving slabs which so far have blunted three masonry bits. I will bide my time (and buy more masonry bits) before laying the final siding.
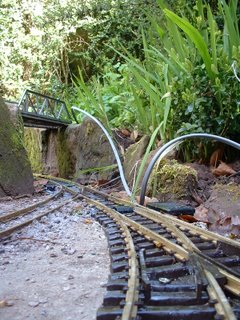
The station throat. All points are laid, but not yet wired up, hence the cables. Those screws need a dab of brown paint!
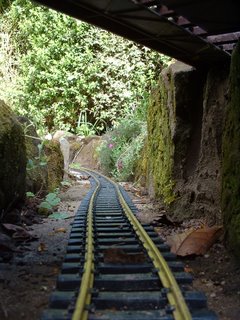
Through the underbridge which carries the upper line forming the figure of 8. This track is Aristocraft which has black sleepers and paler brass - but is a joy to lay as it is more flexible and resists springing back - but is apt to kink if you are not careful.

Rising up the incline (roughly 1 in 40) .......

...... and around the rocky outcrop........
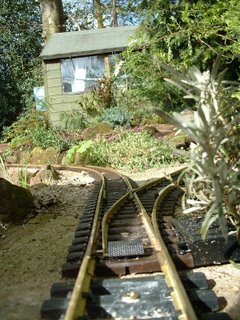
..... to the cross-over. The line to the right is used to reverse trains if needs-be.
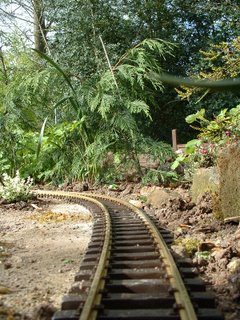
The line now curves to the left into the through station (yet to be named).
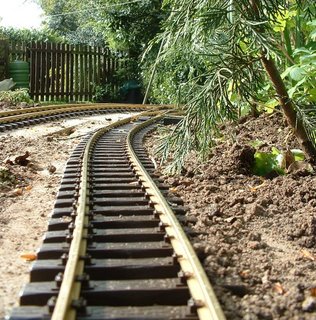
To the left is the siding and ahead is the cross-over for the passing-loop. You''ll notice a slight bow in the siding. Frustratingly the blocks have settled and there is a dip right under the pointwork which I now realise will have to be relaid. Past experience with OO gauge modelling has taught me that unless pointwork is perfectly level trouble will ensue!
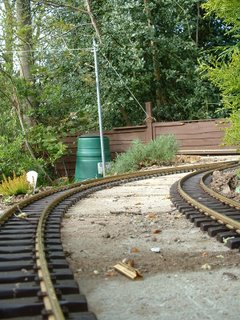
Through the station - there will eventually be an island platform to the right. We're on LGB track here which is very robust but the 3m lengths can be somewhat unwieldy.
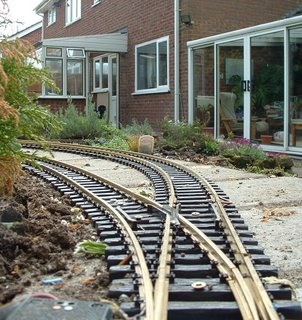
Looking back into the station ........
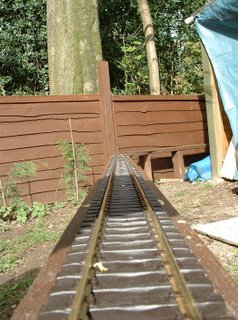
..... we then cross the long bridge. Incidentally, you'll notice the sun is shining - so it is now about 5 degrees warmer than when the track was laid - and already I am noticing the effects of temperature on rail expansion..............
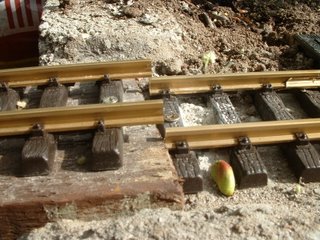
The further rail is approximately 2mm longer now than when it was laid two days ago! A hacksaw job - and I will have to check all my expansion gaps again!
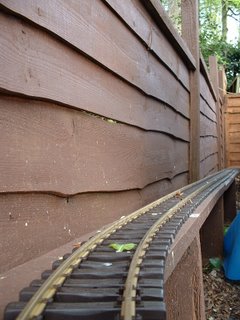
We now enter the non-scenic section behind the sheds. Interestingly, this seems to be the part which most interests visitors!

Back on to concrete blocks here.
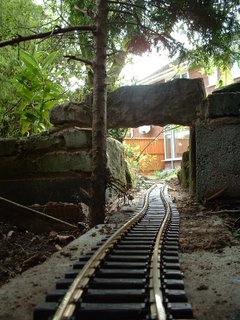
Through the conifers and back out into the garden. This section was meant to be 'hidden', but now the track has been laid I quite like it. I may remodel the approach so the trains can be seen snaking through the trees.
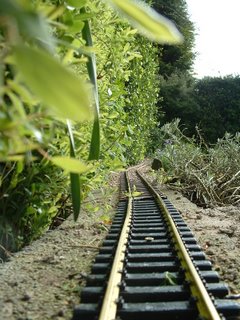
After traversing the cross-over, a gentle climb of 1:70 towards the overbridge crossing the lower line which is now on our right.
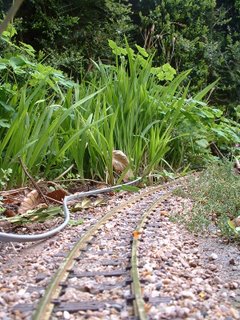
This is Tenmille track - which has a slightly narrower profile - more like bullhead than flat-bottom rail. It has been ballasted with 'Alpine pink' gravel held in place with exterior PVA adhesive. The wire to the left will soon be buried. It leads to the furthermost point for the through station.
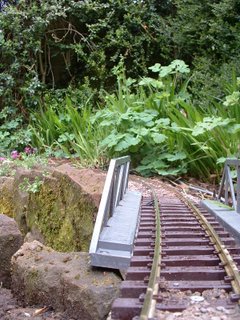
Looking back across the overbridge which crosses the lower line at the centre of the figure of 8. As the lines cross at an angle I needed a skewed bridge. The LGB girder bridge was sliced in half and skewed. I looks slightly drunken on the left - has yet to be fixed into place and cemented in.
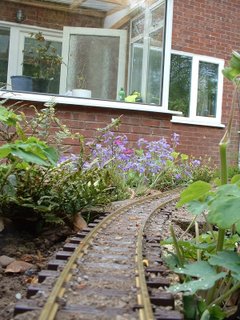
The line now curves to the right. The terminus station is below to the left.
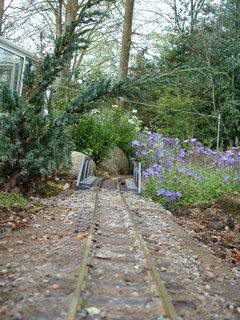
The line now descends (1:40). Ahead is the bridge over the stream which will later be extended into the area on the right. The ballasting here is a mix of gravel:sand:cement in the proportion 2:1:1. Brushed on dry and then watered. Much easier to lay than the PVA method and I must admit I am warming to its appearance. It doesn't look as artificial as the neat gravel and PVA method!
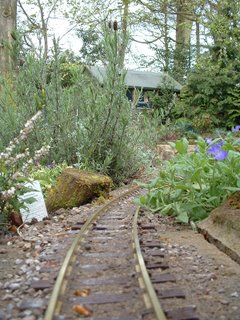
A curve to the right .........
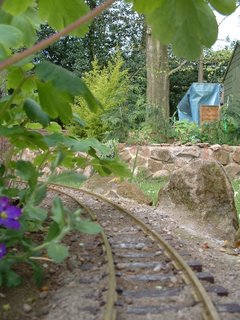
....before curving back to the left in a large circle. The through-station is across the lawn dead ahead at this point.
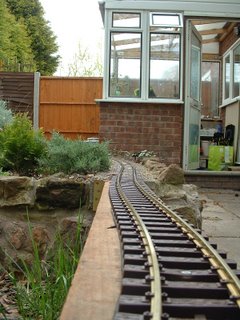
Across the patio bridge. To the left will be a small patio - eventually. Viewing the line from this level, I am alarmed to see how uneven the track seems to be. Some relaying might be required here otherwise there might be some interesting accidents as trains traverse the bridge!
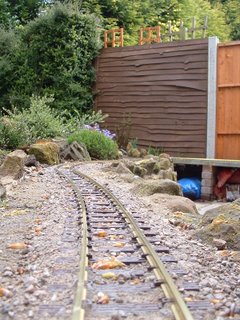
The line now meanders back towards the terminus station which can be seen ahead. I like this section of the line. I'm hoping that, once the vegetation becomes more established and the stream (to the left) flows through, on a summer's evening I can sit on the patio with a cool beer ......
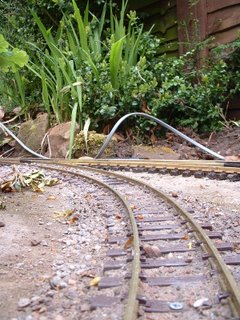
We rejoin the railway at the terminus station to our right.
A test train has been run and already I have identified several 'snags' which need ironing out - mostly caused by the blocks settling. But there's plenty of time for that.............................
Apart from one 3m length, all that rail is now laid.
A tour of the line

Emerging from the tunnel to the storage sidings we enter the main station. The run-round loop is completed (though not yet wired) and the siding to the right it to be laid. The base for the station is two 3'x2' paving slabs which so far have blunted three masonry bits. I will bide my time (and buy more masonry bits) before laying the final siding.

The station throat. All points are laid, but not yet wired up, hence the cables. Those screws need a dab of brown paint!

Through the underbridge which carries the upper line forming the figure of 8. This track is Aristocraft which has black sleepers and paler brass - but is a joy to lay as it is more flexible and resists springing back - but is apt to kink if you are not careful.

Rising up the incline (roughly 1 in 40) .......

...... and around the rocky outcrop........

..... to the cross-over. The line to the right is used to reverse trains if needs-be.

The line now curves to the left into the through station (yet to be named).

To the left is the siding and ahead is the cross-over for the passing-loop. You''ll notice a slight bow in the siding. Frustratingly the blocks have settled and there is a dip right under the pointwork which I now realise will have to be relaid. Past experience with OO gauge modelling has taught me that unless pointwork is perfectly level trouble will ensue!

Through the station - there will eventually be an island platform to the right. We're on LGB track here which is very robust but the 3m lengths can be somewhat unwieldy.

Looking back into the station ........

..... we then cross the long bridge. Incidentally, you'll notice the sun is shining - so it is now about 5 degrees warmer than when the track was laid - and already I am noticing the effects of temperature on rail expansion..............

The further rail is approximately 2mm longer now than when it was laid two days ago! A hacksaw job - and I will have to check all my expansion gaps again!

We now enter the non-scenic section behind the sheds. Interestingly, this seems to be the part which most interests visitors!

Back on to concrete blocks here.

Through the conifers and back out into the garden. This section was meant to be 'hidden', but now the track has been laid I quite like it. I may remodel the approach so the trains can be seen snaking through the trees.

After traversing the cross-over, a gentle climb of 1:70 towards the overbridge crossing the lower line which is now on our right.

This is Tenmille track - which has a slightly narrower profile - more like bullhead than flat-bottom rail. It has been ballasted with 'Alpine pink' gravel held in place with exterior PVA adhesive. The wire to the left will soon be buried. It leads to the furthermost point for the through station.

Looking back across the overbridge which crosses the lower line at the centre of the figure of 8. As the lines cross at an angle I needed a skewed bridge. The LGB girder bridge was sliced in half and skewed. I looks slightly drunken on the left - has yet to be fixed into place and cemented in.

The line now curves to the right. The terminus station is below to the left.

The line now descends (1:40). Ahead is the bridge over the stream which will later be extended into the area on the right. The ballasting here is a mix of gravel:sand:cement in the proportion 2:1:1. Brushed on dry and then watered. Much easier to lay than the PVA method and I must admit I am warming to its appearance. It doesn't look as artificial as the neat gravel and PVA method!

A curve to the right .........

....before curving back to the left in a large circle. The through-station is across the lawn dead ahead at this point.

Across the patio bridge. To the left will be a small patio - eventually. Viewing the line from this level, I am alarmed to see how uneven the track seems to be. Some relaying might be required here otherwise there might be some interesting accidents as trains traverse the bridge!

The line now meanders back towards the terminus station which can be seen ahead. I like this section of the line. I'm hoping that, once the vegetation becomes more established and the stream (to the left) flows through, on a summer's evening I can sit on the patio with a cool beer ......

We rejoin the railway at the terminus station to our right.
A test train has been run and already I have identified several 'snags' which need ironing out - mostly caused by the blocks settling. But there's plenty of time for that.............................
No comments:
Post a Comment