I have three types of flat wagons on my railway; one type adapted from the Hartland Locomotive Works (HLW) Mini Series of wagons, one type which is simply a repaint of the LGB stake wagon and one made from an Atropos kit for an Admiralty wagon.

The first task was to fill the holes. On this occasion, I used car filler as that is what I had to hand, but any type of resin or filler will do the job. Firstly, I taped over the holes on the upper surface with masking tape.

Filler was then poured into the holes on the underside.

With car filler, I needed to puddle the filler down into the holes with a straightened out paper-clip to ensure there were no air-bubbles.

Once the filler had hardened, I scraped or filed off any excess and in places tidied up the filling with model putty. At the same time, I filed the edges of the body to extend the planking down the sides.
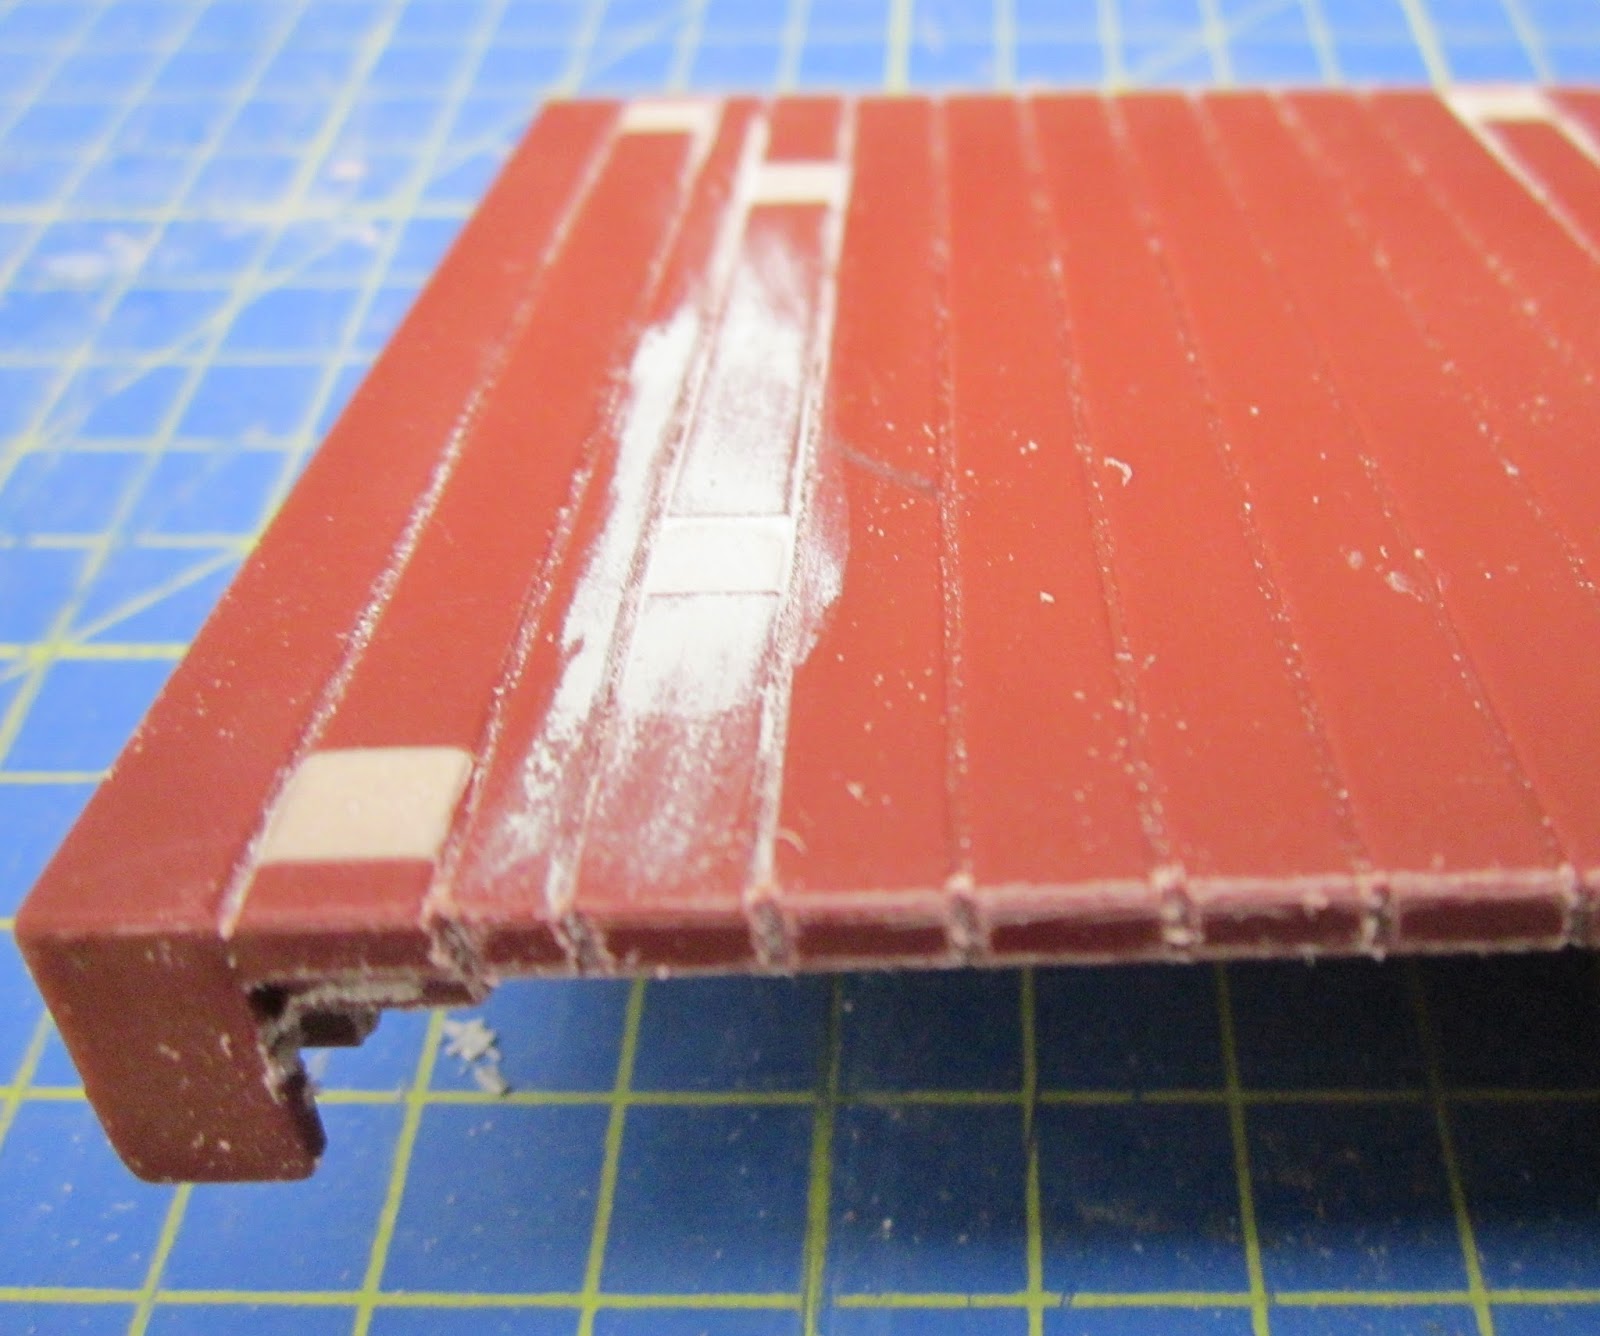
The body was then ready for the next stage.

Two pieces of 6mm square section styrene (eg Plastruct) were cut to the width of the body. On this occasion, I did not have any square section to hand and so I added 1mm thick plasticard to two sides of some 5mm square tube.


These cross-members were then superglued to the ends of the body.

The mould-lines at the ends of the body were then smoothed down with a file and the ends of the tube were plugged with filler and also filed smooth.

The body was then given a couple of coats of Halfords' grey primer from an aerosol rattle can.

While the paint was drying, I stripped some insulation from a piece of twin and earth electrical cable.

A short length was then wound tightly around the stem of a small Philips head screwdriver.

The loops were then sawn through with a razor-saw and squashed flat with pliers to form rings.

Eyelets were then formed from 1.5mm lengths of wire....


Adapting an HLW wagon
This is a fairly straightforward bash. HLW wagons can be bought quite cheaply from various suppliers including Back2Bay6 - mine cost between £10 and £15. The lower bodies for the tank wagon and the tippler wagon are moulded with planking and so lend themselves readily to modification into flat wagons. The kit for the chassis comprises very few parts which mostly slot together.The first task was to fill the holes. On this occasion, I used car filler as that is what I had to hand, but any type of resin or filler will do the job. Firstly, I taped over the holes on the upper surface with masking tape.
Filler was then poured into the holes on the underside.
With car filler, I needed to puddle the filler down into the holes with a straightened out paper-clip to ensure there were no air-bubbles.
Once the filler had hardened, I scraped or filed off any excess and in places tidied up the filling with model putty. At the same time, I filed the edges of the body to extend the planking down the sides.
The body was then ready for the next stage.
Two pieces of 6mm square section styrene (eg Plastruct) were cut to the width of the body. On this occasion, I did not have any square section to hand and so I added 1mm thick plasticard to two sides of some 5mm square tube.
These cross-members were then superglued to the ends of the body.
The mould-lines at the ends of the body were then smoothed down with a file and the ends of the tube were plugged with filler and also filed smooth.
The body was then given a couple of coats of Halfords' grey primer from an aerosol rattle can.
While the paint was drying, I stripped some insulation from a piece of twin and earth electrical cable.
A short length was then wound tightly around the stem of a small Philips head screwdriver.
The loops were then sawn through with a razor-saw and squashed flat with pliers to form rings.
Eyelets were then formed from 1.5mm lengths of wire....
The rings were then threaded on to the eyelets and the closed shut with pliers.
These were then given a light coat of matt black primer.
I usually find that giving a model a couple of coats of primer exposes any imperfections in the bodywork, and this was the case with this model. White Putty filler was applied to the various dints and crevices .......
.... and then smoothed off with a file and fine emery paper ........
....... before being given another couple of coats of grey primer.
Four 1.2mm holes were drilled in the ends of the upper sides of cross-members,.......
........ and the eyelets and rings inserted with a dab of superglue to hold them in place.
The solebars and couplings were then added to the body, as per the instructions and the wheels. I use large diameter Bachmann metal wheels to give the wagon more weight and to improve its smooth running.
The wagon was now ready for service (although in need of weathering - see How I weather my wagons)
One flat wagon was given a load of some farm machinery (Brittains' models). Although these are under-scale, once painted and clustered together, they look suitably agricultural. The items were glued (with Evostik) to a sheet of 2mm thick plywood, scribed to match the planking on the wagon. The ply was made a tight fit in between the cross members and so the wagon can run down the line loaded and return empty (See Managing freight on the railway).
Another flat wagon acts as a match wagon for the mobile crane (scratchbuilt on another HLW flat wagon chassis - see How I constructed a mobile crane).
The tools and loco jack are whitemetal castings from various sources and
the toolbox is made from a piece of balsa with paper-clip wire handles. More clutter will be added as time and maybe finances permit.
At present the third flat wagon is unladen. When I see a suitable lineside model in roughly the right scale (eg a stationary engine or a piece equipment for the copper mine), it will be mounted on a piece of ply for transportation down the line.
LGB Stake Wagons
At present, there are four of these on the railway. Three are used to carry timber to and from the timber yard at Peckforton.
Their loads are plastic Bachmann (?) logs, purchased through eBay. They have been lightly weathered with Humbrol matt acrylic aerosol sprays (Dark Earth (29) and Sand (63)) to make them less shiny. Four to six logs were glued together as a unit with Evostik and fine chain then glued across and left dangling at the ends. This enables the logs to be removed as a unit to enable the wagons to travel in unloaded condition down the line.
Another stake wagon has a tractor load.
After searching in vain for a model tractor of the right period (ie early 1930s) in the right scale, I happened across some resin money boxes which vaguely resembled early tractors in more or less the right dimensions. One of these was purchased. the slot filled in with resin and mounted on piece of 2mm plywood the same size as the wagon. Pegs were attached to the underside of the ply to slot into the brackets for the stakes - thus enabling the wagon to return empty once the tractor has been delivered to its destination.
Atropos Admiralty Wagon
This was actually purchased as part of a job-lot of wagons on eBay and initially, I considered selling it on. However, I was so impressed by the quality of the kit and the finish which the builder had achieved I decided to find a use for it on my railway. It is now attached to the first passenger train of the day to transport milk churns.
I needed quite a large number of churns, not only to load on to the wagon but also as part of lineside detailing around the railway and decided that the expense of buying resin cast models was going to be prohibitive - so I made my own (see How I constructed some milk churns).
I found the flanges on the wagon were too narrow for the LGB pointwork which meant that the wagon derailed regularly whenever it negotiated the curve of a point (turnout). The wheels were replaced with Bachmann small diameter metal wheels and LGB style couplings were added..
This wagon needs some weathering but has proven itself to be an important part of the railway's workings.
I am not planning to construct any more flat wagons. I feel I now have sufficient to meet the freight needs of my railway. I did consider making one into a one-plank wagon, but am quite satisfied with the appearance of the wagons as they exist.
3 comments:
I really do love this.
Plywood Manufacturer in India
what was the total cost for you to make a open wagon?
The flat wagons based on HLW chassis cost only around 20UKP - 14UKP for the wagon chassis and then another 6UKP for the metal wheels. You could use the plastic wheels which come with the HLW kit and save some cash. The open wagons on my railway probably cost around 25UKP each. I use resin castings but even the smallest quantity of resin will make around 20 wagons - so the cost is shared out across all the wagons.
Post a Comment