 I have reached that stage in the construction of my railway where I am turning more of my attention to adding finer details. The main station (Beeston Market) has undergone a few changes since it was first built, with sidings being added and the length of the station being extended to include access to the storage roads in the garage (see Progress Report 59). This created a forecourt area for the station which has remained largely undeveloped. What I felt was needed initially was some sort of separation between the railway and the outside world - ie some fencing.
I decided to invest in some fencing packs from North Pilton Works. These seemed to me to be the most cost effective way of getting long runs of picket fencing and so I very shortly took delivery of four packs - a level crossing pack (see How I made a Level Crossing), a fencing pack and two gate packs.
....... to reveal a set of laser-cut components .........
..... and a set of instructions.
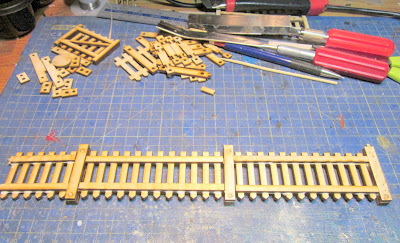
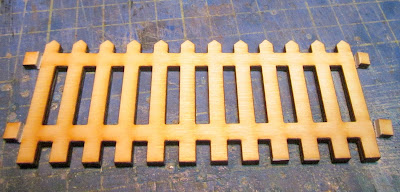
The first job was to measure up the site to work out the length of fencing I'd require. To fit the gate for the station yard in the right place, I worked out that I needed to shorten one of the fence panels from 117mm to 70mm. One panel was duly shortened, making sure I left the locating lugs on both ends.
Next, I started making-up a series of posts. These are constructed from three components; a plain outer piece, an outer piece with a peg at the base and a notched inner piece.
These were glued together using exterior PVA and short lengths of dowel to help align the pieces.
The fence panel was then glued to the post using the slots in the post.
The next post needed to be double-sided to support a panel on each side. This was constructed from three sections, the centre section including two sets of notches.
The post was then glued together and inserted between the existing short length of fence and a full length of fencing. Battens were then applied behind the panels.
The bases for the posts were then glued on.
... and the run of fencing was left to let the glue dry. Note that as the right hand post will be a gate post, it has a raised edge to act as a gate-stop.
This was constructed from three pieces as previously - one of the outer sections containing the gate-stop.
The next run of fencing would require a 90 degree bend and so a corner post was put together from three sections; one of the outside pieces including rectangular holes to receive the tabs on the fence panel at right angles to the normal run of the fence.
The gate for the station yard was constructed from a fence panel with a backing piece comprising framing battens and a diagonal. The holes are to take the screws for hinges (supplied in the kit).
I decided at this point to make myself another gate using a spare fence panel. The tabs were removed from the end of the panel...
.... and two verticals were cut from an offcut of fencing panel.
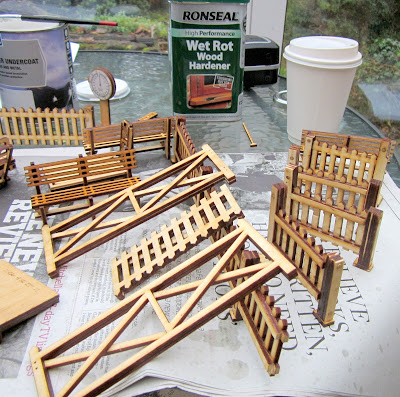
The verticals were glued on to the fence panel and horizontal battens glued between them. A diagonal batten was then glued between the two horizontal battens.
They were then given a couple of thin coats of exterior housepaint (light cream).
The bases were then given a coat of greeny-grey acrylic to represent concrete.
and 1.5mm diameter brass rods were inserted into holes drilled into the bases to act as locating pegs when the fencing panels will be installed.
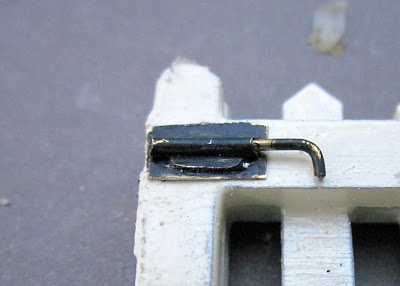
I decided to construct my own latches for the gates. These were made by cutting a 5mm strip of 1mm brass sheet and soldering a short length of 2mm diameter brass tube to the end.
The end with the tube was then snipped off and the solder filed smooth.
A short piece of 1.5mm diameter rod was inserted into the tube, bent at 90 degrees and snipped off to form the bolt for the latch.
Latch plates were then made in a similar way to receive the bolts.
The latches were then superglued to the gates and painted with primer and black acrylic.
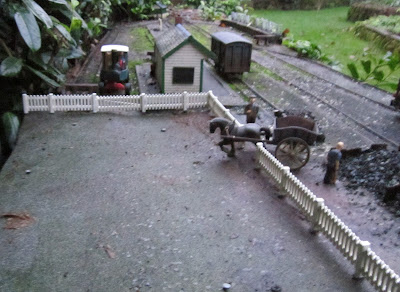
The lengths of pre-assembled fencing panel were then taken out into the garden and fitted into place, holes being drilled in the baseboard to take the brass pegs on the base of each post.
At the moment, the fencing has been fitted temporarily. I need to do some landscaping to build up the verges and curbs and the road surface. Some of the bases of the posts are therefore 'floating'. (Note one of the galvanised nail heads in the foreground. These will act as keys to help fix the concrete screed to the baseboard).
Eventually, the bases of the posts will be buried in the ground and will hardly be visible.
I could have left the bases off completely and will do so when I fit fencing at subsequent locations. I did try removing them, but the PVA had bonded far more strongly than I expected.
I will add more information and pictures to the foot of this blog-post, when I have finished the landscaping (weather permitting).
In the meantime, the fencing seems to be able to bear quite close scrutiny.
Though I am going to have to paint those hinges!!
The packs of fencing and gates from North Pilton Works seem to present good value for money at less than a pound (GBP) per panel. Having tried to make my own picket fencing from wood and from plastic and discovered it's not easy to get the spacing consistent or vertical, these panels give a much better finish than I know I could achieve. I still have more than enough fencing left to complete the fencing at the other end of the station - another job for the never-ending jobs-list.
I will keep you posted as to developments when I finish off the landscaping.









No comments:
Post a Comment