When I saw another recordable module on eBay for a reasonable price (£12.00 GBP), I thought if give it a try, particularly as it was also available on AliExpress for less than £3.00 GBP. They are also available on the UK Amazon website for £13.99 (including a battery box and a suitable USB lead).
There was no documentation but one of the photos accompanying the listing indicated the module could be programmed to operate in different modes.
Further research on t'internet revealed the modes were fairly limited but it was possible to loop the sound file, which is what I needed for a basic soundcard.
This chart may at first look baffling but, with help from a YouTube video, I managed to interpret it - see below for more info.
I had already tracked down a suitable sound file of a noisy diesel tractor on the Soundsnap website (see How I added sound to my Bluetooth controlled diesel loco), and so my first job was to edit a suitable clip from the file to upload to the sound module.
Since I downloaded this file, there has been a price increase on SoundSnap so you might want to seek out alternative tractor sounds from one of the free online sound libraries - eg https://freesound.org/people/aUREa/sounds/268779/
I used the free audio editing program Audacity to create a clip of the running engine lasting about two and a half minutes ( clips of up to four minutes can be uploaded dependent on sound quality).
For more information on using Audacity see How I used Audacity to create sounds for my railbus
The file was exported as a WAV. Unlike MP3 files, WAV files don't suffer from that annoying half-second break in sound when the file loops back to the beginning.
The module was connected to the computer with a micro USB connector, bearing in mind that some USB leads are not fully wired. The first lead I tried must have been wired only for charging a device as it failed to show the module's memory store.
With the right lead, the module's memory opens like any other USB drive.
The MP3 file which comes with the module was deleted....
At first, I tested the sound was OK by connecting the two power leads to a 4.5v battery box.
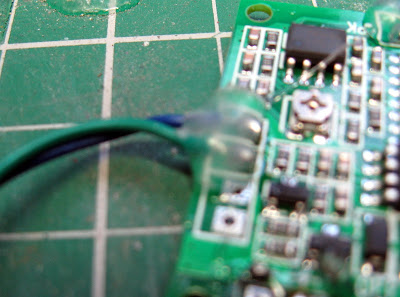
I then got to grips with changing the playback mode using the above chart. It was a lot simpler than I expected. The zeros and ones indicate which of the three resistors labelled A B and C needed to be retained or removed to change the mode.
For example, 0 0 1 means keep resistors A and B and remove resistor C. This will make the module play the sound file when the button is pressed and continue until the the button is released (or the sound file ends).
The mode I was interested in was the penultimate one - press the button to play and then cycle or loop the file being played until the button is pressed again. This was coded 1 0 1 which meant I needed to remove resistors A and C but retain resistor B.
The process was repeated for resistor A.
A quick test play showed the operation was successful.
I now had to fit the unit into the loco. Fortunately, the loco in question is powered by two li-ion cells wired in parallel to give 3.7v output to the Deltang Rx60b receiver. In addition to the 5v input terminal, the sound module has 3.7v input pads.....
... so the wires on the 5v input pads were removed and two wires were soldered to the 3.7v terminals.
These were then connected to the 3,7v input to the Deltang Rx60b so the sound module would be powered up when the loco was switched on.
I removed the leads to the push-button. At first I simply soldered across the terminals to the push button so the sound module would start playing immediately the loco was turned on.
However, as the sound file I used was of the engine running at speed rather than ticking over, I decided I wanted some way of turning the sound on and off from the transmitter.
The designers of this module have fortunately anticipated this requirement as the push button connects the trigger for turning on the sounds to ground (0v). Fortunately, they also include a trigger which is activated when it is connect to V+. The Rx60b is a very early Deltang receiver, with outputs which give only 3.2v rather than the 0v of later models and so, via a 1k resistor, I could connect the output pad from the Rx60b to the V+ trigger pad (labelled PH - P High) on the sound module - the other pad is PL (P Low)
The small speaker which is supplied with the module was housed in an enclosure which I designed in Tinkercad and 3D printed.
This was mounted, as is my usual practice, on the underside of the cab roof using double sided sticky pads.
The loco was then given a few test runs
This soundcard solution is not the most sophisticated - it plays only one sound which is independent of the speed at which the loco is running. There is also no horn or whistle. It is akin to the sound cards which used to be marketed by Acme (no longer in production). However, as the modules can be bought for under £3.00GBP which includes the speaker, it is a cheap and reasonably effective way of providing small internal combustion-engined models with a sound system.
Update: How I added a second card to provide a horn sound


No comments:
Post a Comment