Monday, March 07, 2011

Progress Report 34

Despite semi-retirement, I seem to have had less time to indulge in modelling than when I was working full time. Maybe when I come to the end of the list of household jobs which have been accumulated over the past 30 years, I'll have a little more time for the railway.

More figures
Since my last Progress Report (see Progress Report 33), I've slowly been accumulating more figures to populate the railway, courtesy of eBay.

One of the difficulties I've found about buying figures from eBay is that 'G Scale' covers a multitude of scales from 1:32 to 1:19. As a consequence, some figures I have bought are grossly under scale whilst others seem to be relative giants. As my model is supposed to represent a 3ft narrow gauge railway, the scale I am working to is 15mm to the foot or 1:20.3, 16mm scale figures (1:19) are therefore slightly over scale.

Locomotives
At long last I have completed the repaint and the lining for the Barclay 2-4-0 (Beeston - No. 2)


and also for loco No. 3 (Bickerton), a Hunslet-inspired 0-4-0 (See How I constructed the Hunslet from a GRS kit)


Both have been finished in the railway's livery of Humbrol Brunswick Green with gold (Trimline) lining (see How I lined my locos with Trimline tape). I am slowly improving my spray painting techniques though it is still something which I approach with a certain amount of trepidation.

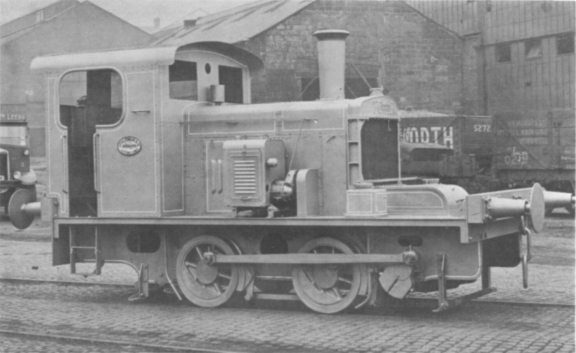
Work has started on bashing the ToyTrain diesel into a more prototypical model based on those constructed in the 1920s and 30s by Fowler (see How I bashed a ToyTrain diesel into an early Fowler)


I am presently working on trying to adapt the chassis to add a layshaft and fly cranks. Once I have the chassis sorted I will turn my attention to the body which, I'm hoping, will be less complicated and traumatic than hacking the chassis about.

Coaching stock
I am also in the process of making two Andel coach kits of Ashover Railway coaches. I picked these up on eBay a couple of years ago when I wasn't sure what coaches I wanted to have for the railway. Once the kits have been completed, I will try them out on the line to see if I can use them as reserve coaching stock.
NB - Subsequently, the coaches were bashed into a Ford(ish) railcar - see How I bashed two Andel coaches into a Ford(ish) railcar.


Goods stock
Four more open wagons have been constructed using chassis from Hartland and bodies cast in resin from my own moulds (see How I made my third batch of open wagons from resin).

These will join the existing collection of open wagons. Ultimately I want to have at least 20 open wagons as these will form the mainstay of the goods rolling stock, as per my two inspirational prototypes - the Welshpool & Llanfair and the Southwold Railways.

Pruning and over-wintering
Outdoors, the shrubs and more energetic plants have been pruned back


and the vulnerable concrete overbridges have been covered to protect them from frost.


The Workshop
I've spent a bit of time (and money) on improving facilities in the workshop. This is situated on one side of the conservatory (with thanks to my other half). I've lengthened and widened the shelves - on which I store ongoing projects and stock requiring remedial attention - the casualty bay!


In addition, I've extended the workbench. This was originally a pine dressing table discarded by my daughter. A large piece of pine shelving (discarded by my other half) was almost tailor-made to fit the available space.

To do
Next on the list are:
One thing you can say about garden railway modelling - there is never nothing to do!

    How I lined my locos using Trimline tape

    Introduction
    In this posting I aim to share with you the approach I have developed for applying Trimline lining tape to locos.
    This comes in 5 metre reels with a range of widths on each reel. At a cost of around 3 UKP a reel it represents good value for money. One reel is sufficient for one small G scale loco, though I've found it's handy to have another reel to spare. The loco shown in this posting is the line's No. 3, a Hunslet constructed from a Garden Railway Specialist's kit and an LGB Toytrain 0-4-0 chassis (see How I constructed a Hunslet loco from a GRS kit).

    Painting 
    From some of my other blog postings you'll see that painting locos and stock is my least favourite activity. I struggle to get that perfect finish which I'd like to achieve. I am improving my techniques for spray painting but I've still not entirely cracked it. I use aerosol spray cans. I don't feel I would sufficient use from a compressor and spray gun to justify its cost - I assume I'd have to buy an expensive one to get a decent finish. Anyway, what I have learned about aerosol spray painting so far is:
    • Only spray when the weather is dry and the room is warm
    • Heat up the cans in a bucket of warm water before using them
    • Use high quality masking tape designed for models
    • Try to spray evenly in long easy passes rather than in short bursts
    • Handle the sprayed models with disposal latex or vinyl gloves to avoid greasy finger marks
    • Remove the masking tape as soon as the paint is touch dry
    • Wait a couple of days for the paint to harden off before applying the tape
     Lining
    Once the paint had hardened off, I then decided where to start the lining. I now tend to do it by eye, but with the first loco, I measured 4mm in from the edges and put a pin mark at each end to try and keep the spacing regular. I usually start with the longest, straightest lines as these tend to be the easiest to apply. On this Hunslet model the longest run was along the base of the saddle tank.


    I cut off a piece of the lining tape, allowing a couple of centimetres at each end. Although this is wasteful of tape, I find it useful to have this excess for handling the tape.


    The tape was then lifted off the backing sheet with the point of a craft knife or scalpel.


    The ends of the tape were then held between finger and thumb of both hands and positioned, stretching it slightly to keep the tape taut and straight.

    The tape was then manoeuvred on to the model and once applied, smoothed down with the tip of one finger. If (well, when) the tape ended up in the wrong place or slightly curved, it was lifted and reapplied.


    When two adjacent tapes crossed over each other,


    the scalpel blade was carefully positioned lightly over each tape


    and the excess piece of tape pulled up against it. In this way the tape was trimmed off precisely without cutting into the underlying paint.

    The remainder of the straight lining was completed before tackling the curved lining. This took a little longer. Rather than laying down the whole length of tape, one end was pressed down with a finger-tip and the tape curved round and pressed down in short steps. This often took two or three attempts before the right curve was made.

    As with the straight lining, the excess was trimmed off at the most appropriate angle against the adjoining piece.

    On one loco (the Barclay) I used wider tape and found the tape buckled on some of the tighter curves. The rucks were nicked with the point of the knife and pressed down with the rounded end of knife handle. This was not entirely satisfactory so, in future, I will stick with the narrowest tape.


    Once all the lining had been applied and firmly pressed down using the back of a finger nail or the rounded end of the scalpel handle, I touched up the spectacle plates, sandboxes and chimney with 'brass' enamel paint.


    Nameplates
    I then applied the nameplates and number plates. From experience I have discovered that the most reliable way of gluing nameplates on is to position them,

    then move them to one side, apply a one or two small drops of superglue to the place where the plate will be fixed,


    then place the plate on the glue.


    This helps ensure the glue stays out of sight behind the plate.


    Here's what happened when I did not use this approach:


    The glue seeped out from behind the plate and all attempts to remove it made the problem worse - another lesson learned from experience!

    Varnishing
    The loco was then masked, in preparation for the application of varnish.


    Waterslide transfers were applied to the buffer beams.


    As with the paint, I used an aerosol of varnish which was warmed up first in a bucket of water.


    Two light coats of acrylic varnish were applied, and left to dry, before the masking tape was removed and the loco left for a couple of days for the varnish to harden off.

    WARNING! Always test the compatibility of the varnish with the underlying paint before applying. Here's what happened when I didn't. The paint was Humbrol enamel and the varnish was acrylic car spray:


    The handrails were then fixed in place (with Superglue), spectacle plates were glazed and a driver positioned in the cab.


    Loco number three was now ready to join the line's expanding roster (apart from re-fitting the couplings!).

    Sunday, November 07, 2010

    Fitting a decoder to a GRS kit on an LGB ToyTrain 0-4-0 chassis

    Introduction
    The ubiquitous LGB/Playmobil 0-4-0 Toytrain chassis were (and to a large extent still are) the mainstay for many 45mm gauge kits and conversions. They formed the basis for the locos in basic starter sets - such as Otto:


    OHO

    and Rusty.

     They are also used for the Playmobil diesel shunter.

    These chassis are quite basic in design but fairly robust and have the advantage that they do not have rubber traction tyres which are the bane of the Stainz and other 0-4-0 chassis. I have so far used two of these chassis as the basis for my kit-based conversions - see How I made a Peckett from a GRS kit and How I made a Hunslet from a GRS kit. I also intend to convert the Playmobil diesel into something more UK-based - such as this 1935 Fowler:

     ...... but that's another story (see How I converted a ToyTrain diesel into a Fowler(ish) loco).

    Fitting the decoder
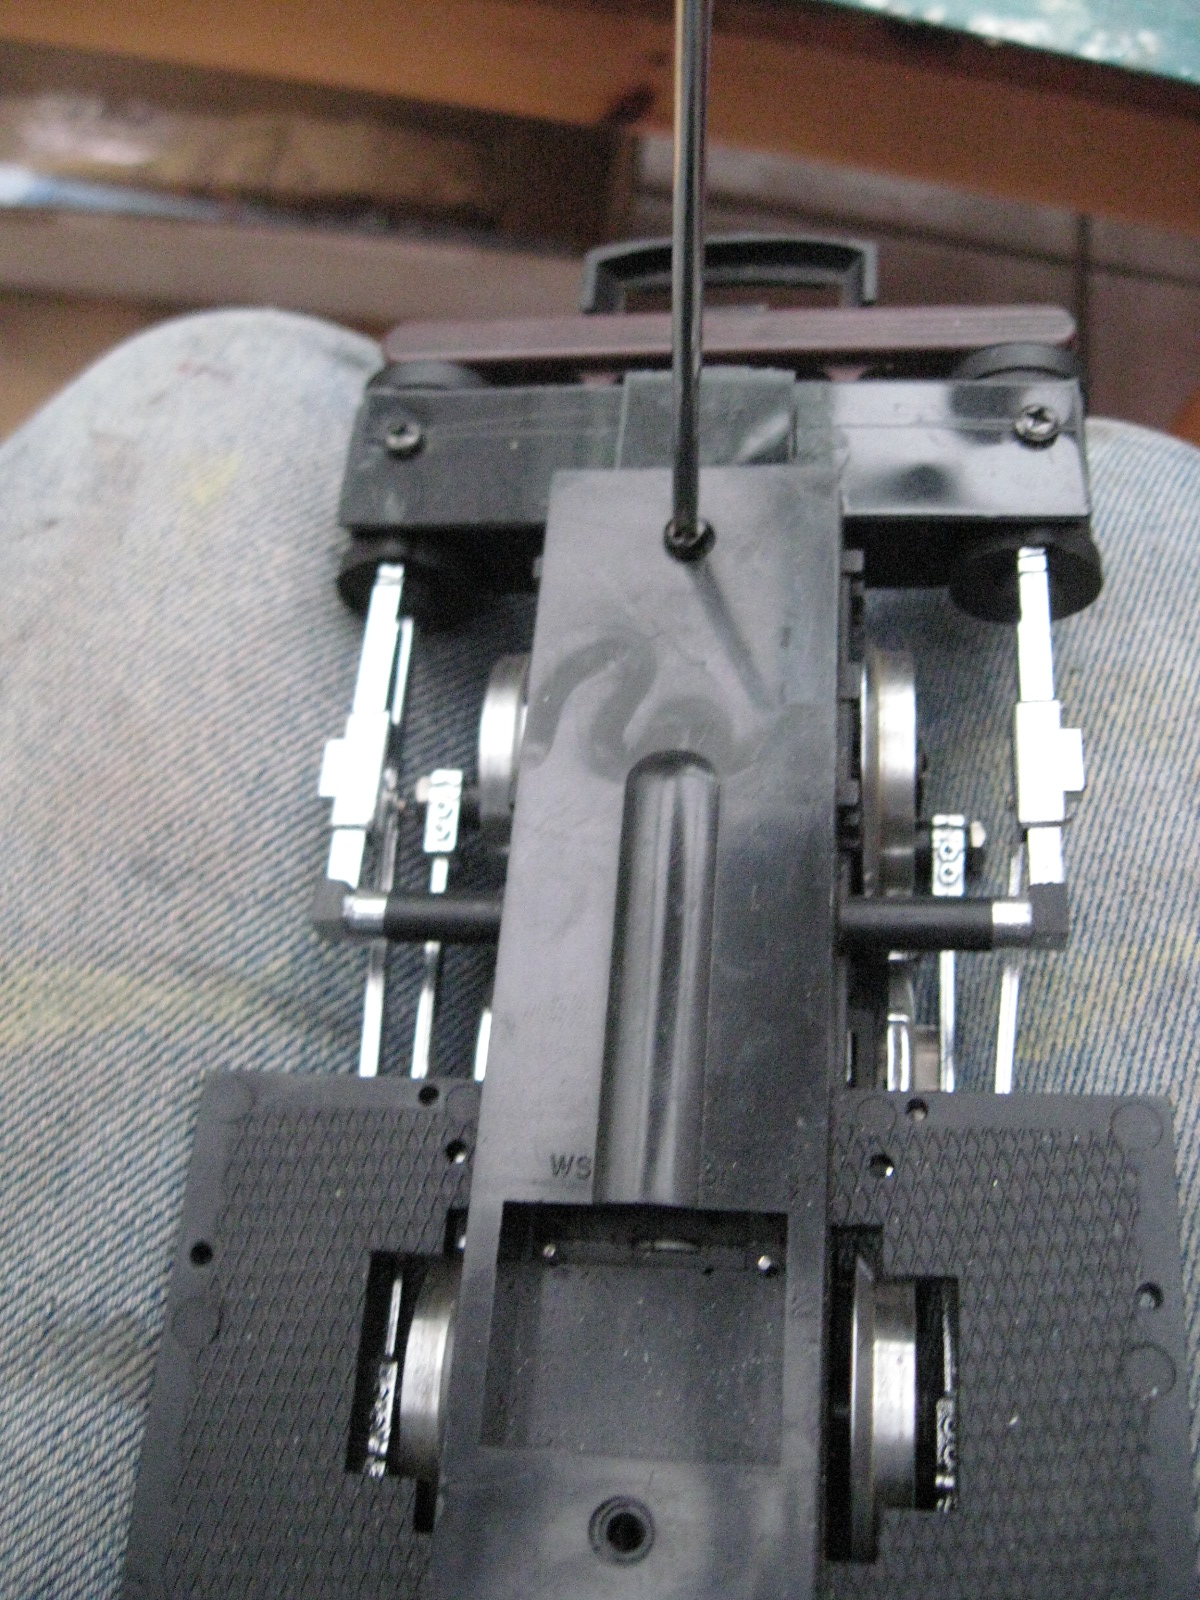
    The first stage of of chipping the chassis was to strip down the donor loco to remove the body from the chassis. This was a fairly straightforward process, requiring the removal of half a dozen screws.

    The next stage was to remove the cover holding the motor in place by removing two screws:

    The cover lifts straight off to reveal the double ended motor.

    This simply lifts out. When fitting a decoder, it's important to isolate the motor connections from the pick-ups. This could be achieved by bending back the motor contact tags so they are no longer touching the vertical wire pegs which supply the current from the wheels and pick-ups. However, given the cost of decoders for G scale, I prefer something a little more reliable. I turn the motor around so the motor contacts have no chance of accidentally touching the leads from the pick-ups. To accommodate the motor contacts, a slot needed to be cut in the opposing chassis member. Two cuts were made on either side of the hole in the cross-member with a razor saw.

    The plastic was removed by 'persuasion' from a pair of pointed-nose pliers. The hole in the chassis-member meant the plastic could be bent outwards until it snapped off. A needle file was used to do the final tidying up.

    The motor was fitted back in temporarily to check clearances (Note the two pick-up wires now at the other end of the motor).

    A similar slot needed to be cut into the flange on the motor cover, to provide sufficient clearance for the tag on the motor. Again, a razor saw was used.

    Two holes were drilled in the other flange of the motor cover to take the leads from the motor contact tags to the decoder:

    The decoder (a Massoth L or an LGB 55020 or 55021) was tucked into the boiler on each of my two conversions. The sockets were snipped off the ends of the motor leads (yellow and green)........

    ..... and the leads were then soldered to the motor tags after being threaded through the holes in the flange.

    The motor cover was then screwed back into place, making sure the leads did not foul the motor mechanism, and the leads for the track pick-ups were pushed on to the pick-up connectors which protrude from the top of the motor cover.

    The bodies of the locos were then carefully fixed back on to the chassis, making sure none of the leads were trapped in the process. The locos were then placed on the track, programmed and tested.