- Part 2 - Modifications and conversions
- Part 3 - Semi-scratchbuilding
- Part 4 - Scratchbuilding (pending)
- Part 5 - 3D Printing
In this series of related posts, I have started with kits as, apart from buying readymade rolling stock, this is undoubtedly the easiest way of equipping yourself with a battery powered loco. Most kits are supplied complete (apart from batteries, a control system and paints) and so it's usually a case of unpacking the parts, following the instructions and the painting your new loco.
For more information on batteries and control systems for your locos see A Quick Introduction to Batteries for Model Trains
I have constructed a few kit-built locos over the years and know several fellow modellers who have similarly constructed various kits and so will share my own and their experiences.
Materials
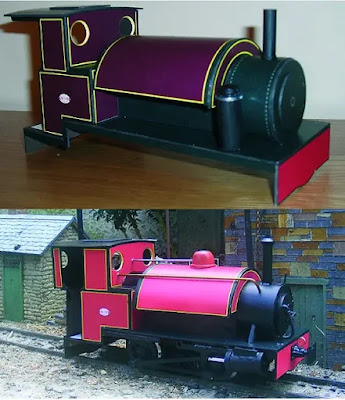
Card
 |
| Source: https://www.rail-roadmodels.co.uk/product-page/corris-hughes-loco |
 |
| Source: https://www.rail-roadmodels.co.uk/product-page/hunslet-tram-loco |
Wood
Several suppliers make wooden kits for large scale locomotives suitable for garden railways. These are generally laser cut plywood or MDF. They can provide a very cost effective way of creating small battery powered locos, or more advanced larger locos.
For sample, one of the cheapest sources for wooden battery loco kits is Phil Sharples.
I have had experience with building loco kits from IP Engineering (see How I built an IPE Albert kit, How I built an IPE Lollypop Railcar) and HGLW (see How I built a HGLW small diesel from a kit)
In each case, the instructions were clear and the construction process fairly straightforward - a bit like a 3D jigsaw puzzle.
 |
| The HGLW loco kit before construction |
 |
| The HGLW loco kit after construction |
The kits include all the parts needed including the wheels, motor and gears - though HGLW sell their chassis separately so you can choose which style you prefer.
The locos will happily potter around with a very basic level of control - eg an on/off switch, a reversing switch or a simple manual speed controller (For more information on battery power and basic control see - A quick introduction to battery power). Alternatively, you may prefer to install radio control (for more information on radio control see - Getting started with battery power and radio control). You can even install a soundcard, if you fancy......
More sophisticated wooden loco kits can be obtained from IP Engineering, Bowaters Models and Yatton Engineering.
 |
| Bowaters SAR Class 91-000 kit built loco - source: https://shop.bowatersmodels.co.uk/collections/bowaters-models-own-products/products/16mm-scale-south-african-railways-class-91-000 |
These take longer to construct and require more persistence, but the outcomes are well worth the effort.
Plastic and Resin kits
These days, kits for locos made of plastic are generally 3D printed. One of the best known and highly regarded sources for 3D printed loco kits in the UK is PDF Models. Their models range from compact little steam and diesel locos.....
 |
| Source: https://www.pdf-models.co.uk/gallery?pgid=khqk9dom-fe066775-0287-4bb3-9add-8ce2ec8f3598 |
...... to much larger models.
 |
| Source: https://www.pdf-models.co.uk/gallery?pgid=khqk9dom-ec2f6aa9-1ff9-4abf-a318-083afbb309e6 |
3D printed parts tend to need a certain amount of filling and sanding to achieve a smooth finish but the cost of the kits is quite modest when you look at the quality of detailing which each model provides. Comprehensive instructions are provided for each kit in .pdf format (what else?) and in some cases as YouTube videos.
Kits made from resin are similarly easy to construct and are provided in the UK by Garden Railway Specialists and Swift Sixteen. Both suppliers allow you to buy their kits with or without motorised chassis so you could use your own instead.
 |
| A Swift Sixteen Tin Turtle - Source: https://www.swiftsixteen.co.uk/product-page/tin-turtle |
I have constructed a couple of GRS loco kits. An earlier version of their Peckett loco which used styrene parts (they are now resin cast) and their cabbed Hunslet loco (see How I constructed a GRS Hunslet loco)
In my experience, resin kits are easy to construct as the parts tend to be larger than those produced by a 3D printer and hence there are fewer parts needing to be glued together.
Metal
There are at least two types of metal kit; those made from whitemetal castings and those made from laser cut steel, or etched brass or nickel silver.
Whitemetal kits
Whitemetal is generally used for small 16mm scale locos, owing to the difficulties involved in making larger castings. The advantage of whitemetal as a medium is that it ensures the finished loco will be quite weighty and hence will be unlikely to require additional ballast to assist adhesion and hence pulling-power. The disadvantage of whitemetal is the difficulties involved in gluing the parts together. Two-part epoxy resin adhesives can be used but, in my experience, the bond isn't always 100% secure and also even rapid-set epoxies take a while to harden off. A more reliable way to fix whitemetal parts together is to use low-melt solder. This provides an almost instantaneous bond which, if done correctly, is very secure. However, low-melt soldering is an acquired skill and, if the soldering iron is too hot, can prove disastrous - reducing small whitemetal parts to a blob.
My direct experience with large scale whitemetal kits was gained through the construction of an IP Engineering Plate Frame Simplex locomotive (see How I constructed an IP Engineering Simplex loco)
I bought it secondhand, partially completed. It looked as if the previous owner had tried putting it together with epoxy resin and given-up. There seemed to be more resin smeared on the surfaces of the parts than was actually present in the joints. The model came apart alarmingly easily giving me great incentive to use low-melt solder. I found that, provided the parts are clean and sufficient flux is used, construction with solder is a lot easier than with epoxy.
I decided to add a few extra details, including a cab which houses the Deltang radio receiver. These were fashioned from plasticard and various off-cuts - held in place with superglue.
Despite its size, this weighty model is quite powerful. I even managed to squeeze in a low-cost sound system.
Laser-cut steel or brass
Etched brass (or nickel silver)
These are probably the most sophisticated of kits and require the greatest amount of technical expertise. The parts usually need to be removed individually from a large sheet and then assembled using epoxy resin adhesive or solder. As with whitemetal, solder is the better option, but does require a fair amount of expertise.
My first-hand experience with an etched brass kit was gained through the construction of a County Donegal Railcar using parts provided by John Campbell.
The parts were joined together with solder which, as with whitemetal, gives an almost instantaneous joint which can easily be unjoined should some tweaking be required.
Additional detailing parts are usually provided with the kit, usually made from whitemetal or, these days, 3D printed plastic. In my case, these parts were missing as John had etched the parts for me as a favour and so I had to create the missing parts myself. However, as can be seen, an etched brass kit does produce a very fine model and can be well worth the extra effort involved.
Conclusion
Kits provide a cost effective way of adding to your collection of battery powered locos. They do require a certain amount of patience in putting-together. Laser-cut wooden kits are generally the easiest to construct and the most cost effective. 3D printed plastic kits are probably the next easiest to construct while metal kits usually require the most expertise, particularly if there is some soldering involved.
However, whichever kit is chosen, the outcome will certainly be worth the effort involved.


No comments:
Post a Comment