The sand quarry is a relatively recent addition to the lineside industries on Peckforton Light Railway. At first, it was simply a short spur siding on the approach to Bickerton Station (see Progress Report 75).

I decided that the siding really needed to include some way of loading sand into the Snailbeach style hopper wagons I had constructed to handle the quarry traffic (see How I constructed a rake of Snailbeach hopper wagons)..

| Source: https://thesandmuseum.org/transport.html#road |
So, I felt there was no alternative but to design and construct my own. I sketched a rough design in my notebook, ......

.... and then started work.
I decided to start with the main component, the hopper.

10mm wide planking was then scribed on each piece with a flat-bladed screwdriver.

A razor saw blade was then scraped over each piece a few times to give the effect of wood grain

The ends which I knew would be exposed were also scribed.


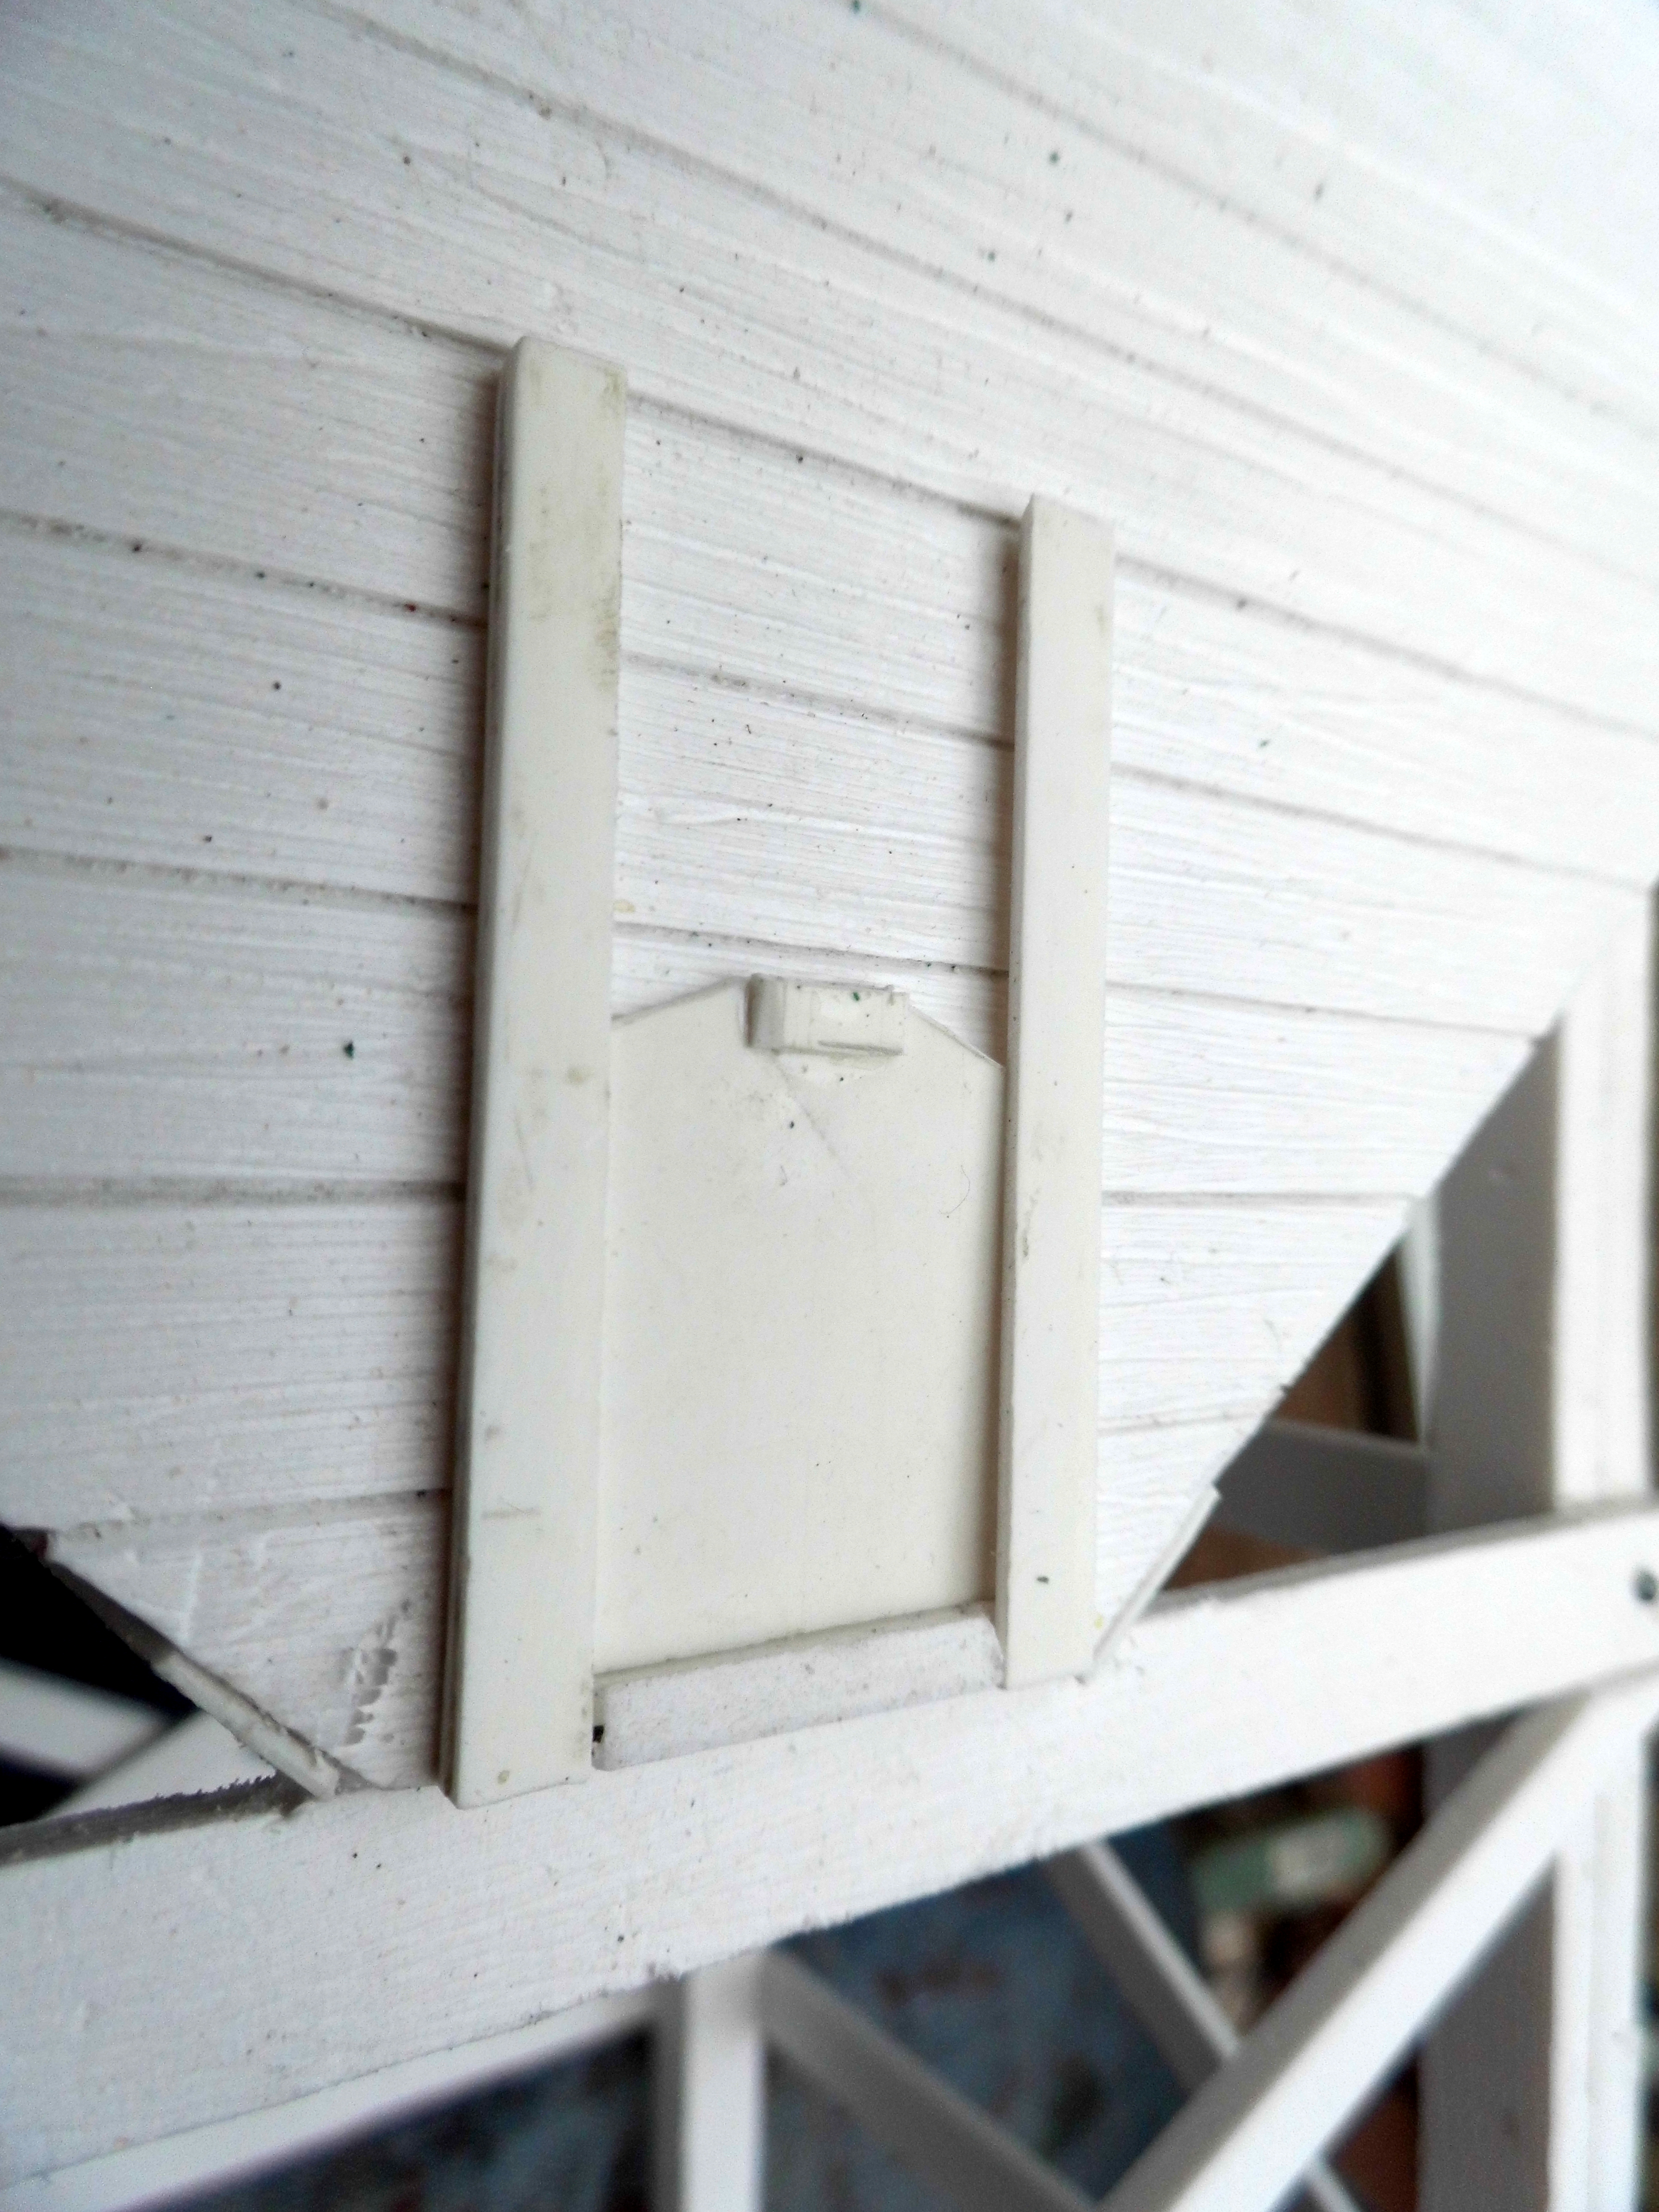
Once aligned, the parts were given a spray of superglue activator to speed up the gluing process. Four square(ish) holes were then cut in the corners of the hopper for the legs. Although the legs will be 10mm square in section, the holes needed to be 10mm x 12mm at the front and 10mm x 11mm at the rear as the base is sloping. It might have been easier to cut these holes before the hopper was glued together but the exact geometry of the holes was hard to work out.


Next, the legs were made. I used two layers of 5mm thick foamboard, but it is possible to buy 10mm thick foamboard from Simply Plastics. The front legs were 260mm long and the rear legs 297mm long (ie the width of an A3 sheet of foamboard).

The legs were then glued into the holes in the hopper, with 180mm from the bottom of each leg to the base of the hopper.

Cross bracing was then cut from 3mm thick foamboard and glued into place: 10mm wide strips for the horizontal braces and 6mm wide strips for the diagonals. The central horizontal bracing was 120mm from the base.


19mm wide strips of 1.5mm thick plasticard with then glued to the angled edges of the hopper as reinforcement plates.

Nail art bolt heads were then glued to these in line with the planking.


The chute was made from a piece of 40mm x 31mm 1.5mm thick plasticard, with a 40mm x 5mm strip each side.


A single pulley block was mounted above the sliding door......

...... and a double pulley block on one of the front legs

A length of linen book-binding thread was attached to the sliding door handle ........
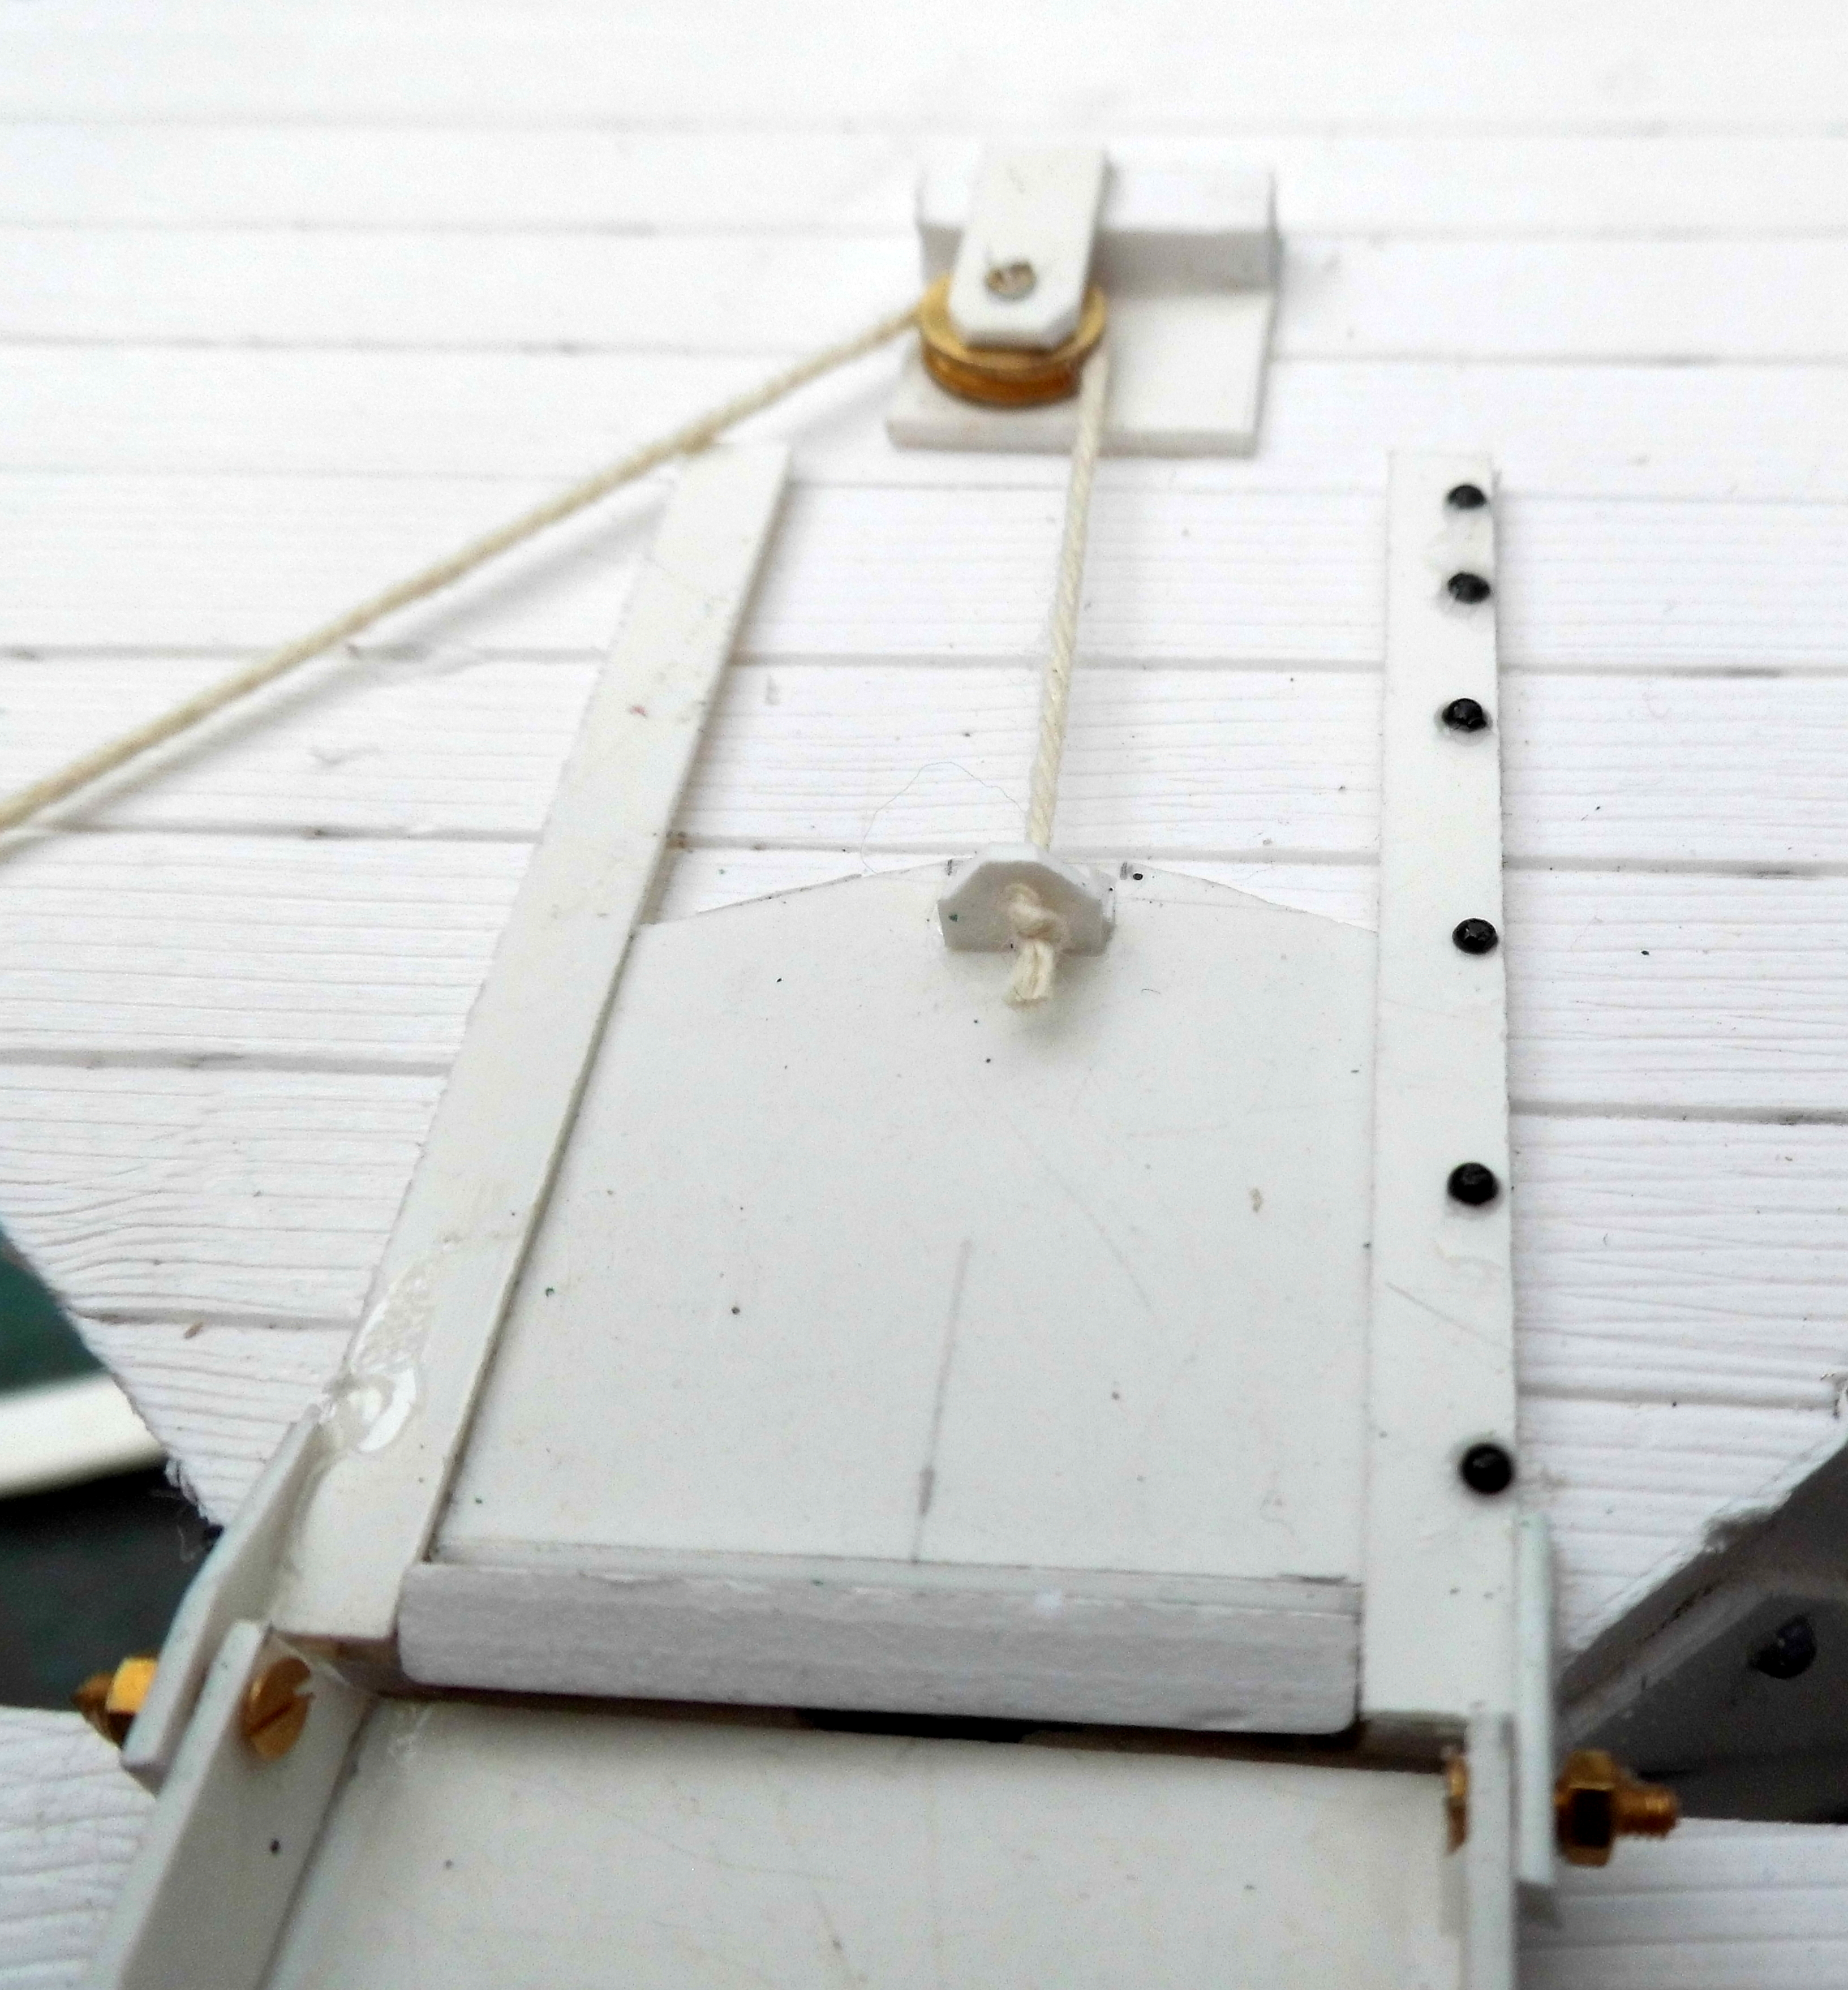
..... and passed through the two pulley blocks.


....... with nail art gems applied to simulate bolt heads

Above processes were repeated until three identical loading hoppers had been made.

The hoppers were given a couple of coats of Halford's grey primer from a rattle can aerosol.

The planking was given a thin wash of black acrylic to highlight the grain and the divisions between the planks.

The metalwork was picked out in black acrylic.

And then spots of rust (orange and burnt sienna) were applied.


A piece of 5mm ply was cut to fit into the hopper.

A piece of foam packaging was stapled to it, leaving one side unstapled, .....


The sheets were painted with red oxide primer and then glued and pinned to the roof supports.


The roofs were then weathered with acrylics.


Another single pulley was attached above the sliding door pulley and a thread tied to the chute.

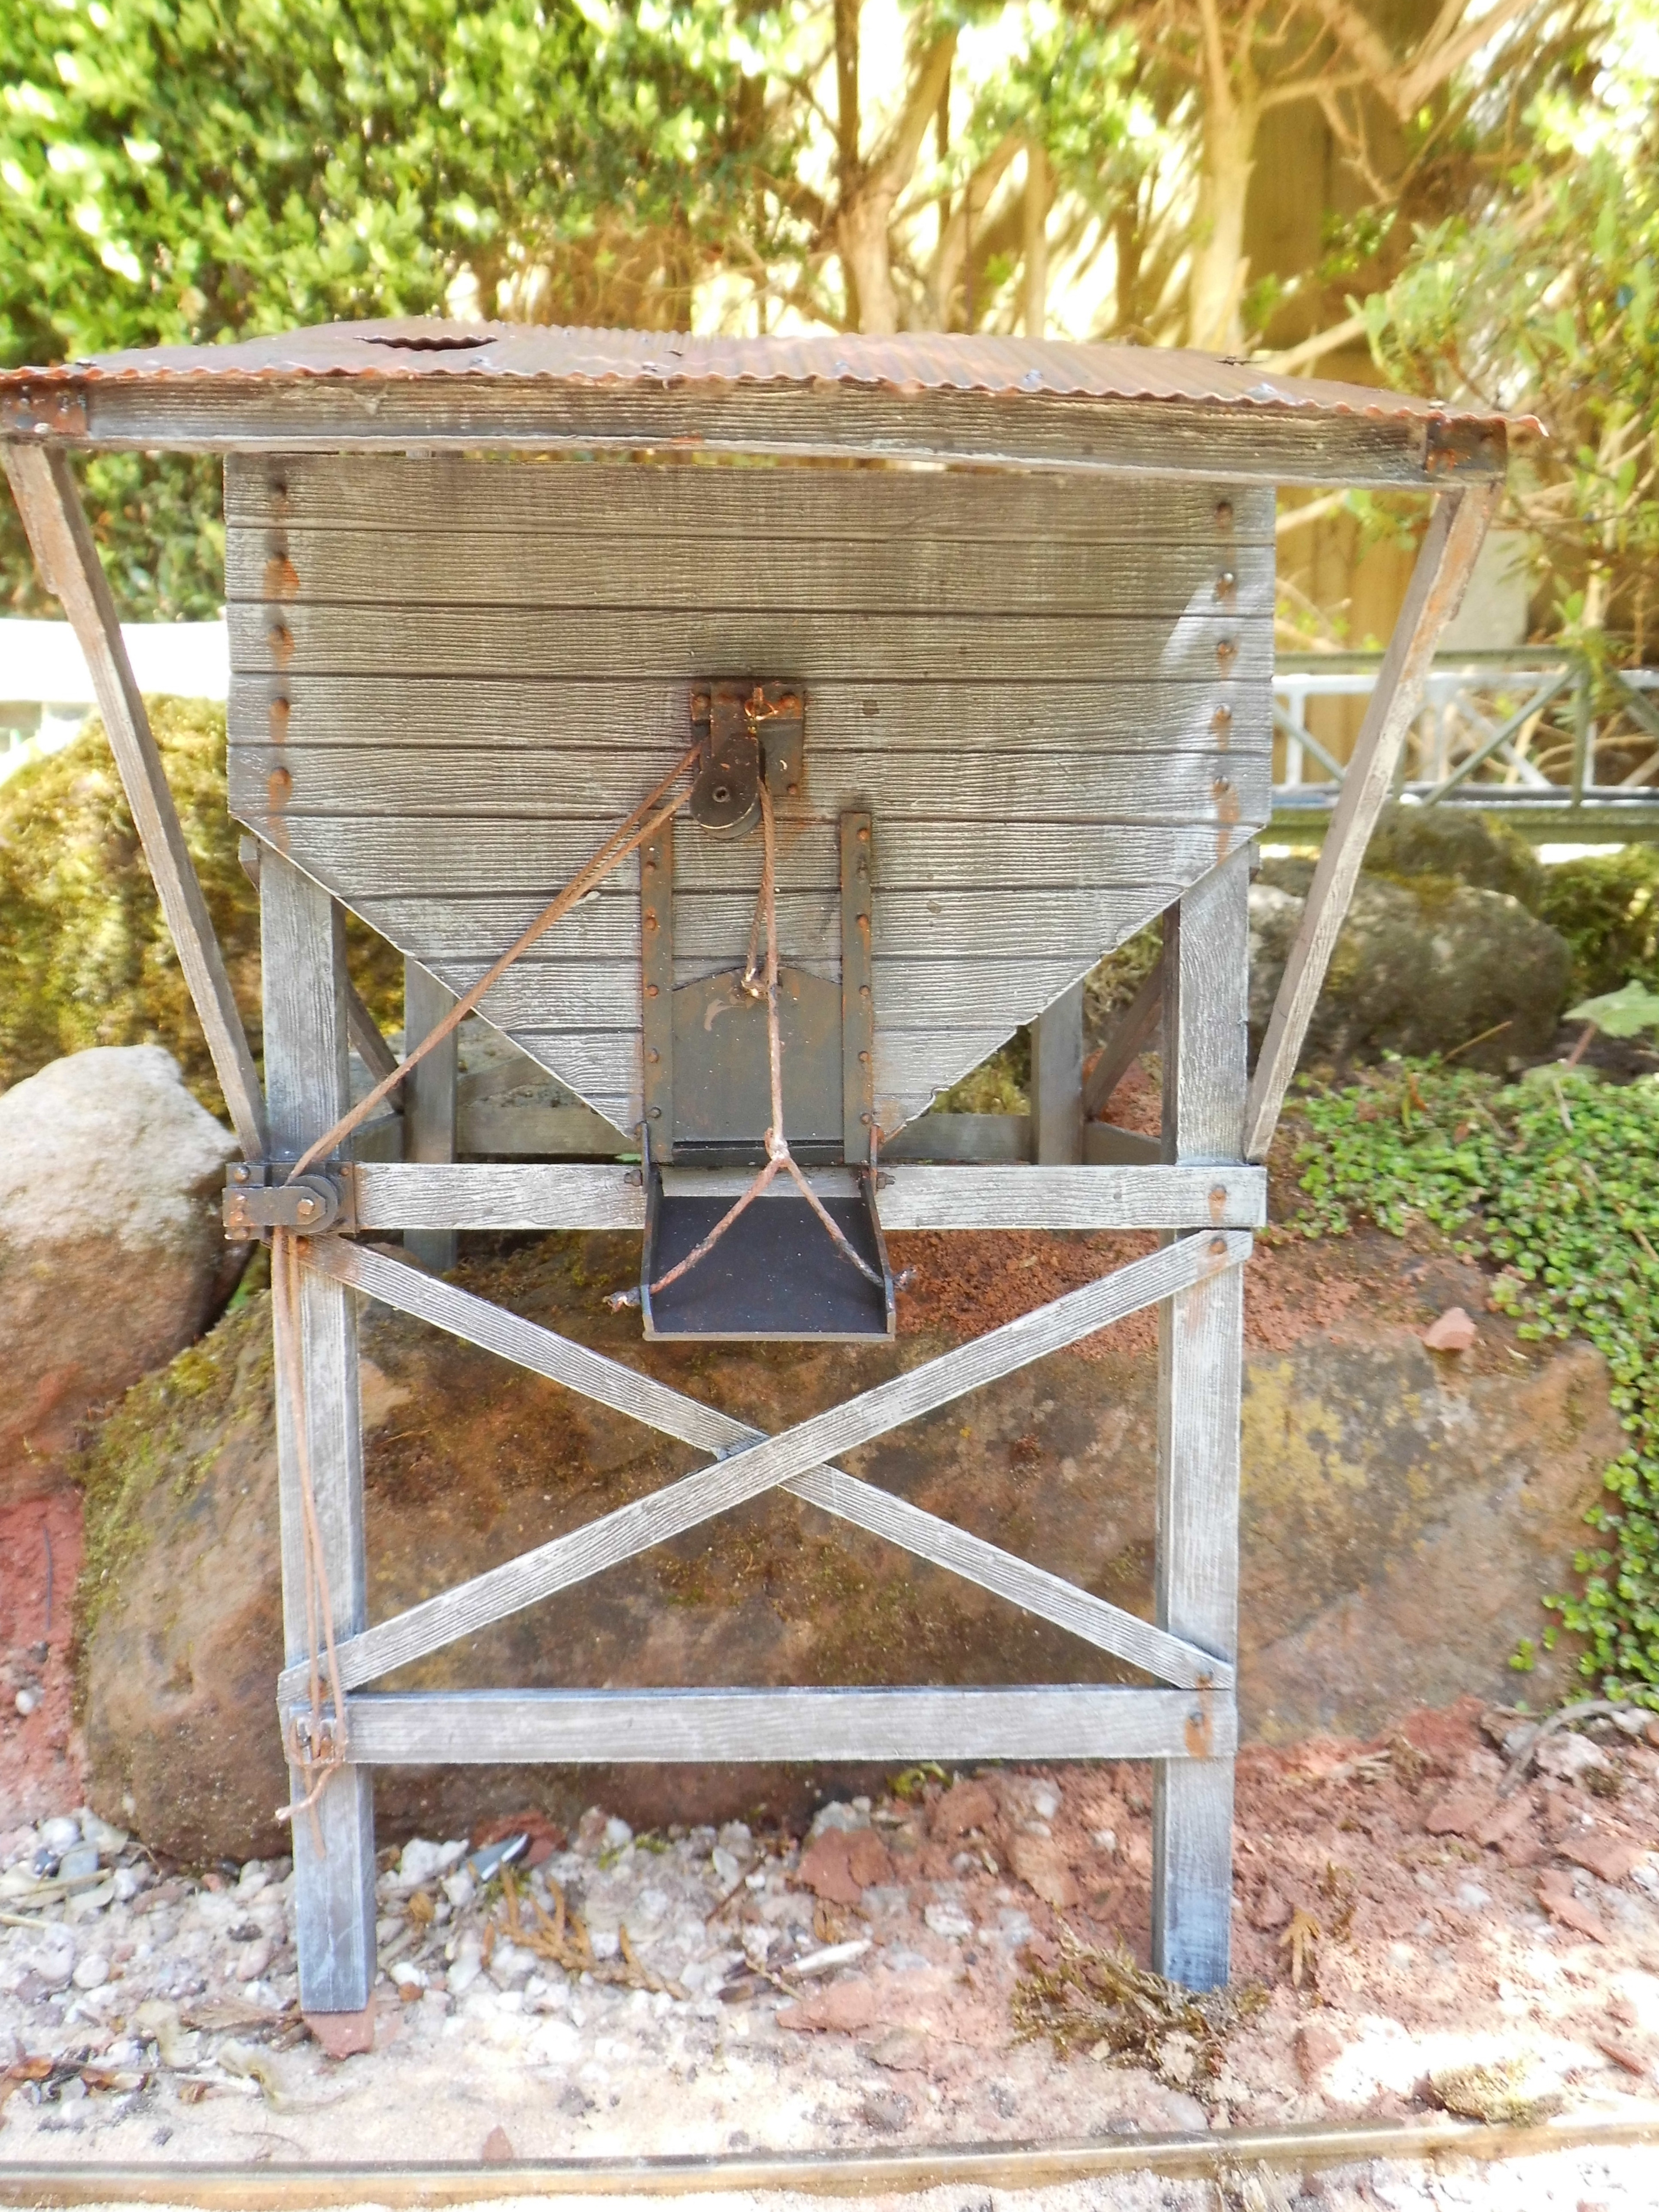
Various other parts of the hoppers were then subtly weathered before they were installed below the two foot gauge feeder railway running along the embankment on the quarry siding (see How I created a concrete embankment for the sand quarry).


No comments:
Post a Comment