Saturday, March 05, 2022

Cloning sheep

Having constructed an open topped cattle wagon from an IP Engineering kit and repainted a secondhand Tralee & Dingle open topped cattle wagon in PLR livery, I decided to give them both sheep loads. 
#
Having acquired my own 3D printer (see How I assembled my Anet A8 clone printer), I printed out a dozen sheep using files downloaded from the Thingiverse website - https://www.thingiverse.com/thing:182273 and loaded them into the wagons.


However, someone with more knowledge than me about transporting livestock, pointed out that sheep were usually crammed into wagons to prevent them from falling over and injuring themselves or getting trampled-on and so I needed a whole load more sheep. I reckoned I needed around 20 per wagon. I didn't fancy printing out that many (they are a bit fiddly to print effectively and take three or four hours each to print out) so, being a bit impatient, not to mention, penny-pinching, I looked for another way of filling the wagons more quickly and cheaply.

Why not make castings using plaster, I thought?

The first job was to make a casing for the mould. This was made slightly smaller than the internal dimensions of the wagon from five pieces of corriflute. The base was the size of the internal dimensions minus 10mm to take account of the thickness of the sides of the mould box.

The sides were 35mm tall. These were fixed to the base with hot glue.

Some cheap PlayDoh was acquired from my local Bargain Store and this was squidged into the mould box to about half its depth,

A couple of my 3D printed sheep were then carefully pressed into the PlayDoh and removed, leaving an impression.

When the entire surface had been impressed with sheep backs, a sloppy mix of plaster was poured into the mould and left for an hour to set.

The sides of the mould box were then prised off and the PlayDoh removed.

The cast was then scrubbed under the tap with a pan-cleaning brush to remove the more persistent pieces of PlayDoh.

The false floor was then painted black with acrylic paint.

The sheep were then painted a yellowy cream colour ........

..... and then dry-brushed with white so the cream colour showed through in the depressions. Their faces were painted black.

 Their bums were painted brown, leaving their tails white. They were test fitted into the wagon and, although they looked OK, they did give the impression they were swimming in molasses.

Furthermore, when the sheep were removed from the PlayDoh, some of their heads became misshapen.....

So, I decided to have another go. 

I had noticed that when pushing the back of the sheep into the PlayDoh, there was a tendency for the previous adjacent impression to become distorted, causing some of the sheep to have narrow ridged backs. So, for my second attempt, I used six sheep, varying their size slightly (in my slicer - Cura), I left most of the sheep in the PlayDoh while I made the new impressions.

This helped to prevent the adjacent impressions becoming distorted. I was also very careful when removing their heads from the Doh to try and preserve as much detail as possible. Eventually, the mould was finished ........

...... and so was filled with plaster, paying careful attention to ensure it was poured into the head cavities.

After an hour or so, the cast was removed and cleaned-up.

This was a big improvement. Before the plaster fully hardened, I carefully removed unnecessary pieces of plaster from around the edges and tidied up some of their heads with a craft knife and the blade of a small chisel.

I then painted them as before.

As the sheep are more tightly clustered, there is less impression of them swimming in treacle and, providing they are not given close scrutiny, I think they could pass for a load of sheep.

I think the PlayDoh cost less than £4.00 (though you could make your own from flour, water, salt and oil) and the 1kg of plaster was £6.99 on eBay. There was enough plaster in the bag for three castings - hence £2.33 per casting as the PlayDoh is reusable.

A word of warning! Don't mix the plaster too thickly. It needs to be about the consistency of whipping cream so it can flow freely into all the nooks and crannies. I made the mistake of making one batch too thick (more like rich double cream) and it simply wouldn't flow. In fact it was starting to set as I tried pouring. The result was headless sheep with no surface detail.

If the sheep were clustered even more tightly, so little if any floor was visible, then I think the casting would be even more effective. I am sure some of you will be far more patient and skilled than me!

An added bonus of using plaster is that it provides much needed additional weight in the wagons - not to mention keeping costs down in filling wagons. I am beginning to wonder what other loads could be cast using this method: packing cases, stacks of timber, stacks of bricks, stacked slates, coal, minerals? The possibilities are endless!

Tuesday, February 22, 2022

Progress Report 94

Well! I can't believe my last progress report was three months ago! In many ways, so much, and yet so little, has happened. 

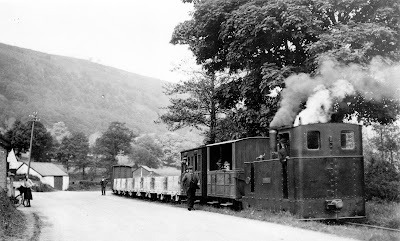
At this time of year, most of my modelling is indoor, rather than braving the elements outside on the garden. As mentioned in my previous progress report, I have become interested in creating an indoor representation of the Glyn Valley Tramway (GVT) in 7mm scale. Quite apart from the fact that the site of the GVT is less than an hour's drive from here, I have always been fascinated by its rolling stock and its rationale - serving the slate mines and granite quarries in the picturesque valley of the Ceiriog Valley.

Source: NGRS WJK Davies Collection

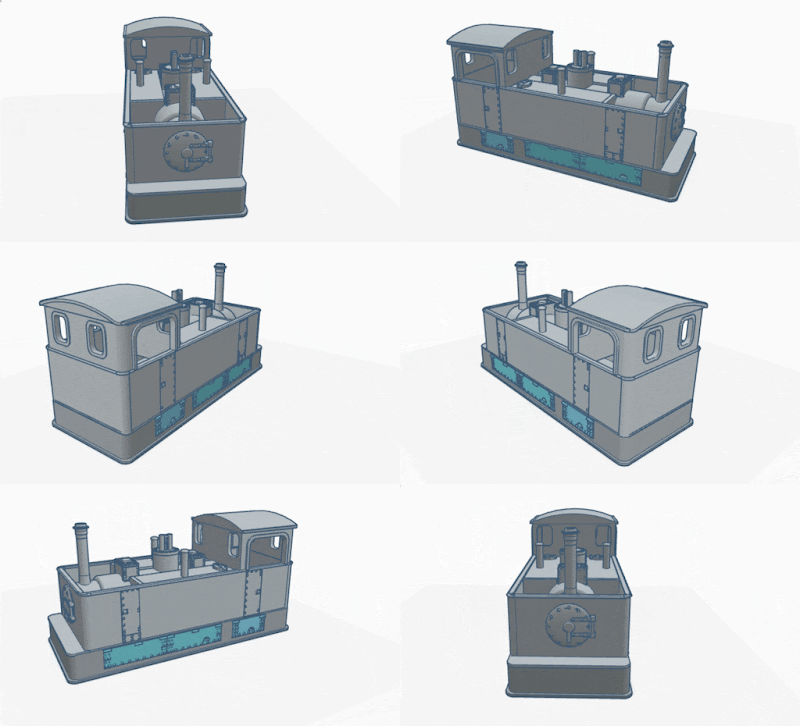
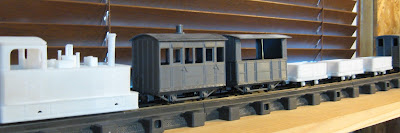
To this end, I have now created not only one of the locomotives but also two styles of coaches, a van, a guard's van and an open wagon. These have been 3D drawn in TinkerCAD and several copies printed out on my 3D printer.

 In addition, I have completed another instalment in my video history of the PLR and created another video explaining what prompted me to create a garden railway.

Other than that, my productive output has been limited to tinkering and tweaking. There is always something to do on a garden railway and, of course, in the garden and house.


The Glyn Valley Tramway project

Whether it's my imagination or an effect of climate change, our winter weather seems to be changing. We have fewer frosty mornings but we seem to have a lot more wind and rain. Those latter conditions are not ideal for running a garden railway. In the past, I have usually managed to organise some partial running sessions during the winter months, but this year fewer opportunities seem to have arisen. This has prompted me to explore the setting-up of an indoor line in the workshop. Rather than G Scale, or 16mm scale, I decided to venture into 0-16.5 scale (ie 7mm (0) scale models running on 16.5mm gauge track). This equates to roughly 2' 4" gauge which is what the Glyn Valley Tramway used.

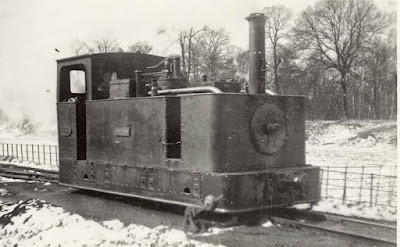
There is plenty of information online about this delightful railway which was ostensibly built to transport output from the granite and slate quarries around Glyn Ceiriog to the canal and mainline railway at Chirk. I have always been attracted by the four wheeled coaches and compact locomotives which ran on this railway, but a further attraction is that Chirk is around an hour's drive from where I live.
Source: NGRS Collection

Locomotive "Glyn"

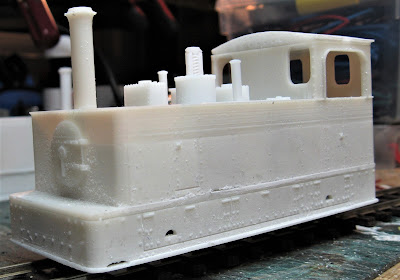
I decided to start by constructing one of the line's three Beyer Peacock locomotives and opted for the slightly larger version named Glyn.

I figured out how the loco could be broken down into segments suitable for 3D printing and then drew the respective parts using TinkerCAD - a freebie online 3D drawing package which I have found to be the easiest to use of all those I've tried.

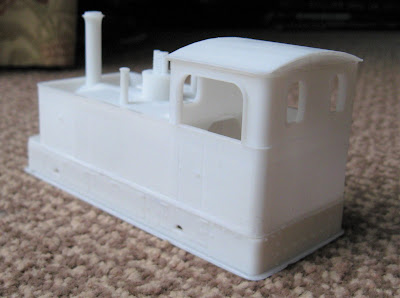
The parts were then printed out using my recently acquired resin printer and glued together.

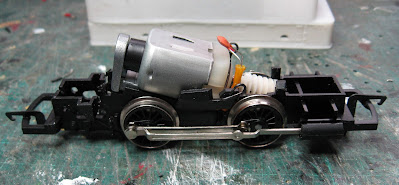
The body was made to fit on a Hornby Smokey Joe 0-4-0 chassis ......


 and so a two wheel bogie (or more accurately a pony truck, as the locos always ran cab-first) was also designed, drawn and printed-out. 


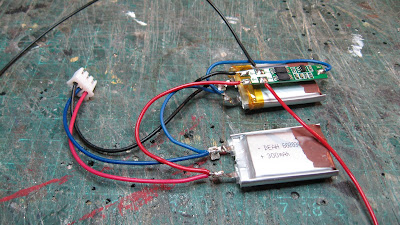
The electrics were then wired-up, using two mobile phone lipo cells and a Deltang Rx60 receiver/controller for radio control.

The loco is awaiting a coat or two of paint and finer detailing.


Coaches

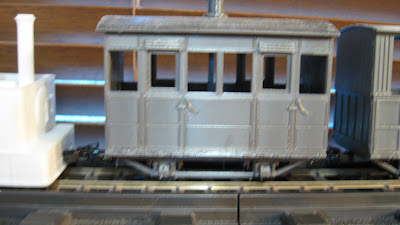
So far, two designs of coaches have been drawn, printed and constructed; a closed third .....

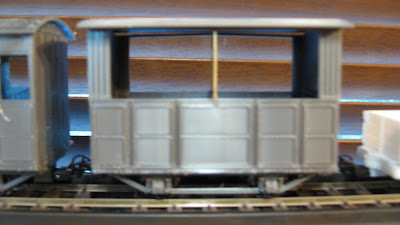
..... and an open coach.

I will eventually produce all the coach variants which ran on the railway.


Goods stock

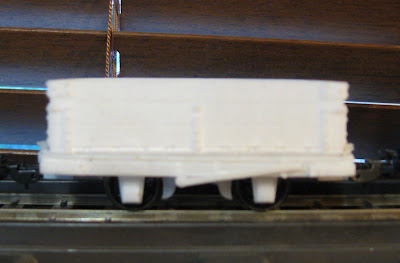
Up to now, the line's distinctive style of granite wagon has been drawn and printed .....

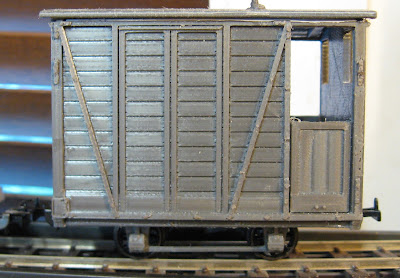
.... and a brake van.

Next on the agenda are slate wagons, vans and flat wagons.


When I have finished drawing, printing and constructing the stock I need in 0-16.5 scale. I will probably re-scale the drawings for 15mm or 16mm scale. I quite like idea of having a rake of GVT coaches running on the PLR. 

Eventually, the .STL files will be made available as downloads on Thingiverse.

The track plan

I haven't finalised a trackplan for the railway as yet. I might keep it very simple and just have a passing loop such as that provided at Pontfaedog. Alternatively, I might opt for a simplified version of the Chirk terminus and somehow include a complete circuit of track.

I'm also trying to figure out if I can somehow also retain the 45mm test track which I completed last year - see How I made a test track in the workshop


History of the Railway Part 5

Having put together four previous videos charting the history of the PLR, I have now brought the story up to date by making another video showing what has happened on the railway over the past year.


I will now continue this practice of making another video at the end of each year. They say a garden railway is never entirely finished and so it is likely there will be another few years' worth of video histories yet to come ....

<< Previous Progress Report                         Next Progress Report >>

Tuesday, November 30, 2021

Progress Report 93

 It doesn't feel as if three months have passed since my last progress report. There are quite a few developments which have kept me very busy and so writing the blog has taken a bit of a back seat for a while.

It's coming to that time of year when the railway goes into hibernation and so there's nothing to report about the railway's infrastructure. However, I have managed to get a couple of good running sessions in since my last progress report and hosted a visitor when live steam was the only motive power. I have constructed another locomotive and another two and a half Cleminson six wheeled open wagons - all of which were 3D printed. I have now acquired a resin 3D printer and have discovered the delights of printing small objects with fine detailing (including a figure). I have also shared my experiences with 3D printing and drawing via blog posts and had a short article about my Southwold rolling stock published in the Southwold Railway Trust.

On related issues, I have been fortunate enough to have a footplate ride on the Walsingham Light Railway in Norfolk and have made a start on an indoor project - an 0-16.5 representation of a small part of the Glyn Valley Tramway.


Rolling stock

Southwold Railway Cleminson open wagons

Having already constructed a Southwold Railway Cleminson six wheeled open wagon from my own 3D printed parts (see How I constructed a Southwold Railway Cleminson open wagon), I modified the drawings to produce two variants on the original design. 

One variant has additional metal straps across the planking on the side doors .......

...... and the other has the name of the local coal merchant, MOY, in large raised letters across the three side doors.

Although the first variant has been constructed, the second variant is awaiting the delivery of Bachmann metal wheels which have been on a back order from a supplier for two months. Apparently, there is a national shortage of these parts!


Metropolitan Water Board Kerr Stuart 0-4-2T

Having used a Bachmann Lyn motor block to construct a 3D printed model of a Schull & Skibbereen 0-4-2T loco, I was was generously given another Lyn motor block by a fellow modeller. This block was from a more recent version of the Lyn and was completely re-engineered from the original which I had found to be seriously under-powered. Then new design is a great improvement but my block had some significant faults - the flanges on two of the wheels were completely worn away on around a quarter of their circumference and the non replaceable brushes on the motor had disintegrated. Furthermore, the cylinders and associated coupling rods were also missing. 

Replacements were acquired from Bachmann Industries in the USA. The postage costs were almost as much as the cost of the spares but considering the motor block had been donated to me, I felt the costs were acceptable and much less than the cost of a secondhand Lyn.


After a quick internet search revealed, not only a suitable outside framed prototype, but some line drawings of the actual and the proposed locomotives. Using these, I produced 3D drawings for an amalgamation of the two designs - the proposed design better suited the dimensions of the motor block while the actual locos were more attractive in appearance (and provided several photographs for reference).

Once the parts had been printed out .......

..... it was remarkably easy to construct (or maybe I'm just getting the hang of designing, printing and constructing 3D printed locos).

However, I was unhappy with the way the body sat on the block - the larger diameter driving wheels made the body sit higher above the track than the original locos. So, back to the workshop and after a few cuts from the razor saw, I was much happier with how she looked.

The 3D drawings were modified to reflect these changes and have now been uploaded to Thingiverse.


3D printing

Having acquired a very cheap 3D printer just before Covid lockdowns started nearly two years ago, I have produced a wide range of items for the railway. A few people have asked me about the basics of 3D printing and so I put together a beginners' guide - see A beginners' guide to 3D printing

I have now also acquired an AnyCubic resin printer which produces highly detailed smaller items.

For example, here's a comparison between the builder's plate printed on my FDM printer and my SLA resin printer.


Operation

I managed to organise a couple of really good full operating sessions towards the end of August and early September.


In addition, I had another visit from Zach Bond and we had a good session running live steamers.


A new venture

With winter weather already making its presence felt, I was looking for something different to occupy my time before it's warm enough to return to working outside. 

I have always found the Glyn Valley Tramway interesting. Partly because of its location (less than an hour from here by car), partly because of its rolling stock and partly because of the type of goods it carried.

Source: NGRS WJK Davies Collection

Rather than attempting to squeeze a 16mm scale railway into the cramped space in my workshop, I thought I would experiment with 0-16.5. so far, I have drawn one of the Beyer Peacock tram locos for 3D printing and downloaded a wagon and a coach for 3D printing.


I am finding the challenge of working in a smaller scale to be interesting and already discovered I need to over engineer some of the parts to ensure they will print successfully. I am also beginning to realise that the resin printer will be more successful at producing the level of detail needed for the smaller scale models.


A grand day out

Towards the end of September, I was fortunate enough to be invited to take a footplate ride on the Wells  & Walsingham Light Railway in Norfolk.


The visit contributed to my retirement quest to visit all the narrow gauge and miniature railways in the UK and Ireland which I am logging on one of my other blogs - see ngruk.blogspot.co.uk


After taking some photos and video footage along the line I took my place in the confined space of the cab.

My driver (a certain Zach Bond), was an excellent and informative companion on the trip, explaining the complexities and intricacies of driving a loaded train up and down the undulating track which was laid lightly across the Norfolk countryside.

I can certainly appreciate the attraction and challenges of driving a real steam locomotive - even one which has been miniaturised. I am still not fully convinced that reducing the scale to 1:19 provides a comparable experience but, if I had the space and the capital, I would be sorely tempted to invest in a live steam ride-on loco.